
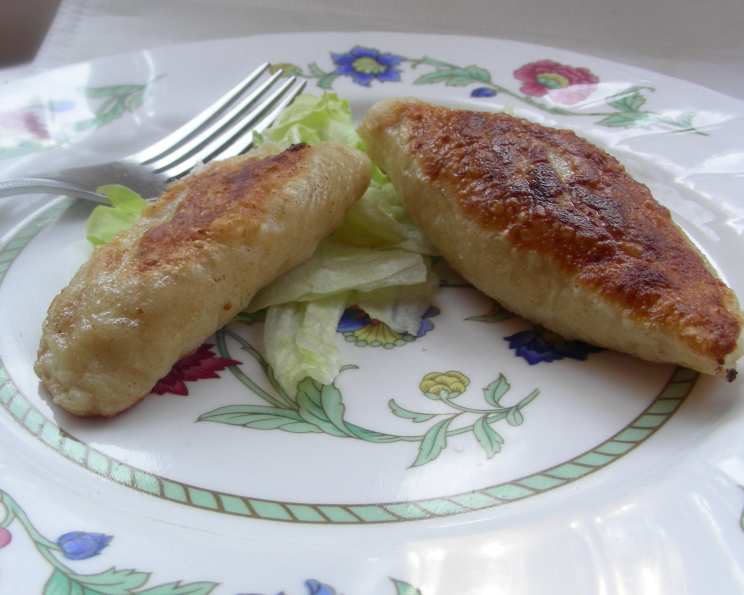
Ruskie Pierogi: A Taste of Home
The scent of butter-sautéed onions always takes me back to my grandmother’s kitchen. I can almost feel the warmth of the wood-burning stove radiating through the small, cozy space as she patiently guided me through the process of making pierogi. Her wrinkled hands, dusted with flour, moved with a grace that belied their age, shaping each delicate dumpling with love. It wasn’t just a cooking lesson; it was a passing down of tradition, a tangible connection to my heritage. These Ruskie Pierogi, with their creamy potato and cheese filling, are more than just food; they are a taste of home, a reminder of the simple joys of family and heritage.
Recipe Overview
- Prep Time: 1 hour
- Cook Time: 30 minutes
- Total Time: 1 hour 30 minutes (including chilling time)
- Yields: 24 pierogi
- Serves: 4
- Dietary Type: Vegetarian
Ingredients
For the Filling:
- 2 medium potatoes, cooked & mashed (1/2 cup instant or leftover mashed potatoes is fine too)
- 1 cup cottage cheese, drained
- 1 medium onion, minced & sautéed in butter until clear
- 1 egg yolk, beaten
- 1 tablespoon butter, melted
- 1 teaspoon sugar
- 1⁄4 teaspoon salt
- Pepper, to taste
For the Dough:
- 2 1⁄4 cups flour
- 1⁄2 teaspoon salt
- 2 tablespoons butter, cut in pieces
- 1 large egg, at room temperature
- 1 egg yolk, at room temperature
- 1⁄2 cup reduced-fat milk, at room temperature
- 2 tablespoons sour cream, at room temperature
To Prepare:
- 12 cups salt water
Equipment Needed
- Large pot
- Food processor (optional)
- Large bowl
- Plastic wrap
- Rolling pin
- 3-inch cookie cutter or glass
- Slotted spoon
- Paper towels
- Serving dish
Instructions
- Prepare the Filling: In a medium bowl, combine the mashed potatoes, drained cottage cheese, sautéed onion, beaten egg yolk, melted butter, sugar, salt, and pepper. Mix thoroughly until well combined. Cover the bowl with plastic wrap and refrigerate until ready to assemble the pierogi. This allows the flavors to meld together.
- Make the Dough (using a food processor): Combine the flour, salt, and butter in a food processor. Pulse until the mixture resembles coarse crumbs.
- Make the Dough (wet ingredients): In a separate bowl, blend together the egg, egg yolk, milk, and sour cream.
- Combine Wet and Dry Ingredients: Add the egg mixture to the flour mixture in the food processor. Process until the dough cleans the sides of the bowl and sticks together. The dough will be slightly sticky.
- Make the Dough (by hand, alternative method): If you don’t have a food processor, whisk together the dry ingredients. Cut in the cold butter using a pastry blender or your fingers until the mixture resembles coarse crumbs. Then, whisk the wet ingredients together and gradually add them to the dry ingredients, mixing until a dough forms.
- Chill the Dough: Remove the dough from the food processor (or bowl) and shape it into a ball. Wrap it tightly in plastic wrap and chill in the refrigerator for at least 3 hours, or preferably overnight. This chilling period is crucial as it allows the gluten in the flour to relax, resulting in a more tender and pliable dough.
- Roll Out the Dough: After chilling, cut the dough into thirds. On a lightly floured surface, roll out each section of dough into a 12-inch round. Keep the remaining dough covered to prevent it from drying out.
- Cut the Dough into Circles: Using a 3-inch cookie cutter or a glass, cut each round into 8 circles. Gather the dough scraps, re-roll them, and cut out more circles until all the dough is used.
- Fill the Pierogi: Place about 2 teaspoons of the potato and cheese filling in the center of each dough circle. Be careful not to overfill them, as this can make them difficult to seal.
- Seal the Pierogi: Moisten the outer edges of each dough circle with a little water. Fold the dough over the filling to form a half-moon shape. Seal the edges by pressing gently with the back of a fork or pinching them together tightly with your fingers. Ensure the seal is secure to prevent the filling from leaking out during cooking.
- Cook the Pierogi: In a large pot, bring the salted water to a boil. Gently drop 12 pierogi at a time into the boiling water, being careful not to overcrowd the pot.
- Boil the Pierogi: Reduce the heat to a gentle boil and cook the pierogi until they float to the surface, which usually takes about 5 minutes. Once they float, continue to cook them for another minute to ensure they are heated through.
- Remove and Drain: Remove the cooked pierogi with a slotted spoon, drain them on paper towels, and transfer them to a serving dish.
- Repeat: Repeat the cooking process with the remaining pierogi.
- Serve or Freeze: At this point, you can serve the pierogi warm, freeze them for later use, or fry them in butter over medium heat, lightly browning both sides before serving.
Expert Tips & Tricks
- Dough Consistency: The dough should be slightly sticky, but not too wet. If it’s too sticky, add a little more flour, one tablespoon at a time. If it’s too dry, add a teaspoon of water until it comes together.
- Preventing Leaks: A well-sealed pierogi is key to preventing leaks during cooking. Ensure the edges are tightly sealed by pressing firmly with a fork or pinching them together.
- Make-Ahead Tip: You can make the pierogi ahead of time and freeze them. To freeze, lay them out on a baking sheet lined with parchment paper and freeze until solid. Then, transfer them to a freezer bag or container. Cook them directly from frozen, adding a minute or two to the cooking time.
- Sautéing the Pierogi: For extra flavor and texture, sauté the cooked pierogi in butter until golden brown and crispy. Add some chopped onions or garlic to the butter for even more flavor.
Serving & Storage Suggestions
Serve Ruskie Pierogi hot, topped with your favorite accompaniments. Traditional toppings include fried bacon bits, sour cream, melted butter, or butter-browned breadcrumbs. They also pair well with caramelized onions or a dollop of applesauce.
Leftover pierogi can be stored in the refrigerator for up to 3 days in an airtight container. To reheat, you can either pan-fry them in butter until heated through, boil them briefly in water, or microwave them. For longer storage, freeze cooked pierogi for up to 2 months. Thaw them in the refrigerator before reheating.
Nutritional Information
| Nutrient | Amount per Serving | % Daily Value |
|---|---|---|
| Calories | 550 kcal | 27% |
| Total Fat | 17g | 25% |
| Saturated Fat | 9g | 43% |
| Cholesterol | 167mg | 55% |
| Sodium | 753mg | 31% |
| Total Carbohydrate | 80g | 26% |
| Dietary Fiber | 5g | 18% |
| Sugars | 7g | N/A |
| Protein | 20g | 39% |
Note: Nutritional information is an estimate and may vary based on specific ingredients and cooking methods.
Variations & Substitutions
- Vegan Pierogi: Substitute the cottage cheese with a vegan cheese alternative, use plant-based milk and sour cream, and replace the egg and egg yolk with an egg replacer or flax egg (1 tablespoon flaxseed meal mixed with 3 tablespoons water).
- Gluten-Free Pierogi: Use a gluten-free flour blend for the dough. You may need to add a binder like xanthan gum to help the dough hold together.
- Different Fillings: Get creative with the filling! Try adding sautéed mushrooms, sauerkraut, or caramelized onions to the potato and cheese mixture. You can also make sweet pierogi with fruit fillings like blueberries or cherries.
- Herb Infusion: Incorporate fresh herbs, such as dill or chives, into the dough for an added layer of flavor.
FAQs (Frequently Asked Questions)
Q: Why is my pierogi dough tough?
A: Overworking the dough can develop the gluten too much, resulting in a tough pierogi. Be gentle when mixing and rolling out the dough, and make sure to chill it for the recommended time to allow the gluten to relax.
Q: How do I prevent the filling from leaking out?
A: Ensure you seal the edges of the pierogi tightly by pressing firmly with a fork or pinching them together. Also, avoid overfilling the pierogi, as this can cause the dough to burst during cooking.
Q: Can I freeze uncooked pierogi?
A: Yes, you can freeze uncooked pierogi. Lay them out on a baking sheet lined with parchment paper and freeze until solid. Then, transfer them to a freezer bag or container. Cook them directly from frozen, adding a minute or two to the cooking time.
Q: What is the best way to reheat pierogi?
A: The best way to reheat pierogi is to pan-fry them in butter until heated through and lightly browned. This gives them a crispy texture and adds flavor. You can also boil them briefly in water or microwave them, but they won’t be as crispy.
Q: Can I use instant mashed potatoes for the filling?
A: Yes, you can use instant mashed potatoes for the filling in a pinch. Just make sure to use a high-quality brand and follow the package instructions for preparing them. Leftover mashed potatoes also work well.
Final Thoughts
Making Ruskie Pierogi is a labor of love, but the results are well worth the effort. The combination of the tender dough and the creamy, flavorful filling is simply irresistible. Don’t be afraid to experiment with different fillings and toppings to create your own signature pierogi. Gather your family and friends, put on some music, and enjoy the process of making these delicious dumplings together. Share your creations and let us know how they turn out!