
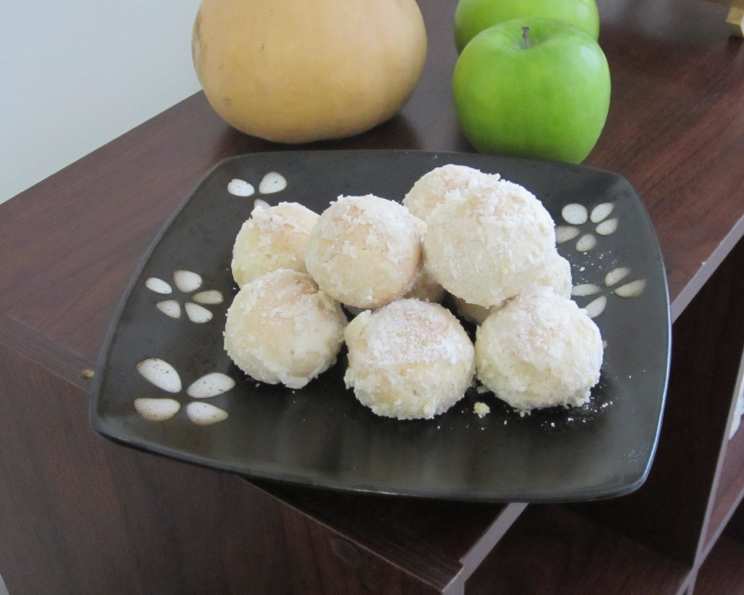
Russian Tea Cakes: A Nut-Free Holiday Classic
The scent of these delicate cookies instantly transports me back to childhood Christmases. I remember standing on a stool next to my grandmother, her hands dusted with powdered sugar as she gently rolled the dough into perfect little spheres. The best part? Getting to “paint” the tops with vibrant red and green sugar crystals, transforming simple cookies into festive gems. These weren’t just treats; they were edible memories, woven with love and tradition. And while my grandmother’s recipe always contained walnuts, this version allows everyone to enjoy these melt-in-your-mouth delights, nut allergy or not!
Recipe Overview
- Prep Time: 10 minutes
- Cook Time: 10 minutes
- Total Time: 20 minutes
- Yields: 48 cookies
- Serves: 48
- Dietary Type: Vegetarian
Ingredients
- 1 cup butter or 1 cup margarine, softened
- ½ cup powdered sugar
- 1 teaspoon vanilla extract (or 1 teaspoon almond extract)
- 2 ¼ cups all-purpose flour
- ¼ teaspoon salt
- ⅛ cup colored sugar crystals (red and green recommended for the holidays!)
Equipment Needed
- Mixing Bowl
- Electric Mixer (optional, but recommended)
- Measuring Cups and Spoons
- Baking Sheet
- Parchment Paper (optional, for easier cleanup)
Instructions
-
Preheat your oven to 400°F (200°C). This temperature ensures the cookies bake quickly without browning too much.
-
In a large mixing bowl, cream together the softened butter or margarine and powdered sugar. Use an electric mixer for the best results, beating until the mixture is light and fluffy. If mixing by hand, ensure the butter is very soft and that you incorporate plenty of air into the mixture.
-
Add the vanilla extract (or almond extract, if using) to the butter and sugar mixture. Mix until well combined. The extract adds a subtle, delicious flavor that complements the buttery shortbread perfectly. I personally love the almond extract.
-
In a separate bowl, whisk together the flour and salt. This ensures the salt is evenly distributed throughout the flour, which is important for flavor.
-
Gradually add the dry ingredients (flour and salt) to the wet ingredients (butter, sugar, and extract), mixing until just combined. Be careful not to overmix the dough, as this can develop the gluten in the flour and result in tougher cookies. Mix until the ingredients are just incorporated.
-
Roll the dough into 1-inch balls. This size is perfect for a single bite.
-
Pour the colored sugar crystals into a small, shallow dish.
-
Dip the top of each dough ball into the colored sugar crystals, gently pressing to ensure they adhere. This creates a festive and eye-catching decoration.
-
Place the sugar-coated dough balls onto a greased baking sheet. These cookies don’t spread much, so you can place them relatively close together. You can also line the baking sheet with parchment paper for easy cleanup.
-
Bake for 10 minutes, or until the cookies are set but not brown. Keep a close eye on them; they should still be pale in color. Overbaking will result in dry, crumbly cookies.
-
Remove the baking sheet from the oven and let the cookies cool on the baking sheet for a few minutes before transferring them to a wire rack to cool completely.
Expert Tips & Tricks
- Soft Butter is Key: Make sure your butter or margarine is properly softened, not melted. This will help create a light and airy dough. Leave it out at room temperature for at least an hour before starting.
- Don’t Overmix: Overmixing the dough will result in tough cookies. Mix until the ingredients are just combined.
- Chill the Dough (Optional): If your dough is too soft to handle, wrap it in plastic wrap and chill it in the refrigerator for 30 minutes before rolling.
- Uniform Size Matters: Try to roll the dough into uniform-sized balls for even baking.
- Make Ahead: The dough can be made ahead of time and stored in the refrigerator for up to 3 days. Let it come to room temperature slightly before rolling.
- Double-Dip for Extra Sparkle: For an extra festive touch, you can dip the cookies in melted white chocolate after baking and then sprinkle with more sugar crystals.
Serving & Storage Suggestions
These Russian Tea Cakes are best served at room temperature. They are perfect with a cup of hot tea or coffee, or as part of a holiday cookie platter.
- Storage: Store the cookies in an airtight container at room temperature for up to 5 days.
- Freezing: These cookies freeze well. Store them in a freezer-safe container for up to 3 months. Thaw at room temperature before serving.
- Reheating: These cookies are best enjoyed at room temperature, so reheating is generally not necessary. However, if you prefer a slightly warm cookie, you can heat them in a low oven (200°F/95°C) for a few minutes.
Nutritional Information
| Nutrient | Amount per Serving | % Daily Value |
|---|---|---|
| Calories | 62.4 kcal | N/A |
| Calories from Fat | 35 kcal | N/A |
| Total Fat | 3.9 g | 5% |
| Saturated Fat | 2.4 g | 12% |
| Cholesterol | 10.2 mg | 3% |
| Sodium | 39.5 mg | 1% |
| Total Carbohydrate | 6.2 g | 2% |
| Dietary Fiber | 0.2 g | 0% |
| Sugars | 1.8 g | N/A |
| Protein | 0.7 g | 1% |
Variations & Substitutions
- Gluten-Free: Substitute the all-purpose flour with a gluten-free all-purpose flour blend. You may need to add a little extra liquid (such as milk or water) to the dough to help it come together.
- Dairy-Free: Use a dairy-free butter substitute. Many high-quality vegan butters are available and work perfectly in this recipe.
- Flavor Variations: Experiment with different extracts, such as lemon, orange, or peppermint. You can also add spices like cinnamon or nutmeg to the dough.
- Citrus Zest: Add the zest of a lemon, orange, or lime for a bright, citrusy flavor.
- Different Sugars: Use sanding sugar or coarse sugar instead of colored sugar crystals for a different texture and look.
- Chocolate Chips: Add mini chocolate chips to the dough for a chocolate twist.
FAQs (Frequently Asked Questions)
Q: Can I use shortening instead of butter or margarine?
A: Yes, you can use shortening, but the cookies will have a slightly different flavor and texture. Butter and margarine provide a richer, more flavorful cookie.
Q: Why are my cookies dry and crumbly?
A: This is usually caused by overbaking or using too much flour. Make sure to measure the flour accurately and bake the cookies until they are just set, not browned.
Q: Can I add nuts to this recipe?
A: While this recipe is designed to be nut-free, you can certainly add finely chopped nuts (such as walnuts or pecans) to the dough if you desire. However, be aware of potential allergies when serving.
Q: My dough is too sticky to roll. What should I do?
A: Chill the dough in the refrigerator for 30 minutes to an hour. This will firm it up and make it easier to handle.
Q: How can I get the sugar crystals to stick better?
A: Slightly dampen the tops of the dough balls with a little water or milk before dipping them in the sugar crystals. This will help the sugar adhere better.
Final Thoughts
These nut-free Russian Tea Cakes are a timeless classic, perfect for holiday gatherings or any time you crave a sweet and delicate treat. This recipe is incredibly versatile, allowing you to customize the flavors and decorations to your liking. Gather your family, preheat your oven, and get ready to create some delicious memories. Don’t be afraid to experiment with different flavors and decorations to make them your own! I’d love to hear about your baking adventures and any creative twists you add to this classic recipe. Happy baking!