
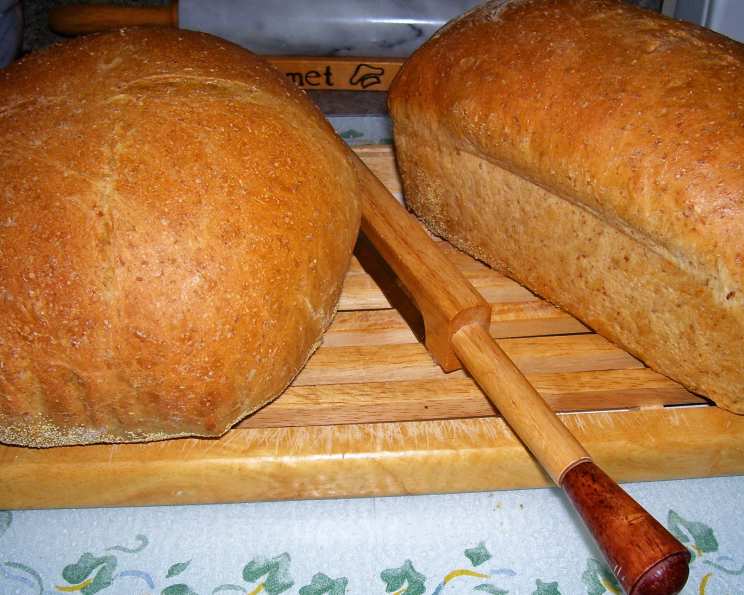
Rustic Bread: A Bread Machine Masterpiece
The scent of freshly baked bread… it’s a culinary perfume that instantly transports me back to my grandmother’s kitchen. She didn’t use fancy equipment, just her strong hands and a well-worn oven. While I cherish those memories, time marches on, and the bread machine has become my modern-day shortcut to that same comforting aroma and taste. This Rustic Bread recipe brings together the best of both worlds: the convenience of a bread machine with the satisfying depth of flavor that reminds me of Grandma’s loaves.
Recipe Overview
- Prep Time: 20 minutes (plus overnight rest for Biga)
- Cook Time: 40 minutes
- Total Time: 4 hours 5 minutes (includes Biga rest & rising)
- Servings: approximately 20 slices (per loaf)
- Yield: 2 loaves
- Dietary Type: Vegetarian
Ingredients
For the Biga (Italian Starter):
- 1 cup warm water
- 1 teaspoon bread machine yeast
- ½ cup unbleached flour
- ½ cup whole wheat flour
For the Bread:
- 1 ¼ cups warm water
- 1 tablespoon honey
- 1 tablespoon barley malt (or see note below)
- 2 tablespoons butter
- 1 tablespoon vegetable oil
- 1 ½ cups unbleached bread flour
- 2 cups whole wheat bread flour
- 2 teaspoons sugar
- 1 tablespoon salt
- 2 tablespoons vital wheat gluten
- 2 teaspoons bread machine yeast
Equipment Needed
- Glass or plastic bowl
- Wooden spoon
- Bread machine
- Bread pans (optional – can also shape free-form loaves)
- Baking sheet or pizza stone
- Sharp knife or bread lame
Instructions
- Prepare the Biga: In a glass or plastic bowl, combine the warm water, bread machine yeast, unbleached flour, and whole wheat flour. Stir with a wooden spoon until a smooth mixture forms.
- Rest the Biga: Cover the bowl with a clean cloth and let it stand at room temperature overnight (approximately 12-18 hours). The biga will become bubbly and slightly sour.
- Combine Dry Ingredients: In a separate bowl, whisk together the unbleached bread flour, whole wheat bread flour, sugar, salt, and vital wheat gluten. Set this mixture aside.
- Load the Bread Machine: Pour the prepared biga into the bread machine pan.
- Add Liquids: Add the warm water, honey, barley malt, butter, and vegetable oil to the bread machine pan, on top of the biga.
- Add Flour Mixture: Carefully add the flour mixture to the bread machine pan, ensuring even distribution.
- Add Yeast: Create a small well (or “groove”) in the center of the flour mixture and add the bread machine yeast.
- Start Dough Cycle: Set the bread machine to the Dough cycle. This cycle will mix and knead the dough, then allow it to rise.
- Monitor the Dough: Keep an eye on the dough during the kneading and rising process. If the dough rises too quickly and reaches the top of the bread machine pan before the end of the cycle, gently push it back down. This ensures even rising and prevents the dough from overflowing.
- Remove and Divide: At the end of the dough cycle, carefully remove the dough from the bread machine pan. Divide the dough in half.
- Shape the Loaves: Shape each piece of dough into a loaf. You can either shape them free-form (e.g., round or oblong loaves) or place them into greased bread pans.
- Preheat Oven: Preheat your oven to 400°F (200°C).
- Second Rise: Cover the shaped loaves with a clean cloth and let them rise for approximately 45 minutes in a warm place.
- Score the Loaves: Using a sharp knife or bread lame, score the top of each loaf. This allows the bread to expand properly during baking and creates an attractive crust.
- Initial Bake: Place the loaves in the preheated oven and bake for 10 minutes at 400°F (200°C).
- Reduce Heat and Continue Baking: Reduce the oven temperature to 350°F (175°C) and continue baking for another 30 minutes.
- Check for Doneness: Remove the bread from the pans (if used) and tap the bottom of each loaf. A hollow sound indicates that the bread is fully baked. If the bread sounds dense or heavy, return it to the oven (without the pan) for another 5-10 minutes.
- Cooling: Place the baked loaves on a wire rack to cool completely before slicing and serving.
Expert Tips & Tricks
- Biga Temperature: The water for the biga should be just warm to the touch, not hot. Hot water can kill the yeast.
- Barley Malt Alternative: If you don’t have barley malt, you can double the amount of honey in the recipe. Barley malt contributes a subtle sweetness and depth of flavor, but honey is a suitable substitute.
- Warm Environment for Rising: Create a warm and humid environment for the second rise by placing the covered loaves in a slightly warmed oven (turned off) or near a warm stovetop.
- Steam for Crust: For a crispier crust, create steam in the oven during the initial bake by placing a pan of hot water on the bottom rack.
- Scoring Techniques: Experiment with different scoring patterns to create visually appealing loaves. A simple slash down the center is classic, but you can also try diagonal lines or more intricate designs.
Serving & Storage Suggestions
This Rustic Bread is delicious served warm with butter, jam, or olive oil. It’s also excellent for making sandwiches, toast, or croutons.
- Room Temperature: Store cooled bread in a bread box or airtight container at room temperature for up to 3 days.
- Refrigerator: For longer storage, store the bread in the refrigerator for up to a week.
- Freezer: To freeze, wrap the bread tightly in plastic wrap and then in foil. Frozen bread can be stored for up to 3 months. Thaw completely at room temperature before serving. Reheat slices in a toaster or oven for the best texture.
Nutritional Information
(Estimated per slice, based on 20 slices per loaf)
| Nutrient | Amount per Serving | % Daily Value |
|---|---|---|
| Calories | 124 kcal | 6% |
| Total Fat | 2.35g | 4% |
| Saturated Fat | 0.9g | 5% |
| Cholesterol | 3mg | 1% |
| Sodium | 359mg | 15% |
| Total Carbohydrate | 22.6g | 8% |
| Dietary Fiber | 2.3g | 8% |
| Sugars | 1.4g | 3% |
| Protein | 3.9g | 8% |
Variations & Substitutions
- Seeded Bread: Add a mixture of seeds (such as sunflower, pumpkin, or sesame) to the dough before shaping the loaves.
- Herb Bread: Incorporate chopped fresh herbs (such as rosemary, thyme, or oregano) into the dough for a savory flavor.
- Cheese Bread: Add shredded cheese (such as cheddar, parmesan, or mozzarella) to the dough for a cheesy twist.
- Olive Bread: Add chopped olives (such as Kalamata or green olives) to the dough for a Mediterranean-inspired flavor.
- Spelt Flour: Substitute some of the whole wheat flour with spelt flour for a slightly nutty flavor.
- Gluten-Free: This recipe, as written, is not gluten-free. Substituting gluten-free flours and a binding agent will be necessary. Be aware the bread machine process may need adapting.
FAQs (Frequently Asked Questions)
Q: Why is the biga important?
A: The biga adds a depth of flavor and improves the texture of the bread. It allows the yeast to develop fully, resulting in a more complex and satisfying taste.
Q: Can I skip the biga and make the bread in one day?
A: While you can skip the biga, the flavor and texture will not be as complex. The overnight fermentation process in the biga is what gives this bread its rustic character.
Q: My dough is too sticky. What should I do?
A: Add a tablespoon of flour at a time until the dough comes together and is no longer excessively sticky. Be careful not to add too much flour, as this can make the bread dry.
Q: My bread is dense and heavy. What did I do wrong?
A: Possible causes include using old yeast, not allowing the dough to rise enough, or adding too much flour. Ensure your yeast is fresh, give the dough ample time to rise, and avoid over-measuring the flour.
Q: Can I bake this bread without a bread machine?
A: Yes, you can mix and knead the dough by hand or with a stand mixer. Allow the dough to rise in a warm place for 1-1.5 hours, or until doubled in size, before shaping and baking.
Final Thoughts
I encourage you to try this Rustic Bread recipe and experience the joy of baking your own homemade bread. Don’t be afraid to experiment with variations and substitutions to create your own signature loaf. Share your creations with family and friends, and enjoy the simple pleasure of freshly baked bread. Let me know how it turns out, and what your favorite additions were!