
Rustic Lemon-Raspberry Tart: A Taste of Summer
I still remember the first time I tasted a lemon tart. It was at my grandmother’s house, during a sweltering summer afternoon. The tart, with its vibrant yellow filling and delicate pastry, offered a burst of sunshine with every bite, cutting through the thick, humid air. It was the perfect balance of sweet and tart, a flavor memory I’ve chased ever since, now reimagined with the delightful addition of fresh, juicy raspberries.
Recipe Overview
- Prep Time: 30 minutes
- Cook Time: 40-50 minutes
- Total Time: 1 hour 10 minutes
- Servings: 8
- Yield: 1 tart
- Dietary Type: Vegetarian
Ingredients
For the Crust:
- 1 1⁄2 cups unbleached flour
- 1⁄4 teaspoon salt
- 1⁄8 teaspoon baking powder
- 9 tablespoons cold unsalted butter, cut into small cubes
- 1 1⁄2 teaspoons apple cider vinegar
- 6-7 tablespoons ice water
For the Filling:
- 1 large lemons or 1 Meyer lemon
- 4 eggs
- 1⁄3 cup melted butter, cooled before adding the eggs
- 1 1⁄2 cups sugar
- 1 pinch salt
Topping:
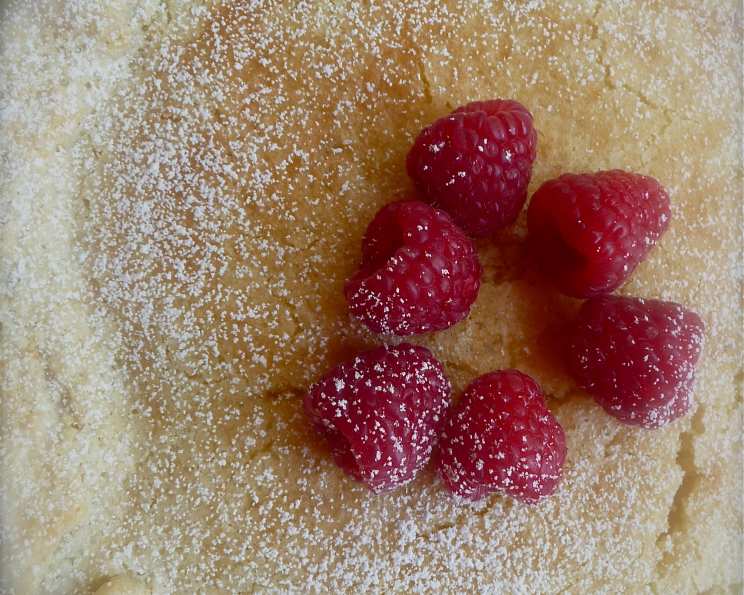
- 1 cup fresh raspberries, washed and drained
- Powdered sugar, for dusting (optional)
Equipment Needed
- Medium-sized metal bowl (or food processor)
- Pastry cutter (optional, if not using food processor)
- Plastic wrap
- Rolling pin
- 10 1/2-inch springform pan (or 9-inch pie pan)
- Blender
- Oven
Instructions
-
Prepare the Crust: In a medium-sized metal bowl, combine the flour, salt, and baking powder. Add the cold butter cubes. Using a pastry cutter (or your fingertips), cut the butter into the flour mixture until it resembles a coarse meal. You should still see small pieces of butter, as these will create flaky layers.
-
Add Liquid: Sprinkle the apple cider vinegar and ice water over the flour mixture. Knead gently until the dough just comes together. Be careful not to overmix, as this will develop the gluten and result in a tough crust.
-
Chill the Dough: Wrap the dough in plastic wrap and chill in the refrigerator for at least 2 hours, or preferably overnight. This allows the gluten to relax and the butter to solidify, resulting in a tender, flaky crust.
-
Alternative Processor Method: For a faster method, combine the flour, salt, and baking powder with the cold butter in a food processor. Pulse briefly until the mixture resembles coarse crumbs. Add the vinegar and water, and pulse until the dough just comes together (approximately 15-20 seconds). Again, avoid overmixing. Chill as described above.
-
Preheat the Oven: Preheat your oven to 375°F (190°C).
-
Roll Out the Dough: On a lightly floured surface (or between two sheets of floured plastic wrap for easier handling), roll out the dough into a 13 1/2-inch circle. Don’t worry too much about perfect edges; a rustic look is part of the charm of this tart.
-
Transfer to Pan: Carefully transfer the rolled-out dough to a 10 1/2-inch springform pan (or a 9-inch pie pan). Press the dough gently into the bottom and up the sides of the pan, ensuring it extends about 1 1/2 inches up the sides.
-
Prepare the Filling: Wash the lemon(s) thoroughly. Slice off the ends, cut the lemon(s) into eighths, and remove any seeds. Important: Do not remove the rind. The rind adds essential oils and contributes to the tart’s intense lemon flavor.
-
Blend the Filling: Add all the filling ingredients – the sliced lemon(s), eggs, cooled melted butter, sugar, and pinch of salt – to a blender. Blend well until completely liquefied, about 1 minute.
-
Pour into Crust: Pour the lemon filling into the unbaked tart shell.
-
Bake the Tart: Bake at 375°F (190°C) for 10 minutes. Then, reduce the oven temperature to 325°F (160°C) and bake for an additional 30-40 minutes (closer to 40 minutes is often needed), or until a knife inserted into the center comes out clean. The filling should be set but still have a slight wobble.
-
Cooling is Key: Set the baked tart aside to cool for at least 45 minutes, or up to 1 hour. The longer it sits, the firmer the tart will become, making it much easier to slice neatly.
-
Add Topping: Once the tart is cooled, top with the fresh raspberries. If desired, lightly dust with powdered sugar before serving.
Expert Tips & Tricks
- Cold Ingredients: Using very cold butter and ice water is crucial for a flaky crust. The cold butter creates steam as it bakes, separating the layers of dough.
- Blind Baking (Optional): For a crispier crust, you can blind bake it before adding the filling. Line the crust with parchment paper, fill with pie weights or dried beans, and bake for 15 minutes at 375°F (190°C). Remove the weights and parchment, and bake for another 5-10 minutes until lightly golden.
- Lemon Variety: Meyer lemons have a sweeter, less acidic flavor than regular lemons. If using Meyer lemons, you may want to reduce the amount of sugar slightly.
- Cooling Time: Resist the urge to slice the tart too soon! Allowing it to cool completely is essential for a firm, sliceable filling.
Serving & Storage Suggestions
Serve the Rustic Lemon-Raspberry Tart slightly chilled or at room temperature. Its bright flavors pair perfectly with a scoop of vanilla ice cream or a dollop of whipped cream.
- Storage: Leftover tart can be stored in the refrigerator for up to 3 days. Cover loosely with plastic wrap to prevent it from drying out.
- Freezing: While the crust may lose some of its crispness, you can freeze the baked tart for up to 1 month. Wrap it tightly in plastic wrap and then in aluminum foil. Thaw overnight in the refrigerator before serving.
Nutritional Information
Note: Nutritional information is an estimate and may vary based on specific ingredients and portion sizes.
| Nutrient | Amount per Serving | % Daily Value |
|---|---|---|
| Calories | 450 kcal | 23% |
| Total Fat | 25g | 38% |
| Saturated Fat | 15g | 75% |
| Cholesterol | 150mg | 50% |
| Sodium | 150mg | 7% |
| Total Carbohydrate | 55g | 18% |
| Dietary Fiber | 2g | 8% |
| Sugars | 35g | – |
| Protein | 5g | 10% |
Variations & Substitutions
- Berry Swaps: Feel free to substitute other seasonal berries for the raspberries, such as strawberries, blueberries, or blackberries. A mixed berry tart is always a crowd-pleaser.
- Gluten-Free Crust: Use a gluten-free flour blend to make a gluten-free version of the crust. You may need to add a binder like xanthan gum to improve the texture.
- Dairy-Free Option: Substitute the butter in the crust and filling with a vegan butter alternative.
- Add Herbs: Infuse the crust with fresh herbs like thyme or rosemary for a savory twist.
FAQs (Frequently Asked Questions)
Q: Can I use bottled lemon juice instead of fresh lemons?
A: While fresh lemon juice is preferred for its brighter flavor, you can substitute bottled lemon juice in a pinch. Use the same amount as the juice from one large lemon.
Q: Why is it important to cool the melted butter before adding it to the blender?
A: Adding hot melted butter to the blender could partially cook the eggs, resulting in a curdled filling. Cooling the butter prevents this.
Q: Can I make the crust ahead of time?
A: Absolutely! The crust can be made up to 2 days in advance and stored in the refrigerator, tightly wrapped in plastic wrap. You can also freeze the unbaked crust for up to 1 month.
Q: My tart is browning too quickly. What should I do?
A: If the crust is browning too quickly, tent it loosely with aluminum foil during the last 15-20 minutes of baking.
Q: What if I don’t have a springform pan?
A: A 9-inch pie pan works perfectly well as a substitute. You may need to adjust the baking time slightly.
Final Thoughts
This Rustic Lemon-Raspberry Tart is more than just a dessert; it’s an experience. The bright, tangy filling, the buttery, flaky crust, and the burst of fresh raspberries create a symphony of flavors that will delight your taste buds. I encourage you to try this recipe and share it with your loved ones. It’s the perfect way to bring a little sunshine to any occasion. I hope you enjoy making and eating this tart as much as I do! Feel free to experiment with different berries or herbs to create your own unique twist. Bon appétit!