
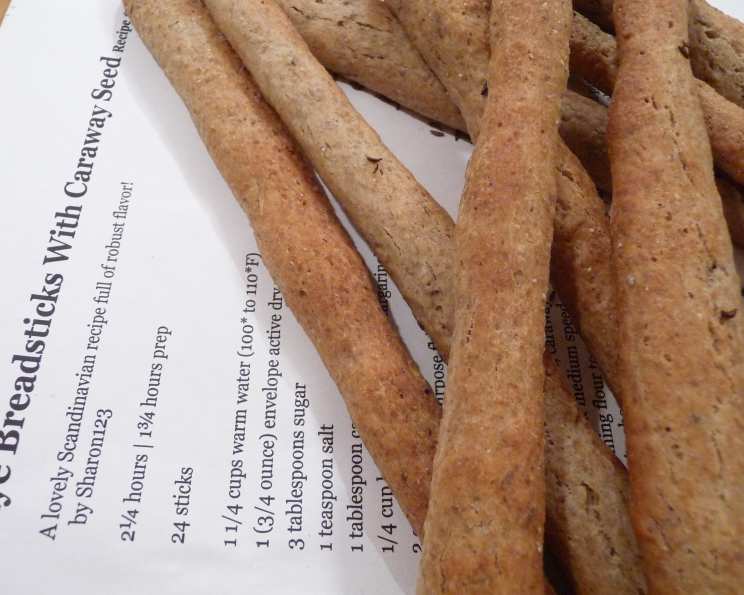
Rustic Rye Breadsticks with Caraway Seed
My grandmother, a woman of few words but immense warmth, always had a jar of these rye breadsticks on her kitchen counter. Their unmistakable aroma, a blend of earthy rye and pungent caraway, was the first thing that greeted me when I stepped through her door. More than just a snack, they were a symbol of her simple, comforting hospitality – perfect for dipping into a steaming bowl of soup on a cold afternoon or simply enjoying with a sliver of cheese and a cup of strong coffee. The taste brings me instantly back to her sun-filled kitchen, filled with love and the scent of baking.
Recipe Overview
- Prep Time: 1 hour 30 minutes
- Cook Time: 15-20 minutes
- Total Time: 2 hours 5 minutes
- Yields: 24 sticks
- Dietary Type: Vegetarian
Ingredients
- 1 1/4 cups warm water (100° to 110°F)
- 1 (3/4 ounce) envelope active dry yeast
- 3 tablespoons sugar
- 1 teaspoon salt
- 1 tablespoon caraway seed
- 1/4 cup butter, softened (or margarine)
- 2 cups rye flour
- 1 1/2 – 2 cups all-purpose flour
- Melted butter or margarine, for brushing
- Additional caraway seed, for sprinkling
Equipment Needed
- Large mixing bowl
- Electric mixer
- Greased bowl
- Measuring cups and spoons
- Baking sheets
- Wire racks
Instructions
-
Begin by activating the yeast. In a bowl, combine 1/4 cup of the warm water with the active dry yeast. Stir gently until the yeast is fully dissolved.
-
In the same bowl, add the remaining 1 cup of warm water, sugar, salt, 1 tablespoon of caraway seed, softened butter (or margarine), rye flour, and 1/2 cup of all-purpose flour.
-
Using an electric mixer at medium speed, beat the mixture for 2 minutes. Be sure to scrape the sides of the bowl occasionally to ensure all ingredients are well incorporated.
-
Gradually stir in the remaining all-purpose flour, adding just enough to form a soft dough that is not too sticky.
-
Turn the dough out onto a lightly floured surface. Knead the dough for 8 to 10 minutes, or until it becomes smooth and elastic. This step is crucial for developing the gluten, which will give the breadsticks their structure.
-
Place the kneaded dough in a greased bowl, turning it to coat the top. This prevents the dough from drying out during the rising process.
-
Cover the bowl and let the dough rise in a warm, draft-free place until it has doubled in size, approximately 1 hour. This allows the yeast to work its magic and create a light, airy texture.
-
Once the dough has doubled, punch it down gently to release the trapped air.
-
Divide the dough in half. Then, cut each half into 12 equal pieces. You should now have 24 pieces of dough.
-
Roll each piece of dough into a rope about 6 inches long. Aim for a uniform thickness to ensure even baking.
-
Place the rolled dough ropes onto greased baking sheets, spacing them about 2 inches apart.
-
Cover the baking sheets and let the breadsticks rise again in a warm, draft-free place until they have doubled in size, about 30 minutes. This second rise is essential for achieving a light and airy texture.
-
Preheat your oven to 400°F (200°C).
-
Gently brush the risen breadsticks with melted butter (or margarine). This will give them a beautiful golden color and a rich flavor.
-
Sprinkle the brushed breadsticks with additional caraway seed. This adds a lovely aroma and visual appeal.
-
Bake in the preheated oven for 15 to 20 minutes, or until the breadsticks are golden brown and sound hollow when tapped. Keep a close eye on them during the last few minutes of baking to prevent burning.
-
Remove the baking sheets from the oven and transfer the breadsticks to wire racks to cool completely. This allows air to circulate around them, preventing them from becoming soggy.
-
Once cooled, serve and enjoy!
Expert Tips & Tricks
- Warm Water Temperature: Make sure your water is within the 100-110°F range. Too hot, and you’ll kill the yeast; too cold, and it won’t activate properly. Use a thermometer for accuracy.
- Kneading Time: Don’t skimp on the kneading! The kneading process develops the gluten in the flour, which gives the breadsticks their characteristic chewiness.
- Rye Flour Variation: Rye flour can vary in moisture content. If your dough feels too sticky, add a tablespoon of all-purpose flour at a time until it comes together.
- Baking Time Adjustment: Oven temperatures can vary. If your breadsticks are browning too quickly, reduce the oven temperature slightly.
- Make-Ahead Tip: You can prepare the dough up to the point of shaping the breadsticks, then refrigerate it overnight. Let it come to room temperature for about 30 minutes before rolling and baking.
Serving & Storage Suggestions
These rye breadsticks are delicious served warm or at room temperature. They pair wonderfully with creamy dips, soups, cheeses, and charcuterie.
- Serving Suggestions: Serve with a selection of cheeses, such as Swiss, Gruyere, or cream cheese. They are also excellent with hearty soups like potato leek or French onion.
- Storage: Store cooled breadsticks in an airtight container at room temperature for up to 3 days. For longer storage, freeze them in a freezer-safe bag for up to 2 months.
- Reheating: To reheat frozen breadsticks, bake them in a preheated oven at 350°F (175°C) for 5-7 minutes, or until warmed through.
Nutritional Information
| Nutrient | Amount per Serving | % Daily Value |
|---|---|---|
| Calories | 85.1 kcal | N/A |
| Calories from Fat | 20g | 24% |
| Total Fat | 2.2 g | 3% |
| Saturated Fat | 1.2 g | 6% |
| Cholesterol | 5.1 mg | 1% |
| Sodium | 111.7 mg | 4% |
| Total Carbohydrate | 14.6 g | 4% |
| Dietary Fiber | 1.7 g | 6% |
| Sugars | 1.7 g | N/A |
| Protein | 2 g | 4% |
Variations & Substitutions
- Gluten-Free Option: Substitute the rye flour and all-purpose flour with a gluten-free bread flour blend. You may need to adjust the amount of liquid.
- Flavor Variations: Add different herbs or spices to the dough, such as dill, fennel seeds, or everything bagel seasoning.
- Dairy-Free Option: Use a dairy-free butter substitute for the softened butter and melted butter.
- Seed Variations: Experiment with different seeds such as sesame seeds, poppy seeds, or sunflower seeds instead of, or in addition to, the caraway seed.
FAQs (Frequently Asked Questions)
Q: Can I use instant yeast instead of active dry yeast?
A: Yes, you can. If using instant yeast, you can skip the first step of dissolving it in water. Simply add it to the dry ingredients.
Q: Why is my dough not rising?
A: There could be several reasons: the yeast might be old or expired, the water might have been too hot (killing the yeast), or the room might be too cold. Ensure your yeast is fresh and the water temperature is correct, and find a warmer spot for the dough to rise.
Q: Can I make the dough in a bread machine?
A: Yes, you can. Use the dough setting on your bread machine and follow the manufacturer’s instructions.
Q: How can I prevent the breadsticks from burning on the bottom?
A: Use a baking sheet with parchment paper to help prevent the bottoms from burning.
Q: Can I freeze the baked breadsticks?
A: Yes, you can. Allow the breadsticks to cool completely before freezing. Wrap them tightly in plastic wrap and then place them in a freezer-safe bag. They can be frozen for up to 2 months.
Final Thoughts
These rustic rye breadsticks are a delightful addition to any meal or gathering. The earthy flavor of the rye, combined with the aromatic caraway seeds, creates a truly memorable taste. Don’t be intimidated by the seemingly long rising times; the result is well worth the effort. So, gather your ingredients, preheat your oven, and prepare to fill your kitchen with the comforting aroma of homemade bread. I encourage you to give this recipe a try and share your creations with friends and family. Perhaps, like my grandmother’s, your version will become a cherished family tradition. Enjoy!