
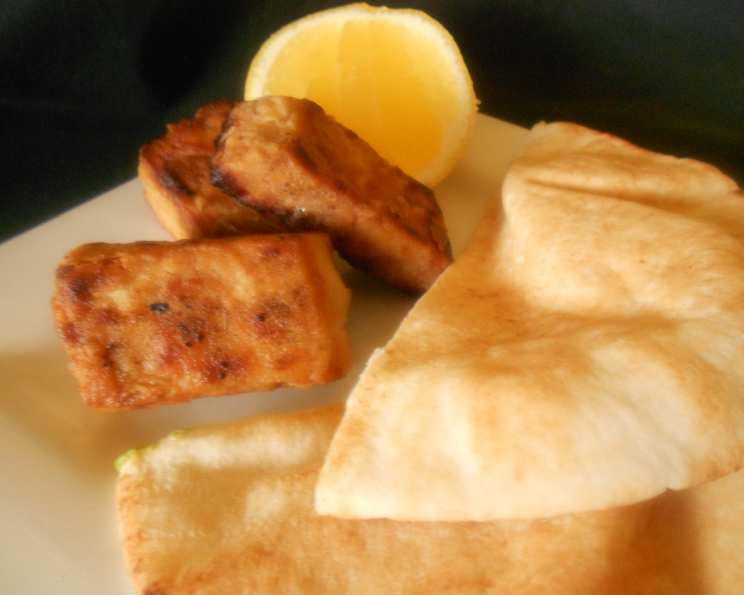
Saganaki: Flaming Cheese, A Taste of Greece
The first time I had saganaki, I was in a small taverna on the island of Crete. The air buzzed with the sounds of Greek music, laughter, and sizzling olive oil. Suddenly, our waiter appeared, carrying a cast-iron skillet engulfed in flames. The cry of “Opa!” echoed through the taverna, and the room erupted in applause. The aroma of melted cheese, brandy, and lemon filled the air – a memory forever etched in my culinary heart. That night, I fell in love with more than just the dish; I fell in love with the spirit of Greece, the joy of sharing food, and the pure theater of saganaki.
Recipe Overview
- Prep Time: 2 hours 5 minutes
- Cook Time: 5 minutes
- Total Time: 2 hours 10 minutes
- Servings: 6-8
- Yield: Varies with cheese size
- Dietary Type: Vegetarian (may not be suitable for vegans)
Ingredients
- 1 lb kasseri cheese (sliced 1/2-inch thick, brick or wheel)
- 2 tablespoons olive oil (more if needed)
- 1/4 cup all-purpose flour
- 1/2 cup brandy or 1/2 cup ouzo
- 2 fresh lemons, cut into wedges
- 4 pita bread, warmed and cut into triangles for serving
Equipment Needed
- Zip-lock bag
- Cast iron skillet
- Spatula
- Lighter or long match
Instructions
-
Begin by preparing the kasseri cheese. Slice the cheese into 1/2-inch thick triangles or 3-4 inch squares, depending on the shape of the cheese block you have. The key is to have even slices for consistent cooking.
-
Place the sliced kasseri into a zip-lock baggie. Pour the brandy (or ouzo) into the bag. Seal the bag, removing as much air as possible. Gently massage the cheese to ensure it’s well coated in the alcohol. Let the cheese marinate in the refrigerator for 2 hours. This step infuses the cheese with flavor and contributes to the dramatic flaming effect later on.
-
After the marinating time is complete, heat the olive oil in a cast iron skillet over medium-high heat. Ensure the skillet is hot before adding the cheese; this helps to achieve a beautiful sear.
-
Remove the cheese portions from the marinade, reserving the marinade for later use. It’s essential to pat the cheese slices dry with paper towels before dredging them in flour; this will allow for a better crust to form.
-
Place the all-purpose flour in a shallow dish. Dredge each cheese slice through the flour, shaking off any excess. A light coating of flour is all you need to help the cheese brown and prevent it from sticking to the pan.
-
Carefully place the floured cheese slices into the hot skillet. Fry the cheese slices for approximately 2 minutes on one side, or until golden brown and nicely seared.
-
Using a spatula, carefully flip the cheese slices and fry for an additional 1-2 minutes on the other side, until equally golden brown and gooey. The cheese should be melty and slightly softened, but not completely melted.
-
Now comes the exciting part! This step requires caution and preparation. Carefully carry the hot cast iron skillet to your dining table. Ensure there is enough space and no flammable materials nearby. Turn off any overhead fans to prevent the flames from spreading.
-
Pour 1 ounce (approximately 2 tablespoons) of the reserved brandy (or ouzo) marinade evenly over the top of the fried cheese. Immediately ignite the alcohol with a lighter or long match. Be prepared for a dramatic burst of flames! And don’t forget to enthusiastically yell “Opa!” – it’s part of the fun!
-
Immediately after igniting, squeeze the juice of one lemon slice over the top of the flaming cheese to dowse the flames. The lemon juice adds a delightful tang that complements the richness of the cheese.
-
Serve immediately with warmed pita bread slices for dipping and additional lemon wedges for squeezing. Encourage everyone to dig in while the cheese is still hot and gooey.
Expert Tips & Tricks
- Cheese Selection: Kasseri is the traditional choice, but if you can’t find it, halloumi or kefalotyri can also be used. These cheeses have a high melting point, which is crucial for achieving that perfect seared exterior without completely melting away.
- Alcohol Quality: Use a good-quality brandy or ouzo for the best flavor. The alcohol is not just for show; it contributes to the overall taste of the dish.
- Skillet Size: Choose a cast iron skillet that is appropriately sized for the amount of cheese you are frying. Overcrowding the pan will lower the oil temperature and prevent the cheese from browning properly.
- Pre-heating: Ensure your cast iron skillet is sufficiently preheated. This will give you a better sear on the cheese and stop it from sticking to the pan.
- Safety First: Always exercise caution when working with open flames. Keep a fire extinguisher or a bowl of water nearby just in case.
- Make Ahead: While the actual frying and flaming must be done just before serving, you can slice the cheese and marinate it up to 24 hours in advance. This will save you time when you’re ready to cook.
Serving & Storage Suggestions
Saganaki is best served immediately while it’s hot, gooey, and flaming. The dramatic presentation is part of the experience. Serve with warm pita bread, crusty bread, or even grilled vegetables for dipping. Accompany with additional lemon wedges, olives, and a simple Greek salad.
Leftovers, if any, can be stored in an airtight container in the refrigerator for up to 2 days. Reheat gently in a skillet over low heat or in a microwave. Keep in mind that the cheese will not have the same texture as when it was freshly fried, but it will still be delicious. It is not recommended to freeze saganaki, as the texture of the cheese will be significantly altered.
Nutritional Information
| Nutrient | Amount per Serving | % Daily Value |
|---|---|---|
| Calories | 229 kcal | N/A |
| Calories from Fat | 45 g | 20% |
| Total Fat | 5.1 g | 7% |
| Saturated Fat | 0.7 g | 3% |
| Cholesterol | 0 mg | 0% |
| Sodium | 215.2 mg | 8% |
| Total Carbohydrate | 28.1 g | 9% |
| Dietary Fiber | 1.6 g | 6% |
| Sugars | 1 g | N/A |
| Protein | 4.4 g | 8% |
Note: Nutritional information is an estimate and can vary based on specific ingredients and serving sizes.
Variations & Substitutions
- Spicy Saganaki: Add a pinch of red pepper flakes to the flour mixture for a spicy kick.
- Herb-Infused: Mix dried oregano or thyme into the flour for added flavor.
- Vegan Saganaki: While traditional saganaki relies on dairy cheese, there are vegan cheese alternatives available that can be fried. Look for vegan cheeses that are specifically designed for grilling or frying. You can also try using firm tofu, pressed to remove excess moisture, and marinated in a flavorful mixture of olive oil, lemon juice, and herbs before frying.
- Different Alcohol: If you don’t have brandy or ouzo, you can use vodka or gin as a substitute, but the flavor profile will be slightly different.
- Cheese Variation: If kasseri isn’t available, try using halloumi or a firm mozzarella (the kind that is low-moisture).
FAQs (Frequently Asked Questions)
Q: Why is my saganaki not flaming properly?
A: Ensure you are using a high-proof alcohol like brandy or ouzo. Also, make sure the cheese is warm and the alcohol is poured directly onto the hot cheese just before lighting.
Q: Can I use a different type of cheese?
A: Kasseri is the traditional cheese, but you can substitute with halloumi or kefalotyri. These cheeses have high melting points and will hold their shape during frying.
Q: What if I don’t have a cast iron skillet?
A: While a cast iron skillet is ideal for even heat distribution, you can use a heavy-bottomed stainless steel skillet as a substitute.
Q: How do I prevent the cheese from sticking to the pan?
A: Make sure the skillet is well-heated and the oil is hot before adding the cheese. Also, ensure the cheese is properly dredged in flour, shaking off any excess.
Q: Can I make saganaki ahead of time?
A: You can slice and marinate the cheese ahead of time, but the frying and flaming should be done just before serving for the best flavor and presentation.
Final Thoughts
Saganaki is more than just a dish; it’s an experience. It’s the sizzle of the cheese, the burst of flames, the cry of “Opa!”, and the shared joy of enjoying delicious food with friends and family. Don’t be intimidated by the flaming aspect – with a little caution and preparation, you can easily recreate this classic Greek appetizer in your own kitchen. So, gather your ingredients, invite your loved ones, and prepare to ignite not just the cheese, but also a memorable culinary moment. Kali Orexi! (Good appetite!)