
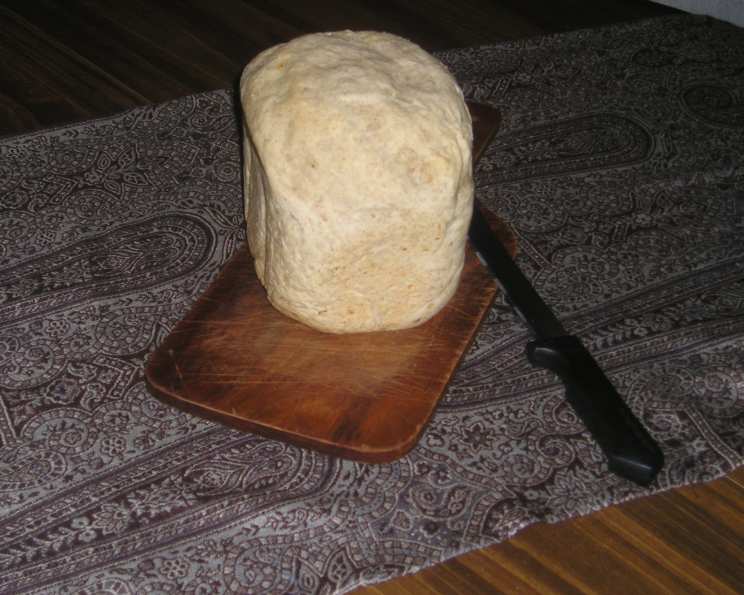
Sage and Onion Wheat Bread (Bread Machine)
The first time I tasted sage and onion bread, it was a cold autumn afternoon in a small village bakery. The yeasty aroma filled the air, mingling with the earthy scent of sage. The warm, crusty slice practically melted in my mouth, a symphony of savory flavors that instantly conjured images of Thanksgiving feasts and cozy family gatherings. It was the perfect comfort food, and I’ve been chasing that flavor ever since, experimenting with different recipes to recreate that magical experience at home.
Recipe Overview
- Prep Time: 15 minutes
- Cook Time: 3 hours 10 minutes (approximate)
- Total Time: 3 hours 25 minutes (approximate)
- Servings: 12
- Yield: 1 loaf
- Dietary Type: Vegetarian
Ingredients
- 1 cup water, plus 1 tablespoon water
- 1/3 cup onion, coarsely chopped
- 2 tablespoons butter, softened
- 2 1/2 cups white bread flour
- 1 cup whole wheat flour
- 1 tablespoon sugar
- 1 teaspoon salt
- 1 3/4 teaspoons rubbed sage
- 2 teaspoons yeast
Equipment Needed
- Bread Machine
Instructions
- Add ingredients to the bread machine pan in the order recommended by your bread machine manufacturer. This is crucial, as the yeast needs to be kept separate from liquids in some machines to prevent premature activation. Generally, liquids go in first, followed by dry ingredients, and finally, the yeast.
- Select the whole wheat cycle on your bread machine. This cycle is designed for the longer rise time and bake time required for whole wheat flour.
- Approximately 10 minutes after the machine begins kneading the dough, open the lid (if possible without stopping the cycle) and check the dough consistency. It should be forming a smooth, round ball.
- Test the dough by gently touching it. The dough should be slightly tacky to the touch, meaning it sticks a little, but no dough should remain on your finger. This is a key step to ensuring the bread has the right texture.
- If the dough appears too dry and is not forming a smooth ball, add 1 tablespoon of water. Allow the machine to knead for a few more minutes, then check again.
- If the dough appears too wet and sticky, add 1 tablespoon of flour. Again, allow the machine to knead for a few minutes before checking. These adjustments are vital for achieving the desired dough consistency.
- Let the bread machine complete the whole wheat cycle. The approximate cook time is 3 hours, but the actual time may vary depending on the specific bread machine model. Consult your machine’s manual for accurate timing.
- Once the cycle is complete, carefully remove the bread from the bread machine pan. Use oven mitts, as the pan will be hot. Place the loaf on a cooling rack to cool completely before slicing. This prevents the bread from becoming soggy.
Expert Tips & Tricks
- Bloom the yeast: For extra insurance, especially if you are unsure about the freshness of your yeast, proof it before adding it to the bread machine. Mix the yeast with a quarter cup of warm water (about 110°F) and a teaspoon of sugar. Let it sit for 5-10 minutes until it becomes foamy. If it doesn’t foam, the yeast is dead and should be replaced. Adjust the water in the recipe accordingly.
- Toast the sage: Lightly toasting the rubbed sage in a dry pan for a minute or two before adding it to the bread machine will intensify its flavor. Be careful not to burn it.
- Sauté the onion: Sautéing the coarsely chopped onion in a little butter before adding it to the bread machine will mellow its flavor and add a touch of sweetness to the bread. Cool slightly before adding.
- Don’t over-knead: Over-kneading whole wheat dough can result in a tough loaf. The bread machine is designed to knead the dough for the appropriate amount of time, but it’s still important to check the consistency to prevent adding too much flour.
- Use a bread machine thermometer: For more precise baking, use a bread machine thermometer. The internal temperature of the bread should reach 200-210°F (93-99°C) when done.
- If the bread is browning too quickly: If the crust is browning too quickly, tent the top of the bread machine with aluminum foil during the last part of the baking cycle.
Serving & Storage Suggestions
This Sage and Onion Wheat Bread is delicious served warm with butter, as a side to soup or stew, or as the base for sandwiches. It pairs particularly well with roasted chicken, turkey, or ham. To serve, slice the bread with a serrated knife for clean cuts.
To store, wrap the cooled loaf tightly in plastic wrap or place it in an airtight container. It will keep at room temperature for 2-3 days. For longer storage, slice the bread and freeze it in a freezer-safe bag or container. Frozen bread can be thawed at room temperature or toasted directly from frozen. It will last up to 2-3 months in the freezer. Reheat thawed slices in a toaster or oven for the best texture.
Nutritional Information
Note: Nutritional information is an estimate and can vary based on specific ingredients and serving size.
| Nutrient | Amount per Serving | % Daily Value |
|---|---|---|
| Calories | 154 kcal | – |
| Total Fat | 2.4 g | 3% |
| Saturated Fat | 1.3 g | 6% |
| Cholesterol | 5.1 mg | 1% |
| Sodium | 209.3 mg | 8% |
| Total Carbohydrate | 28.9 g | 9% |
| Dietary Fiber | 2.2 g | 8% |
| Sugars | 1.4 g | – |
| Protein | 4.4 g | 8% |
Variations & Substitutions
- Gluten-Free: While this recipe is not naturally gluten-free, you can experiment with gluten-free bread flour blends specifically designed for bread machines. Be sure to follow the instructions on the gluten-free flour blend package and adjust the liquid as needed.
- Dairy-Free: Substitute the butter with a plant-based butter alternative, such as coconut oil or vegan butter sticks.
- Herb Variations: Experiment with different herbs, such as rosemary, thyme, or oregano, in addition to or instead of the sage.
- Sweet Onion: Use a sweet onion variety like Vidalia for a sweeter flavor profile.
- Add Seeds: Incorporate seeds like sunflower, pumpkin, or flaxseeds for added texture and nutritional value. Add about 1/4 cup of seeds to the dough along with the flour.
- Garlic: Add 1-2 cloves of minced garlic to the dough for a garlicky flavor.
FAQs (Frequently Asked Questions)
Q: Can I use active dry yeast instead of instant yeast?
A: Yes, you can, but you’ll need to proof it first. Mix the active dry yeast with a quarter cup of warm water and a teaspoon of sugar and let it sit for 5-10 minutes until foamy. Then, add it to the bread machine with the rest of the wet ingredients.
Q: Why is my bread machine bread sinking in the middle?
A: This can be caused by too much liquid, too much yeast, or not enough gluten development. Ensure you are measuring ingredients accurately and using the correct cycle. Adjust the liquid and flour as needed during the kneading process.
Q: Can I make this bread without a bread machine?
A: Yes, but the process will be different. You’ll need to knead the dough by hand or with a stand mixer, let it rise, shape it, and bake it in a conventional oven. Search for a standard sage and onion bread recipe for specific instructions.
Q: My bread is too dense. What can I do?
A: Ensure your yeast is fresh and active. Also, avoid adding too much whole wheat flour, as it can make the bread denser. Try using a higher ratio of white bread flour to whole wheat flour.
Q: How do I prevent the bread from sticking to the pan?
A: Lightly grease the bread machine pan before adding the ingredients. You can also use a baking spray specifically designed for bread machines.
Final Thoughts
This Sage and Onion Wheat Bread is more than just a recipe; it’s a journey back to those comforting flavors of autumn and the warmth of a homemade loaf. Don’t be intimidated by the bread machine – it simplifies the process and delivers consistent results. Feel free to experiment with the variations to make it your own signature bread. I encourage you to try this recipe and share your creations with loved ones. The aroma alone is enough to create a welcoming and inviting atmosphere in your home. Happy baking!