
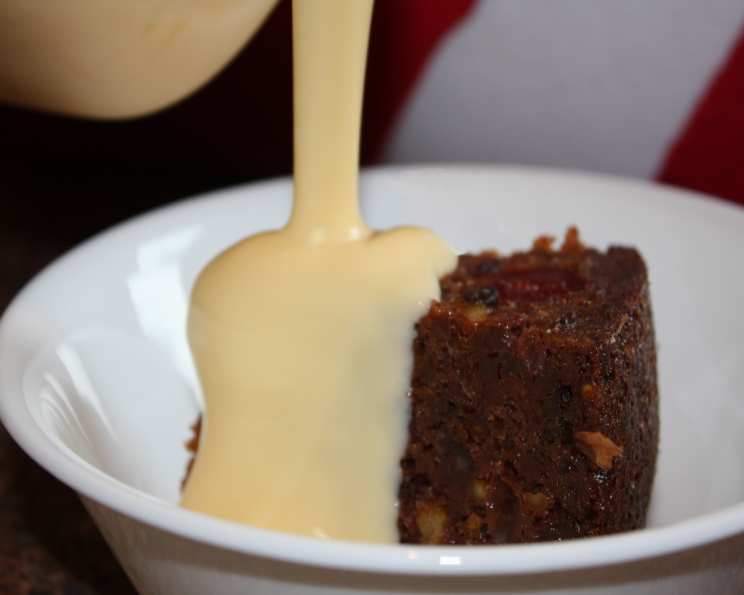
Sago Christmas Pudding: A Taste of Home
The scent of Christmas pudding always transports me back to my grandmother’s kitchen. It wasn’t just about the rich, dark sweetness; it was the warmth of the oven, the happy chatter of family, and the feeling that all was right with the world. While her traditional recipe was a closely guarded secret, this Sago Christmas Pudding evokes similar feelings, carrying on the spirit of festive indulgence in a slightly lighter, delightfully textured way.
Recipe Overview
- Prep Time: 20 minutes (+ overnight soaking)
- Cook Time: 4 hours
- Total Time: 4 hours 20 minutes (+ overnight soaking)
- Servings: 10-12
- Yield: 1 (8-cup) pudding
- Dietary Type: Adaptable (can be Gluten-Free, Dairy-Free, Vegan)
Ingredients
- 2 cups lactose-free milk or 2 cups soymilk
- 2/3 cup sago (130 grams)
- 2 teaspoons bicarbonate of soda
- 1 pinch salt
- 1 1/2 cups brown sugar (330 grams)
- 3 cups soft fresh breadcrumbs or 3 cups gluten-free breadcrumbs
- 3 cups mixed dried fruit (480 grams)
- 4 eggs, lightly beaten
- 120 g butter, melted (or vegan margarine for dairy-free/vegan)
Equipment Needed
- 8-cup pudding basin (ceramic or metal)
- Large bowl
- Large saucepan or stockpot
- Baking paper
- Aluminum foil (if using an uncovered ceramic basin)
- String (if using an uncovered ceramic basin)
Instructions
-
Begin by preparing the sago. In a bowl, bring the milk (lactose-free or soy) to a boil. Remove from the heat and pour it immediately over the sago. This initial heat helps the sago to soften beautifully.
-
Cover the bowl tightly and refrigerate overnight to allow the sago to soak and plump up. This is a crucial step for achieving the pudding’s unique texture.
-
The next day, take the sago mixture from the refrigerator. Add the bicarbonate of soda and a pinch of salt.
-
Stir in the remaining ingredients one by one: the brown sugar, breadcrumbs (either fresh or gluten-free), mixed dried fruit, lightly beaten eggs, and melted butter (or vegan margarine). Ensure everything is thoroughly mixed together to create a cohesive batter.
-
Generously grease an 8-cup pudding basin. Whether you are using a ceramic or metal basin, this step is essential to prevent the pudding from sticking.
-
Cut a circle of buttered baking paper to fit the base of the basin and place it inside. This adds an extra layer of protection against sticking.
-
Carefully spoon all of the pudding mixture into the prepared basin, ensuring it’s evenly distributed.
-
If you are using an uncovered ceramic pudding basin, cover it tightly with two sheets of aluminum foil. Tie the foil securely with string to create a tight seal, preventing water from seeping in during steaming. If you’re using a lidded metal pudding basin, simply cover the pudding with a circle of buttered baking paper before securing the lid.
-
Pour enough water into a large saucepan or stockpot so that it comes halfway up the sides of the pudding basin. This ensures even cooking throughout the steaming process.
-
Bring the water to a boil, then carefully lower the pudding basin into the hot water.
-
Cover the saucepan tightly and simmer gently for 4 hours. It’s important to maintain a steady simmer throughout the cooking process.
-
Check the water level every 30 minutes and add more boiling water if necessary to maintain the halfway point. This prevents the saucepan from boiling dry and potentially damaging the pudding.
-
On the day you plan to serve the pudding, you have two options for reheating. You can either cut it into serving portions and heat them individually in the microwave, or you can leave the pudding in the basin and re-steam it for another 2 hours to heat it through completely.
Expert Tips & Tricks
- For a richer flavor, consider soaking the dried fruit in a little orange juice or apple juice for a few hours before adding it to the pudding mixture.
- If you find the pudding is browning too quickly during steaming, place a clean tea towel between the lid of the saucepan and the pudding basin.
- Don’t be afraid to experiment with different types of dried fruit. Cranberries, glace cherries, and chopped apricots all make delicious additions.
- Ensure your pudding basin is heat-proof, especially if it’s ceramic.
- If you prefer a deeper, darker flavor, use dark brown sugar instead of light brown sugar.
Serving & Storage Suggestions
This Sago Christmas Pudding is traditionally served warm with custard, cream, or brandy butter. For a festive touch, you can flame it with brandy before serving. To do this, gently warm some brandy in a small saucepan, pour it over the pudding, and carefully ignite it with a long match.
Leftover pudding can be stored in an airtight container in the refrigerator for up to 5 days. You can also freeze it for up to 3 months. To reheat, thaw it overnight in the refrigerator and then steam it again or microwave individual portions.
Nutritional Information
Note: Nutritional information is an estimate and may vary based on specific ingredients used.
| Nutrient | Amount per Serving | % Daily Value |
|---|---|---|
| Calories | 510 kcal | 26% |
| Total Fat | 15g | 23% |
| Saturated Fat | 8g | 40% |
| Cholesterol | 107mg | 36% |
| Sodium | 659mg | 28% |
| Total Carbohydrate | 87g | 29% |
| Dietary Fiber | 5g | 20% |
| Sugars | 34g | N/A |
| Protein | 10g | 20% |
Variations & Substitutions
- Gluten-Free: As the original recipe notes, simply use gluten-free breadcrumbs instead of regular breadcrumbs.
- Dairy-Free/Vegan: Substitute the lactose-free milk with your favorite plant-based milk (soy, almond, or oat milk all work well) and replace the butter with vegan margarine.
- Spice It Up: Add 1 teaspoon of mixed spice or cinnamon to the pudding mixture for a warmer, more festive flavor.
- Nutty Delight: Incorporate 1/2 cup of chopped nuts, such as walnuts or pecans, for added texture and flavor.
- Citrus Zest: Add the zest of one orange or lemon to brighten the flavors.
FAQs (Frequently Asked Questions)
Q: Can I use quick-cooking sago instead of pearl sago?
A: While pearl sago is preferred for its texture, you can use quick-cooking sago. You may need to adjust the soaking time, so keep an eye on it.
Q: My pudding basin doesn’t have a lid. What can I use?
A: As the recipe suggests, tightly cover the basin with two layers of aluminum foil, securing it with string to create a tight seal.
Q: How do I know when the pudding is cooked through?
A: A skewer inserted into the center of the pudding should come out clean or with a few moist crumbs attached.
Q: Can I make this pudding ahead of time?
A: Absolutely! In fact, many people believe that Christmas pudding tastes even better after it has been allowed to mature for a few weeks or even months. Store it tightly wrapped in the refrigerator or freezer.
Q: Can I bake this pudding instead of steaming it?
A: While steaming is the traditional method, you can bake it in a water bath (bain-marie) at 325°F (160°C) until a skewer inserted into the center comes out clean. The cooking time will vary, so check it regularly after about 2 hours.
Final Thoughts
This Sago Christmas Pudding is more than just a recipe; it’s an invitation to create new memories and traditions. Whether you’re continuing a family legacy or starting your own, the aroma and taste of this pudding will fill your home with the spirit of Christmas. Don’t be afraid to experiment with variations and make it your own. Share your creations and feedback – I’d love to hear how it turns out! Pair it with a glass of sherry or a warm cup of spiced cider for the ultimate festive experience. Happy baking!