
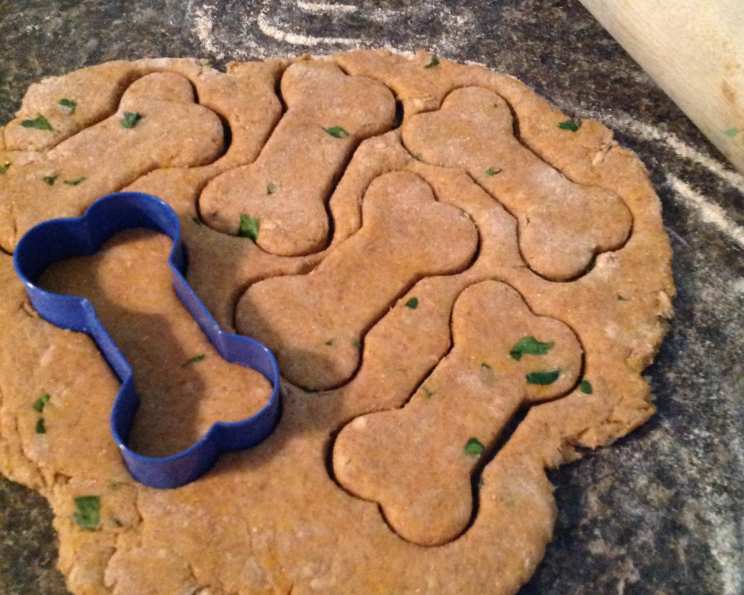
Salmon Sweet Potato Dog Treats: A Paw-sitively Delicious Recipe
My old Labrador, Gus, was the pickiest eater. It wasn’t just kibble; he’d turn his nose up at the most tempting scraps from the dinner table! Then, on a whim, I tried making these salmon and sweet potato treats. The moment he caught a whiff, his tail started thumping, and he practically inhaled the first one. From then on, baking a batch of these became a weekly ritual, filled with the comforting aroma of salmon and the joy of seeing my furry friend happy and healthy. These treats aren’t just food; they’re a tangible expression of love for our canine companions.
Recipe Overview
- Prep Time: 15 minutes
- Cook Time: 30 minutes
- Total Time: 45 minutes
- Yields: Approximately 32 biscuits
- Serves: 1 (dog!)
- Dietary Type: Grain-Free, Gluten-Free (if using certified gluten-free chickpea flour)
Ingredients
- 1 (14 3/4 ounce) can of wild-caught Alaskan pink salmon, drained
- 1 medium sweet potato, steamed, peeled, and mashed
- 3 cups chickpea flour, plus extra for rolling out (or flour of choice)
- 2 large eggs
- 3 tablespoons fresh parsley, chopped
Equipment Needed
- Food processor (optional, but recommended)
- Airtight container
- Cookie sheets
- Parchment paper
- Floured surface
- Rolling pin
- Cookie cutters (desired shapes)
- Cooling rack
Instructions
- The beauty of this recipe lies in its simplicity. For ease and speed, I like to combine all ingredients – the drained salmon, mashed sweet potato, chickpea flour, eggs, and chopped parsley – in a food processor. Pulse until a dough forms. This ensures everything is thoroughly mixed and that the salmon is evenly distributed. If you don’t have a food processor, you can simply mix everything together by hand in a large bowl.
- Transfer the dough from the food processor (or bowl) into an airtight container. This step is crucial: Refrigerate the dough for a minimum of 1 hour. This allows the chickpea flour to fully absorb the moisture, making the dough easier to handle and roll out. The longer the dough chills, the less sticky it will be.
- Once the dough has chilled, preheat your oven to 350 degrees Fahrenheit (175 degrees Celsius). While the oven is heating, line your cookie sheets with parchment paper. This will prevent the treats from sticking and make for easy cleanup.
- Now comes the fun part: rolling out the dough. Transfer the chilled dough to a lightly floured surface. Sprinkle the top of the dough with more flour, and lightly dust your hands and rolling pin to prevent sticking.
- Using the rolling pin, roll the dough out until it’s approximately 1/8 inch thick. A thinner treat will be crispier, while a thicker one will be chewier. While rolling, turn the dough frequently and flip it over, continuing to lightly dust with flour. This ensures even thickness and prevents sticking to the counter.
- Select your desired cookie cutter shape(s) and start cutting out the biscuits. Gather any leftover scraps of dough, gently knead them together, and roll them out again to cut out more treats.
- Place the cut-out biscuits on the prepared cookie sheets in a single layer, leaving a little space between each one.
- Bake the biscuits in the preheated oven for 30 minutes, or until they are crisp and the centers are hard. The exact baking time will depend on the thickness of your biscuits and the efficiency of your oven, so keep a close eye on them. It is important that the biscuits are completely dried out, or they will spoil quickly. You want them to be hard and crunchy, not soft or chewy.
- Once baked, transfer the biscuits to a cooling rack and let them cool completely. This is crucial for achieving maximum crispness and preventing moisture buildup.
- Store the cooled treats in an airtight container for several weeks.
Expert Tips & Tricks
- For extra flavor, consider adding a pinch of dried dill or rosemary to the dough. Dogs generally enjoy these herbs, and they can add a delightful aroma to the treats.
- If your dough is too sticky, gradually add more chickpea flour until it reaches a workable consistency. Conversely, if the dough is too dry, add a teaspoon of water or mashed sweet potato at a time until it comes together.
- To ensure even baking, rotate the cookie sheets halfway through the baking time.
- For a longer shelf life, you can dehydrate the baked treats in a dehydrator for several hours after baking. This will remove any remaining moisture and make them incredibly shelf-stable.
- If you don’t have cookie cutters, simply use a knife or pizza cutter to cut the dough into squares or strips.
- If your dog has any allergies, consult your vet about safe substitutions.
Serving & Storage Suggestions
These Salmon Sweet Potato Dog Treats are best served as a reward or a training tool. Offer them to your dog as a special treat, but remember that treats should only make up a small portion of their daily diet. Store the completely cooled biscuits in an airtight container at room temperature. Properly stored, they should last for several weeks. If you live in a humid environment, you may want to store them in the refrigerator to prevent them from becoming soft. You can also freeze these treats for longer storage. To freeze, place them in a freezer-safe bag or container and they should last for up to 2-3 months. No reheating is required; just let them thaw at room temperature before serving.
Nutritional Information
Here’s an estimate of the nutritional information per serving (approximately 1 biscuit):
| Nutrient | Amount per Serving | % Daily Value (for a dog – varies by size) |
|---|---|---|
| Calories | 58 | N/A |
| Total Fat | 1.5g | N/A |
| Saturated Fat | 0.3g | N/A |
| Cholesterol | 17.7mg | N/A |
| Sodium | 22.3mg | N/A |
| Total Carbohydrate | 5.8g | N/A |
| Dietary Fiber | 1.1g | N/A |
| Sugars | 1.1g | N/A |
| Protein | 5.1g | N/A |
Disclaimer: This is an estimated nutritional breakdown and may vary depending on the specific ingredients used. Always consult with your veterinarian regarding your dog’s dietary needs. Daily values are not readily available for canines and vary widely based on weight, breed, and activity levels.
Variations & Substitutions
- Gluten-Free Option: Ensure that the chickpea flour you use is certified gluten-free to avoid cross-contamination. You can also experiment with other gluten-free flours, such as brown rice flour or oat flour, but you may need to adjust the amount of liquid accordingly.
- Protein Boost: Add a tablespoon of chia seeds or flaxseed meal to the dough for an extra boost of protein and omega-3 fatty acids.
- Veggie Power: Incorporate other dog-friendly vegetables into the mix, such as pureed pumpkin, carrots, or zucchini. Adjust the amount of chickpea flour as needed to maintain the dough’s consistency.
- Salmon Alternative: While wild-caught Alaskan pink salmon is ideal, you can substitute it with other types of cooked salmon or even canned sardines (in water, not oil), which are also packed with beneficial nutrients.
- Egg-Free Option: While the eggs help bind the treats, you can try replacing them with a flax egg (1 tablespoon of ground flaxseed meal mixed with 3 tablespoons of water, let sit for 5 minutes to thicken). However, this may slightly alter the texture.
FAQs (Frequently Asked Questions)
Q: Can I use a different type of flour besides chickpea flour?
A: Yes, you can substitute chickpea flour with other flours like brown rice flour, oat flour, or even regular wheat flour if your dog doesn’t have any grain sensitivities. Keep in mind that the texture and baking time may vary slightly.
Q: How long do these treats last?
A: When stored in an airtight container at room temperature, these treats typically last for several weeks. For longer storage, you can freeze them for up to 2-3 months.
Q: My dog is allergic to eggs. What can I use as a substitute?
A: You can try using a flax egg (1 tablespoon of ground flaxseed meal mixed with 3 tablespoons of water, let sit for 5 minutes to thicken) as a substitute for the eggs. The treats might be a bit more crumbly, but still perfectly safe for your dog.
Q: Can I add other ingredients to these treats?
A: Absolutely! Feel free to add other dog-friendly ingredients like pureed pumpkin, shredded carrots, or chopped apples. Just be mindful of adjusting the amount of flour to maintain the proper dough consistency.
Q: How do I know when the treats are done baking?
A: The treats are done when they are firm to the touch and slightly golden brown around the edges. The centers should be hard and dry. If they are still soft, continue baking for a few more minutes.
Final Thoughts
I truly hope you and your furry friend enjoy these Salmon Sweet Potato Dog Treats as much as Gus did. They’re a simple, healthy, and delicious way to show your dog some love. Don’t be afraid to experiment with different ingredients and flavors to create a treat that your pup will adore. And if you try out the recipe, I’d love to hear about it! Share your pictures and feedback, and let’s celebrate the joy of baking for our beloved canine companions together. Happy baking!