
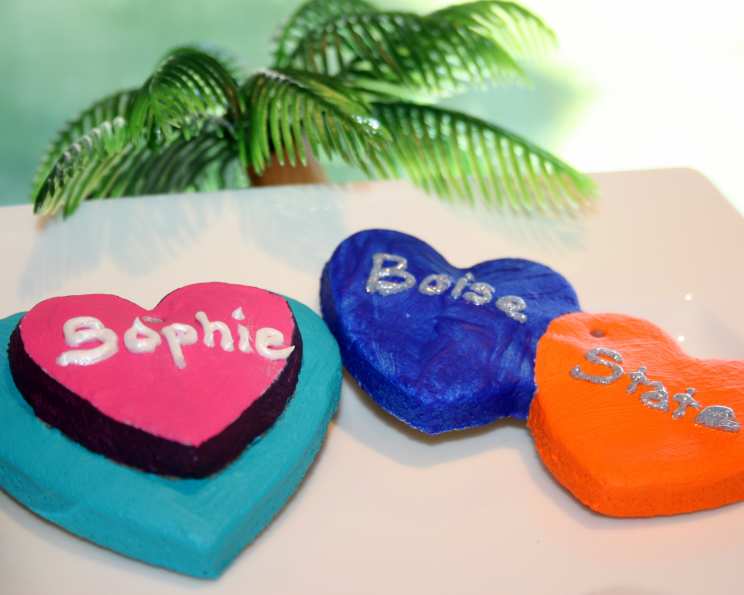
The Enduring Magic of Salt Dough: Crafting Memories, One Shape at a Time
The scent of salt dough baking always transports me back to my childhood. I remember being knee-high to a mixing bowl, my fingers sticky with a concoction of flour, salt, and water, transforming humble ingredients into wonky stars and lopsided snowmen for our Christmas tree. Each creation, painted with vibrant, amateur strokes, held a story, a memory, a piece of our family history hanging from the branches. Now, as a chef, I still find joy in this simple craft, a reminder that the most meaningful creations are often the ones made with love and a little bit of flour dust.
Recipe Overview
- Prep Time: 15 minutes
- Cook Time: 30 minutes (minimum)
- Total Time: 45 minutes + drying time
- Servings: Varies depending on size and number of shapes
- Yield: Approximately 48 small ornaments
- Dietary Type: Vegan
Ingredients
- 2 cups all-purpose flour
- 1 cup table salt
- 1 cup water
Equipment Needed
- Mixing bowl
- Measuring cups
- Measuring spoons
- Cookie sheet
- Aluminum foil
- Rolling pin
- Cookie cutters or knife
- Toothpick or skewer (for making holes)
Instructions
-
Combine the dry ingredients: In a large mixing bowl, thoroughly mix together the 2 cups of all-purpose flour and 1 cup of table salt. Ensure there are no lumps of salt remaining.
-
Incorporate the water: Gradually add the 1 cup of water to the flour and salt mixture. It’s best to add the water a little at a time, mixing continuously. This prevents the dough from becoming too sticky.
-
Knead the dough: Once the ingredients are roughly combined, turn the dough out onto a lightly floured surface. Knead the dough for 7-10 minutes until it forms a smooth, pliable ball. The dough should be firm and not sticky. If it’s too dry, add a tiny bit more water, a teaspoon at a time. If it’s too sticky, add a little more flour.
-
Roll out the dough: Preheat your oven to 325°F (160°C). Line a cookie sheet with aluminum foil. Roll out the salt dough on a lightly floured surface to your desired thickness. A thickness of about 1/4 inch is ideal for ornaments.
-
Cut out shapes: Use cookie cutters or a knife to cut the dough into your desired shapes. For ornaments, use a toothpick or skewer to create a hole near the top of each shape before baking. This will allow you to hang them later.
-
Bake or air dry: Place the shapes onto the prepared cookie sheet. You have the option to either air dry or bake your salt dough creations. Air drying can take several days, depending on the humidity. Baking will speed up the process.
-
Baking Instructions: Bake the salt dough shapes in the preheated oven at 325°F (160°C). For each 1/4 inch of thickness, bake for 30 minutes. So, if your ornaments are 1/2 inch thick, bake them for 1 hour. Keep an eye on them to prevent burning, especially towards the end of the baking time. The baked ornaments should be hard and dry.
-
Cool and Decorate: Once baked, remove the salt dough shapes from the oven and allow them to cool completely on a wire rack. Once cool, you can decorate them as desired with paint, markers, glitter, or other embellishments.
-
Sealing (optional): For added durability, you can seal the finished ornaments with a coat of clear varnish or sealant. This will protect them from moisture and help them last longer.
-
Storage: Store leftover salt dough in a plastic bag in the refrigerator. It can be kept for a few days, but it’s best to use it as soon as possible.
Expert Tips & Tricks
- Don’t overmix: Overmixing the dough can develop the gluten in the flour too much, resulting in a tougher, less pliable dough. Mix until just combined.
- Prevent puffing: To minimize puffing during baking, prick the dough all over with a fork before baking.
- Consistent Thickness: Ensure the dough is rolled out to an even thickness for consistent baking. Thicker areas will take longer to dry and may crack.
- Slow Baking is Key: Baking at a low temperature helps to dry out the dough slowly, preventing cracking and warping.
- Preventing Bubbles: If bubbles form during baking, gently prick them with a needle or toothpick to release the air.
- Alternative Drying Method: If you prefer not to bake, you can air dry the shapes. Place them on a wire rack in a well-ventilated area and turn them periodically to ensure even drying. This can take several days.
- Adding Color to the Dough: You can add food coloring to the water before mixing it into the dough to create colored salt dough.
Serving & Storage Suggestions
Salt dough creations are primarily decorative and not meant to be eaten. Serve them by displaying them as ornaments, decorations, or keepsakes.
Store finished salt dough creations in a cool, dry place, away from moisture. They can be stored indefinitely if properly dried and sealed. Avoid storing them in humid environments, as they can absorb moisture and become soft or moldy.
Nutritional Information
This recipe is not intended for consumption; therefore, detailed nutritional information is not provided. However, considering the ingredients, it would primarily consist of carbohydrates from flour and a high sodium content from salt.
| Nutrient | Amount per Serving (estimated) | % Daily Value |
|---|---|---|
| Calories | Minimal | N/A |
| Total Fat | Trace | N/A |
| Saturated Fat | 0g | 0% |
| Cholesterol | 0mg | 0% |
| Sodium | Very High | N/A |
| Total Carbohydrate | Small | N/A |
| Dietary Fiber | Trace | N/A |
| Sugars | 0g | 0% |
| Protein | Trace | N/A |
Variations & Substitutions
- Gluten-Free Salt Dough: Substitute the all-purpose flour with a gluten-free all-purpose flour blend. You may need to adjust the amount of water, as gluten-free flours can absorb moisture differently.
- Spiced Salt Dough: Add a teaspoon of ground cinnamon, nutmeg, or ginger to the dry ingredients for a festive aroma and subtle flavor (though the finished product is still not meant for eating).
- Aromatic Salt Dough: Incorporate a few drops of essential oils, such as lavender or peppermint, to the water for a fragrant dough.
- Textured Salt Dough: Press seeds, herbs, or other textured materials into the surface of the dough before baking to create unique designs.
- Natural Dyes: Use natural dyes, like beet juice for pink or spinach juice for green, to color the water and create naturally tinted dough.
FAQs (Frequently Asked Questions)
Q: Can I eat salt dough?
A: No, salt dough is not meant to be eaten. It contains a very high concentration of salt, making it unpalatable and potentially harmful.
Q: How do I prevent my salt dough from cracking?
A: Bake at a low temperature and ensure the dough is rolled out to an even thickness. Pricking the dough with a fork before baking can also help prevent cracking.
Q: How long does salt dough last?
A: Properly dried and sealed salt dough creations can last indefinitely if stored in a cool, dry place.
Q: Can I paint salt dough with any type of paint?
A: Acrylic paints work best for decorating salt dough, as they are durable and adhere well to the surface. You can also use markers, but make sure they are permanent markers to prevent smudging.
Q: How do I make sure my ornaments don’t get moldy?
A: Ensure the salt dough is thoroughly dried before decorating and storing. Sealing the finished ornaments with a clear varnish or sealant can also help protect them from moisture.
Final Thoughts
Crafting with salt dough is more than just a recipe; it’s an invitation to create lasting memories and heartfelt gifts. Gather your loved ones, roll up your sleeves, and let your creativity flow. Whether you’re making ornaments for the holidays, decorations for your home, or simply enjoying a relaxing afternoon of crafting, salt dough provides a simple and rewarding experience. Don’t be afraid to experiment with different shapes, colors, and textures. And remember, the most beautiful creations are the ones made with love and a sprinkle of imagination. Share your masterpieces with friends and family, and let the enduring magic of salt dough fill your life with joy and creativity.