
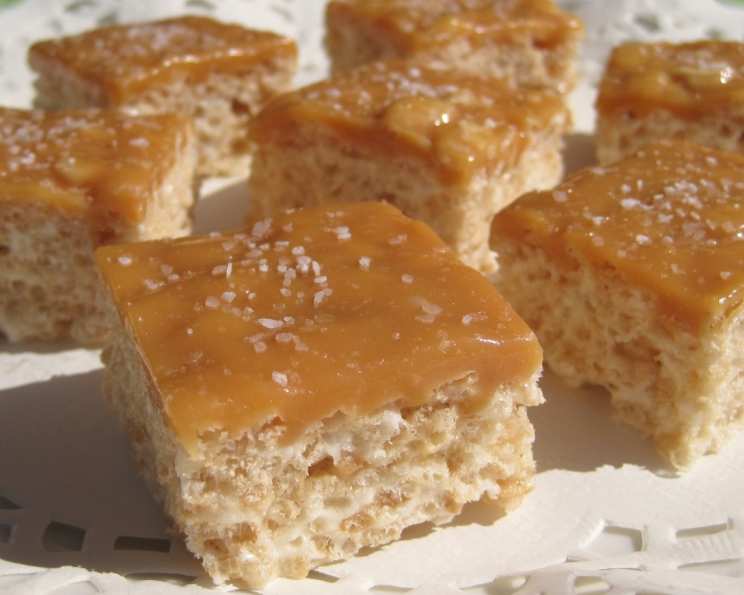
Salted Caramel Dream Squares: An Elevated Treat
My grandmother, bless her heart, wasn’t much of a baker, but she had a knack for elevating simple pleasures. Her signature move was always a generous sprinkle of sea salt on everything sweet. She claimed it woke up the flavors, and boy, was she right. The first time I tasted these Salted Caramel Dream Squares, they instantly transported me back to her kitchen, a familiar scent of toasted sugar and that unforgettable salty-sweet dance on my tongue. These squares are nostalgic, comforting, and just plain addictive.
Recipe Overview
- Prep Time: 20 minutes
- Cook Time: 10 minutes
- Cooling Time: 2 hours
- Total Time: 2 hours 30 minutes
- Servings: 24 squares
- Dietary Type: Vegetarian
Ingredients
For the Caramel:
- 1 (14 ounce) bag caramels, unwrapped
- 1 (14 ounce) can sweetened condensed milk
- 1/4 cup unsalted butter
For the Squares:
- 1/4 cup unsalted butter
- 1 (10 1/2 ounce) bag miniature marshmallows
- 1 1/2 teaspoons vanilla extract
- 3 teaspoons flaked sea salt, divided
- 8 cups toasted rice cereal
Equipment Needed
- Medium saucepan
- 13×9 inch baking dish
- Non-stick aluminum foil
- Rubber spatula
Instructions
- Prepare the caramel: In a medium saucepan, combine the unwrapped caramels, sweetened condensed milk, and 1/4 cup of unsalted butter. Melt over medium-low heat, stirring constantly until the mixture is smooth and completely melted. This may take about 5-7 minutes. Remove from heat once smooth.
- Line the baking dish: Line a 13×9 inch baking dish with non-stick aluminum foil, ensuring that the foil extends at least 2 inches beyond the edges of the dish on all sides. This overhang will make it easy to lift the finished squares out later.
- Melt butter and marshmallows: In another saucepan, melt the 1/4 cup of unsalted butter over medium-low heat. Once melted, add the miniature marshmallows.
- Combine marshmallow mixture: Using a rubber spatula, continuously stir the marshmallows and butter until the marshmallows are almost completely melted. It’s okay if a few small lumps remain, as stirring will continue in the next step.
- Add vanilla, salt, and caramel: Remove the saucepan from the heat. Stir in the vanilla extract, 1 teaspoon of the flaked sea salt, and 1 cup of the prepared caramel (from the first saucepan). Continue stirring until the mixture is smooth and well combined.
- Incorporate the cereal: Add the 8 cups of toasted rice cereal to the marshmallow mixture. Stir quickly and thoroughly to coat the cereal evenly with the marshmallow mixture.
- Press into the baking dish: Transfer the cereal mixture into the prepared baking dish. Using your hands (slightly dampened to prevent sticking) or the back of a spatula, press the mixture firmly and evenly into the baking dish.
- Top with caramel and sea salt: Spread the remaining caramel evenly over the top of the pressed cereal mixture. Sprinkle the remaining 2 teaspoons of flaked sea salt over the caramel layer.
- Cool and set: Let the squares cool completely at room temperature. This will typically take at least 2 hours, or until the caramel has fully set and the squares are firm.
- Cut and serve: Once cooled and set, use the foil overhang to lift the entire slab of squares out of the baking dish. Peel away the foil and cut the slab into 24 even squares.
Expert Tips & Tricks
- Preventing Sticking: Lightly grease your hands or the spatula with butter or cooking spray before pressing the cereal mixture into the baking dish. This will prevent the mixture from sticking and make it easier to create a smooth, even surface.
- Caramel Consistency: If the caramel seems too thick to spread easily, warm it gently in the microwave for a few seconds at a time, stirring in between, until it reaches a more spreadable consistency. Be careful not to overheat it, as it can burn.
- Salt Distribution: For an even distribution of sea salt, try sprinkling it from a height, allowing the flakes to fall evenly over the caramel.
- Crispy Squares: For the crispiest squares, use freshly opened rice cereal. Cereal that has been open for a while may absorb moisture and result in a slightly softer texture.
- Salt Selection: Using a high-quality flaked sea salt is key to achieving the signature salty-sweet flavor. Maldon sea salt flakes are a great choice. Avoid using table salt, as it will not provide the same textural and flavor benefits.
Serving & Storage Suggestions
Serve these Salted Caramel Dream Squares chilled or at room temperature. They make a delightful addition to dessert platters, potlucks, or as an afternoon treat.
To store, keep the squares in an airtight container at room temperature for up to 3 days. For longer storage, they can be stored in the refrigerator for up to a week. The caramel may become slightly firmer in the refrigerator, but the squares will still be delicious. You can also freeze the squares for up to 2 months. Thaw them in the refrigerator before serving.
Nutritional Information
Note: Nutritional information is an estimate and may vary based on specific ingredients and portion sizes.
| Nutrient | Amount per Serving | % Daily Value |
|---|---|---|
| Calories | 224 kcal | 11% |
| Total Fat | 6.8g | 10% |
| Saturated Fat | 3.8g | 19% |
| Cholesterol | 16.9mg | 6% |
| Sodium | 143.2mg | 6% |
| Total Carbohydrate | 39.9g | 15% |
| Dietary Fiber | 0.1g | 1% |
| Sugars | 27.7g | – |
| Protein | 3g | 6% |
Variations & Substitutions
- Chocolate Drizzle: Drizzle melted dark chocolate or milk chocolate over the cooled squares for an extra layer of indulgence.
- Nutty Addition: Add chopped pecans, walnuts, or almonds to the cereal mixture for added texture and flavor.
- Espresso Infusion: Stir a teaspoon of instant espresso powder into the melted caramel for a coffee-flavored twist.
- Gluten-Free Option: Use a gluten-free rice cereal to make these squares gluten-free.
- Different Cereal: While rice cereal is the standard, you can experiment with other cereals like corn flakes or Chex cereal for a different texture.
FAQs (Frequently Asked Questions)
Q: Can I use pre-made caramel sauce instead of making my own?
A: While you could, the homemade caramel really elevates this recipe. Pre-made caramel sauces often contain stabilizers and may not have the same rich flavor and texture as the homemade version.
Q: My caramel is too hard after cooling. What did I do wrong?
A: Overcooking the caramel can cause it to become too hard. Be sure to cook it over medium-low heat and remove it from the heat as soon as it’s smooth.
Q: Can I make these ahead of time?
A: Absolutely! These squares are perfect for making ahead of time. They can be stored at room temperature for up to 3 days or in the refrigerator for up to a week.
Q: Can I use salted butter instead of unsalted?
A: While you can, it will intensify the saltiness of the dish. I would suggest cutting back the amount of flaked sea salt you sprinkle on top.
Q: What kind of salt is best to use for the topping?
A: A flaky sea salt such as Maldon sea salt is ideal. The large flakes provide a burst of salty flavor and a pleasant textural contrast to the sweet caramel.
Final Thoughts
So there you have it – Salted Caramel Dream Squares that are simple, satisfying, and guaranteed to impress. They’re the perfect balance of salty and sweet, crunchy and chewy, and will undoubtedly become a new favorite in your household. Give this recipe a try, and don’t be shy with that final sprinkle of sea salt – Grandma’s secret ingredient to happiness. I’d love to hear how your version turns out and what variations you create, so share your photos and feedback! Pair with a cold glass of milk or a hot cup of coffee for the ultimate treat.