
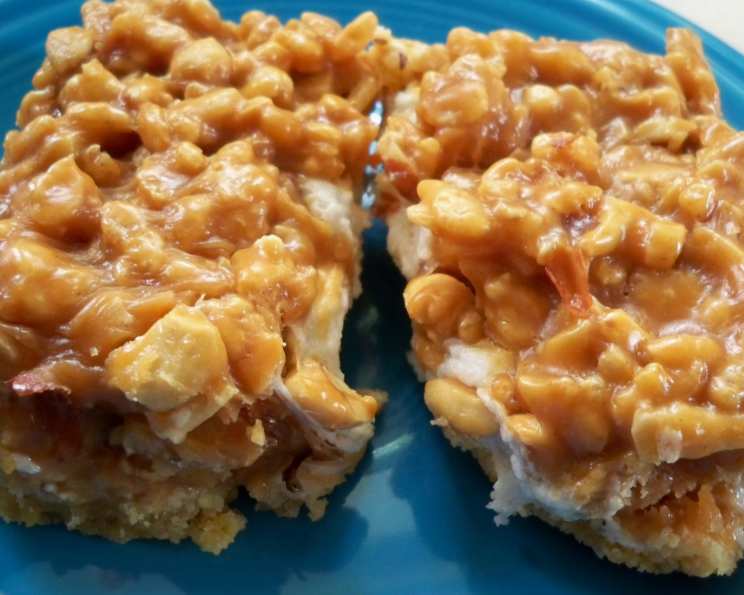
Salted Peanut Chew Bars: A Nostalgic Treat
The smell of warm peanut butter and melting marshmallows instantly transports me back to childhood bake sales. My grandma, a queen of quick and easy desserts, always had a version of these chewy bars ready to be devoured. They were the first thing to disappear from the table, the salty peanuts and sweet topping a perfect balance that kept us coming back for more. Now, I’m excited to share my take on this classic treat – a recipe that’s both comforting and undeniably delicious.
Recipe Overview
- Prep Time: 20 minutes
- Cook Time: 17 minutes
- Total Time: 37 minutes
- Yields: Approximately 36 bars
- Dietary Type: Not specified (contains dairy, eggs)
Ingredients
For the Crust:
- 1 ½ cups flour
- ⅔ cup firmly packed brown sugar
- ½ teaspoon baking powder
- ½ teaspoon salt
- ¼ teaspoon baking soda
- ½ cup margarine or butter, softened
- 1 teaspoon vanilla
- 2 egg yolks
- 3 cups miniature marshmallows
For the Topping:
- ⅔ cup corn syrup
- ¼ cup margarine or butter
- 1 (12 ounce) package peanut butter chips (2 cups)
- 2 – 2 ½ cups crisp rice cereal
- 2 – 2 ½ cups salted peanuts
- 2 teaspoons vanilla extract (optional)
Equipment Needed
- 13×9 inch pan
- Large mixing bowl
- Electric mixer or sturdy spoon
- Measuring cups and spoons
- Large saucepan
- Spatula or wooden spoon
Instructions
-
Preheat your oven to 350°F (175°C). Make sure your oven rack is positioned in the center for even baking.
-
In a large bowl, combine the flour, brown sugar, baking powder, salt, and baking soda.
-
Add the softened margarine or butter and vanilla. Using an electric mixer on low speed (or a sturdy spoon), mix the ingredients until the mixture resembles coarse crumbs. Don’t overmix – you want a crumbly texture.
-
Add the egg yolks to the crumb mixture and mix until just combined. The dough will still be somewhat crumbly, but it should hold together when pressed.
-
Press the dough firmly and evenly into the bottom of an ungreased 13×9-inch pan. Use your fingers or the bottom of a measuring cup to ensure it’s packed tightly.
-
Bake the crust in the preheated oven for 12 to 15 minutes, or until it’s light golden brown. Keep a close eye on it to prevent burning, as ovens can vary.
-
Remove the pan from the oven. Immediately sprinkle the miniature marshmallows evenly over the warm crust.
-
Return the pan to the oven and bake for an additional 1 to 2 minutes, or until the marshmallows just begin to puff up slightly. Watch carefully – you don’t want them to melt completely and spread out.
-
Remove the pan from the oven and let it cool slightly while you prepare the topping.
-
In a large saucepan, combine the corn syrup and margarine or butter. Heat over medium-low heat, stirring constantly, until the margarine or butter is melted.
-
Add the peanut butter chips to the saucepan and continue to heat, stirring constantly, until the chips are completely melted and the mixture is smooth. Be patient and stir frequently to prevent burning.
-
Remove the saucepan from the heat. Stir in the crisp rice cereal and salted peanuts. Add the optional vanilla extract if desired. Mix well until the cereal and peanuts are evenly coated with the peanut butter mixture.
-
Immediately spoon the warm topping mixture over the marshmallows, spreading it evenly to cover the entire surface. Gently press down to help the topping adhere to the marshmallows.
-
Refrigerate the pan until the bars are firm and the topping has set, usually for at least 1 hour, or preferably longer.
-
Once firm, cut the bars into squares or rectangles of your desired size. A warm knife can help with clean cuts.
Expert Tips & Tricks
- Don’t overbake the crust! A slightly underbaked crust is better than a dry, overbaked one.
- For a richer flavor, use brown butter in both the crust and the topping. Simply melt the butter in a saucepan over medium heat and continue cooking until it turns a nutty brown color. Let it cool slightly before using.
- To prevent the marshmallows from sticking to your fingers when pressing them onto the crust, lightly grease your fingertips with cooking spray.
- If the peanut butter chip mixture seems too thick, add a tablespoon or two of milk or cream to thin it out slightly.
- For easier cutting, line the pan with parchment paper before pressing in the crust. This will allow you to lift the entire slab of bars out of the pan for cutting.
Serving & Storage Suggestions
These Salted Peanut Chew Bars are best served chilled or at room temperature. They make a great addition to lunchboxes, bake sales, or as an afternoon treat.
Store leftover bars in an airtight container in the refrigerator for up to a week. You can also freeze them for up to 2 months. To freeze, wrap the bars individually in plastic wrap and then place them in a freezer bag or container. Thaw in the refrigerator before serving.
Nutritional Information
| Nutrient | Amount per Serving | % Daily Value |
|---|---|---|
| Calories | 213 kcal | N/A |
| Calories from Fat | 101 g | 48% |
| Total Fat | 11.3 g | 17% |
| Saturated Fat | 2.6 g | 13% |
| Cholesterol | 9.3 mg | 3% |
| Sodium | 211.6 mg | 8% |
| Total Carbohydrate | 24.3 g | 8% |
| Dietary Fiber | 1.6 g | 6% |
| Sugars | 12.2 g | N/A |
| Protein | 5.6 g | 11% |
Note: Nutritional information is an estimate and may vary depending on specific ingredients and portion sizes.
Variations & Substitutions
- Gluten-Free: Use a gluten-free all-purpose flour blend in the crust. You may need to add a little extra liquid (like milk or water) to help the dough come together.
- Dairy-Free: Substitute the margarine or butter with a vegan butter alternative. Use dairy-free peanut butter chips.
- Nut-Free: Replace the peanut butter chips with chocolate chips and the salted peanuts with sunflower seeds or pepitas.
- Chocolate Peanut Butter: Add 1/4 cup of unsweetened cocoa powder to the crust mixture for a chocolatey twist.
- Spice it Up: Add a pinch of cayenne pepper to the topping mixture for a subtle kick.
FAQs (Frequently Asked Questions)
Q: Can I use a different type of nut?
A: Absolutely! Walnuts, pecans, or almonds would all be delicious substitutes for the peanuts. Just make sure they are salted for the best flavor balance.
Q: My crust is too crumbly. What did I do wrong?
A: Make sure your margarine or butter is properly softened. If the crust is still too crumbly, add a tablespoon of cold water at a time until the dough comes together.
Q: Can I make these ahead of time?
A: Yes! These bars are perfect for making ahead. They can be stored in the refrigerator for several days or frozen for longer storage.
Q: My topping is too thick to spread easily. What should I do?
A: Gently warm the topping over low heat, stirring constantly, until it becomes more fluid. Be careful not to overheat it, or the peanut butter chips may seize up.
Q: Can I use regular marshmallows instead of miniature ones?
A: You can, but miniature marshmallows melt more evenly. If using regular marshmallows, cut them into smaller pieces before sprinkling them over the crust.
Final Thoughts
These Salted Peanut Chew Bars are a guaranteed crowd-pleaser, perfect for any occasion. Their simple ingredients and straightforward instructions make them accessible to bakers of all levels. So, gather your ingredients, preheat your oven, and get ready to create a batch of these irresistible treats. And don’t be shy about sharing your own variations and feedback – I’d love to hear how you make them your own! Maybe a scoop of vanilla ice cream on the side would elevate these bars to a new level!