
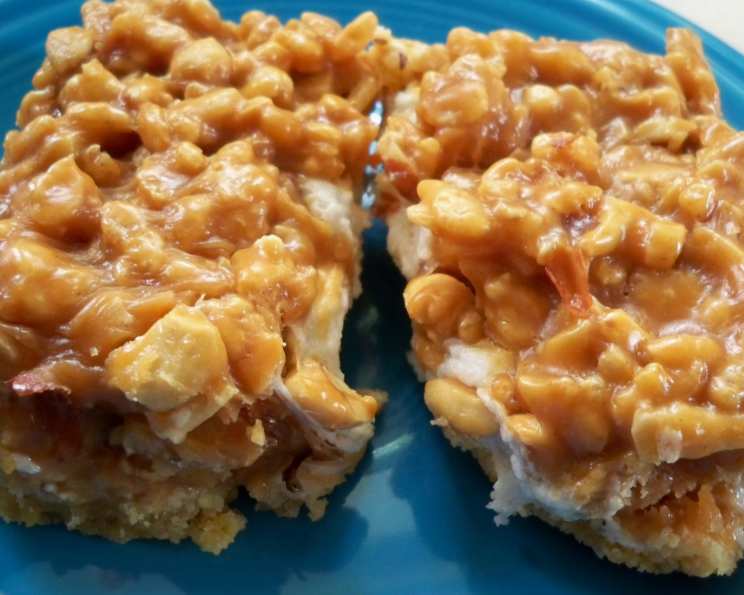
Salted Peanut Chew Bars: A Sweet and Salty Symphony
There’s something about the combination of salty and sweet that just hits the spot, and these Salted Peanut Chew Bars perfectly capture that magic. I remember my grandmother always had a batch of these ready when we visited, her worn hands carefully pressing the crumbly crust into the pan. The smell of melting peanut butter chips and toasted peanuts would fill her kitchen, creating an irresistible aroma that promised pure, unadulterated joy. Biting into one was like a warm hug – comforting, familiar, and utterly delicious.
Recipe Overview
- Prep Time: 20 minutes
- Cook Time: 15-17 minutes
- Total Time: 35-37 minutes + chilling time
- Yields: Approximately 36 bars
- Dietary Type: Not specified, contains dairy and eggs
Ingredients
For the Crust:
- 1 1⁄2 cups flour
- 2⁄3 cup firmly packed brown sugar
- 1⁄2 teaspoon baking powder
- 1⁄2 teaspoon salt
- 1⁄4 teaspoon baking soda
- 1⁄2 cup margarine or 1/2 cup butter, softened
- 1 teaspoon vanilla
- 2 egg yolks
- 3 cups miniature marshmallows
For the Topping:
- 2⁄3 cup corn syrup
- 1⁄4 cup margarine or 1/4 cup butter
- 1 (12 ounce) package peanut butter chips (2 cups)
- 2 – 2 1⁄2 cups crisp rice cereal
- 2 – 2 1⁄2 cups salted peanuts
- 2 teaspoons vanilla extract (optional)
Equipment Needed
- Large mixing bowl
- 13×9-inch baking pan
- Measuring cups and spoons
- Mixer (hand or stand)
- Large saucepan
- Spatula or wooden spoon
Instructions
-
Preheat your oven to 350°F (175°C). Ensure your oven rack is positioned in the center for even baking.
-
Prepare the crust: In a large bowl, combine the flour, brown sugar, baking powder, salt, baking soda, softened margarine or butter, and vanilla.
-
Mix the crust ingredients: Using a mixer at low speed, blend all the crust ingredients until the mixture becomes crumbly. Be careful not to overmix.
-
Press the crust into the pan: Press the crumbly mixture firmly and evenly into the bottom of an ungreased 13×9-inch pan. A flat-bottomed measuring cup or your fingers can help create an even layer.
-
Bake the crust: Bake the crust in the preheated oven for 12 to 15 minutes, or until it turns a light golden brown. Keep a close watch to prevent burning.
-
Add the marshmallows: Remove the pan from the oven and immediately sprinkle the miniature marshmallows evenly over the baked crust.
-
Melt the marshmallows: Return the pan to the oven and bake for an additional 1 to 2 minutes, or just until the marshmallows begin to puff up slightly. Avoid browning them excessively.
-
Cool the base: Remove the pan from the oven and allow the marshmallow-topped crust to cool slightly while you prepare the topping.
-
Prepare the topping: In a large saucepan, combine the corn syrup, margarine or butter, and peanut butter chips.
-
Melt the topping ingredients: Heat the mixture over low heat, stirring constantly, until the peanut butter chips are completely melted and the mixture is smooth. Be patient and stir frequently to prevent scorching.
-
Remove from heat: Once the topping is smooth and melted, remove the saucepan from the heat.
-
Add cereal and peanuts: Stir in the crisp rice cereal and salted peanuts until they are evenly coated with the peanut butter mixture. Add the vanilla extract at this point, if desired.
-
Spread the topping: Immediately spoon the warm topping evenly over the marshmallow layer, spreading it to completely cover the marshmallows.
-
Chill the bars: Refrigerate the pan until the bars are firm, which usually takes about 1 to 2 hours.
-
Cut and serve: Once the bars are firm, cut them into squares or rectangles using a sharp knife. For cleaner cuts, you can warm the knife under hot water and wipe it dry between cuts.
Expert Tips & Tricks
- Softening Butter: For the crust, ensure your butter is properly softened – but not melted! – for optimal mixing. Take it out of the refrigerator about an hour before baking.
- Preventing Scorching: When melting the peanut butter chips, use low heat and stir constantly to prevent them from burning or seizing up.
- Marshmallow Consistency: Don’t overbake the marshmallows! You only want them slightly puffed; otherwise, they can become hard and chewy.
- Topping Consistency: If the topping becomes too thick while you’re working, you can add a tablespoon or two of milk to thin it out slightly.
- Easy Cutting: For clean cuts, use a warm, dry knife. Run the knife under hot water, dry it thoroughly, and then cut the bars. Repeat as needed.
- Evenly Distributed Peanuts: To ensure an even distribution of peanuts in the topping, gently press them into the mixture after spreading it over the marshmallows.
Serving & Storage Suggestions
These Salted Peanut Chew Bars are best served chilled or at room temperature. Cut them into squares and arrange them attractively on a platter. They make a delightful addition to any dessert table or a perfect afternoon treat.
- Storage: Store leftover bars in an airtight container in the refrigerator for up to one week.
- Freezing: For longer storage, you can freeze the bars for up to 2 months. Wrap them individually in plastic wrap and then place them in a freezer-safe container. Thaw them in the refrigerator before serving.
- Reheating: While not typically reheated, you can microwave individual bars for a few seconds if you prefer a slightly softer texture.
Nutritional Information
Here’s an approximate nutritional breakdown per bar (based on a yield of 36 bars):
| Nutrient | Amount per Serving | % Daily Value* |
|---|---|---|
| Calories | 213 kcal | N/A |
| Total Fat | 11.3g | 17% |
| Saturated Fat | 2.6g | 13% |
| Cholesterol | 9.3mg | 3% |
| Sodium | 211.6mg | 8% |
| Total Carbohydrate | 24.3g | 8% |
| Dietary Fiber | 1.6g | 6% |
| Sugars | 12.2g | N/A |
| Protein | 5.6g | 11% |
*Percent Daily Values are based on a 2,000 calorie diet. These values are estimates and may vary based on specific ingredients and portion sizes.
Variations & Substitutions
- Gluten-Free: Use a gluten-free flour blend for the crust to make these bars gluten-free.
- Nut-Free (ish): Replace the peanut butter chips with a different flavor of chips, such as chocolate or butterscotch, and swap the peanuts for sunflower seeds. Please be advised that many chips are produced in facilities that also process nuts.
- Vegan: To make these bars vegan, you’ll need to substitute the butter/margarine with a vegan butter alternative, use an egg substitute (like flax eggs) for the egg yolks, and choose vegan marshmallows and peanut butter chips.
- Different Cereals: Experiment with different types of crisp rice cereal, such as cocoa crispies, for a variation in flavor and texture.
- Extra Crunch: Add chopped pretzels or potato chips to the topping for even more salty crunch.
FAQs (Frequently Asked Questions)
Q: Can I use natural peanut butter instead of peanut butter chips?
A: While you could attempt to use natural peanut butter, the bars’ texture and sweetness will be noticeably different. Natural peanut butter also has more oil and will not melt and solidify as consistently as the peanut butter chips. The recipe’s success hinges on the binding properties of the chips.
Q: My crust is too dry. What did I do wrong?
A: Ensure that your butter or margarine is properly softened before mixing. If the crust still seems dry, add a teaspoon of milk or water at a time until it comes together.
Q: Can I make these ahead of time?
A: Absolutely! These bars are perfect for making ahead. Prepare them a day or two in advance and store them in the refrigerator until you’re ready to serve.
Q: The marshmallows are browning too quickly. What should I do?
A: If the marshmallows start to brown too quickly, cover the pan loosely with aluminum foil during the last minute of baking.
Q: Why are my bars crumbly and not holding together?
A: This can happen if the topping isn’t spread evenly or if the bars aren’t chilled long enough. Make sure the topping covers the marshmallows completely and refrigerate the bars until they are firm.
Final Thoughts
These Salted Peanut Chew Bars are more than just a dessert; they’re a nostalgic trip down memory lane and a testament to the simple pleasures of life. I encourage you to give this recipe a try and experience the delightful combination of sweet and salty for yourself. Don’t be afraid to experiment with variations and make them your own. And please, share your feedback! Knowing others are enjoying these bars as much as my family does would bring me immense joy. These bars pair perfectly with a cold glass of milk or a warm cup of coffee. Enjoy!