
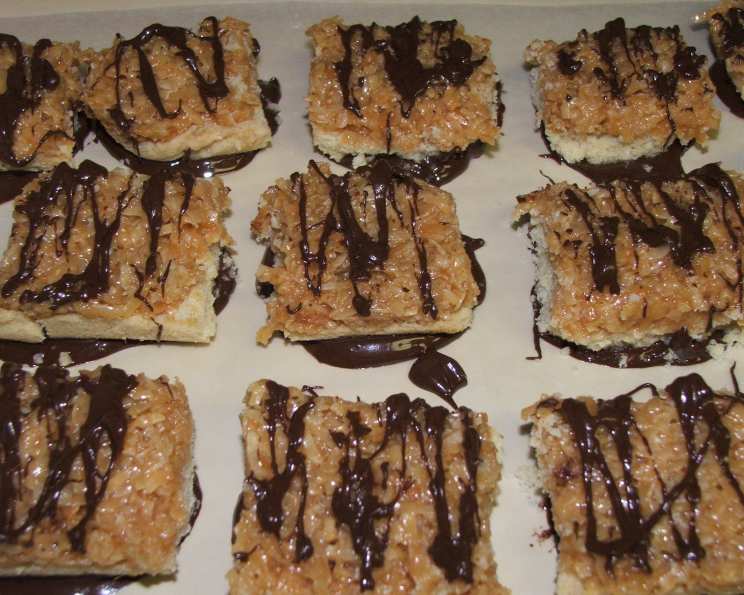
Samoas Bars – Just Like the Girl Scout Cookies!
I remember the sheer thrill of Girl Scout cookie season. Not just for the cookies themselves – though Samoas were always my weakness, the holy grail of coconutty-caramelly goodness – but for the entrepreneurial spirit it fostered. My troop, a whirlwind of braided hair and boundless energy, would set up shop outside the local grocery store, chanting our sales pitch with varying degrees of enthusiasm. I’m pretty sure I ate more cookies than I sold, but every box felt like a badge of honor. These Samoa bars recapture that magic, delivering the same irresistible flavors without the seasonal limitations (or the guilt of eating my entire inventory!).
Recipe Overview
- Prep Time: 2 hours 25 minutes (includes cooling time)
- Cook Time: 20-25 minutes
- Total Time: 2 hours 45-50 minutes
- Yields: 1 9×13 inch pan
- Serves: 30
- Dietary Type: Not specified
Ingredients
Cookie Base
- 1/2 cup sugar
- 3/4 cup (1 1/2 sticks) butter, softened
- 1 large egg
- 1/2 teaspoon vanilla extract
- 2 cups all-purpose flour
- 1/4 teaspoon salt
Topping
- 3 cups shredded coconut, toasted
- 1 (14 ounce) bag caramels
- 1/4 teaspoon salt
- 3 tablespoons milk
Chocolate Coating
- 10 ounces semisweet chocolate (chocolate chips are ok)
Equipment Needed
- 9×13 inch baking pan
- Aluminum foil
- Cooking spray
- Large bowl
- Electric mixer
- Wire rack
- Microwave-safe bowl
- Spatula
- Large knife or pizza cutter
- Wax paper
- Small bowl
Instructions
- Preheat your oven to 350°F (175°C).
- Prepare the baking pan: Line a 9×13-inch baking pan with aluminum foil, leaving some overhang for easy removal. Lightly spray the foil with cooking spray to prevent sticking.
- Make the cookie base: In a large bowl, cream together the sugar and softened butter using an electric mixer until the mixture is light and fluffy. This step is crucial for a tender crust, so don’t rush it.
- Add the wet ingredients: Beat in the egg and vanilla extract until well combined. Scrape down the sides of the bowl to ensure everything is evenly incorporated.
- Incorporate the dry ingredients: Working at a low speed, gradually beat in the flour and salt until the mixture comes together into a crumbly dough, resembling wet sand. Be careful not to overmix the dough, as this can result in a tough crust.
- Press the dough into the pan: Pour the crumbly dough into the prepared pan and press it firmly into an even layer using your fingers or the bottom of a measuring cup. Ensure the dough reaches all the edges of the pan.
- Bake the crust: Bake for 20-25 minutes, or until the base is set and the edges are lightly browned. The baking time may vary slightly depending on your oven, so keep a close eye on it.
- Cool the crust: Remove the pan from the oven and place it on a wire rack to cool completely. It’s important for the crust to be completely cool before adding the topping, as the heat could melt the caramel prematurely.
- Prepare the caramel topping: Unwrap the caramels and place them in a large microwave-safe bowl with the milk and salt.
- Melt the caramel: Microwave on high for 3-4 minutes, stopping to stir every 45 seconds or so to help the caramel melt evenly and prevent scorching. Continue microwaving and stirring until the caramel is smooth and completely melted.
- Fold in the coconut: Once the caramel is smooth, fold in the toasted shredded coconut using a spatula until it is evenly distributed throughout the caramel.
- Spread the topping: Drop dollops of the coconut-caramel topping all over the cooled shortbread base. Using the spatula, spread the topping evenly over the base, making sure to reach all the edges.
- Let the topping set: Allow the topping to set completely until cooled and firm. This will take at least an hour at room temperature, or you can speed up the process by placing the pan in the refrigerator for about 30 minutes.
- Cut the bars: Once the topping is set, use a large knife or a pizza cutter to cut the bars into 30 pieces. A pizza cutter can be particularly helpful for making clean, even cuts.
- Melt the chocolate: In a small bowl, melt the semisweet chocolate in the microwave in 45-second intervals, stirring thoroughly after each interval to prevent scorching. Alternatively, you can melt the chocolate over a double boiler.
- Dip the bars: Dip the base of each bar into the melted chocolate, letting the excess chocolate drip off. Place the chocolate-dipped bars on a clean piece of wax paper.
- Drizzle with chocolate: Use the remaining melted chocolate (or melt a bit of additional chocolate if needed) to drizzle the tops of the bars with chocolate to finish.
- Let the chocolate set: Allow the chocolate to set completely before storing the bars in an airtight container. This will take about 30 minutes at room temperature, or you can speed up the process by placing the bars in the refrigerator for about 15 minutes.
Expert Tips & Tricks
- Toasting the Coconut: Toasting the coconut enhances its flavor and texture. Spread the coconut in a single layer on a baking sheet and bake at 350°F (175°C) for 5-7 minutes, or until golden brown, stirring occasionally to prevent burning. Watch it closely, as it can burn quickly.
- Preventing a Soggy Crust: Make sure the crust is completely cooled before adding the caramel topping. A warm crust can cause the caramel to melt and seep into the base, resulting in a soggy texture.
- Clean Cuts: For clean cuts, use a warm knife or pizza cutter. Run the blade under hot water and dry it before each cut. This will help prevent the topping from sticking to the blade.
- Chocolate Tempering (Optional): For a shiny, snappy chocolate coating, temper the chocolate. This involves heating and cooling the chocolate within specific temperature ranges to stabilize the cocoa butter crystals. This prevents blooming (white streaks) and gives the chocolate a professional finish.
- Salted Caramel Variation: For a salted caramel flavor, sprinkle a pinch of flaky sea salt over the caramel topping before it sets.
Serving & Storage Suggestions
Serve the Samoas bars chilled or at room temperature. They make a delightful addition to any dessert platter and are perfect for sharing with friends and family.
Store leftover bars in an airtight container at room temperature for up to 3 days, or in the refrigerator for up to a week. For longer storage, you can freeze the bars for up to 2 months. Thaw them in the refrigerator overnight before serving.
Nutritional Information
| Nutrient | Amount per Serving | % Daily Value |
|---|---|---|
| Calories | 233.1 kcal | N/A |
| Calories from Fat | 128 g | 55% |
| Total Fat | 14.3 g | 22% |
| Saturated Fat | 9.4 g | 47% |
| Cholesterol | 19.5 mg | 6% |
| Sodium | 141.7 mg | 5% |
| Total Carbohydrate | 27.3 g | 9% |
| Dietary Fiber | 2.2 g | 9% |
| Sugars | 16.1 g | 64% |
| Protein | 3.3 g | 6% |
Variations & Substitutions
- Gluten-Free: Substitute the all-purpose flour in the crust with a gluten-free all-purpose flour blend. Be sure to choose a blend that contains xanthan gum for best results.
- Dairy-Free: Use a dairy-free butter substitute for the butter in the crust. Substitute the milk in the caramel topping with coconut milk or another non-dairy milk alternative. Ensure the chocolate is dairy-free as well.
- Different Chocolate: Experiment with different types of chocolate, such as dark chocolate or milk chocolate, for a unique flavor profile.
- Nutty Variation: Add chopped nuts, such as pecans or almonds, to the coconut-caramel topping for added texture and flavor.
- Espresso Kick: Add a teaspoon of instant espresso powder to the melted chocolate for a mocha-inspired flavor.
FAQs (Frequently Asked Questions)
Q: Can I use pre-toasted coconut?
A: Yes, you can use pre-toasted coconut, but toasting it yourself will provide a fresher, more intense flavor.
Q: What’s the best way to melt the caramels?
A: Microwaving is the fastest and easiest method, but be sure to stir frequently to prevent burning. You can also melt the caramels in a saucepan over low heat, stirring constantly.
Q: Can I make these bars ahead of time?
A: Absolutely! These bars are perfect for making ahead of time. Store them in an airtight container at room temperature or in the refrigerator until ready to serve.
Q: How do I prevent the chocolate from seizing when melting?
A: Avoid getting any water or steam into the chocolate, as this can cause it to seize and become grainy. Use a dry bowl and utensils when melting the chocolate.
Q: My caramel topping is too sticky. What did I do wrong?
A: The caramel may be too sticky if it wasn’t cooked long enough or if the ratio of caramel to milk was off. Be sure to cook the caramel until it is smooth and melted, and use the correct amount of milk as specified in the recipe.
Final Thoughts
These Samoa bars are a delightful homage to a beloved classic, offering a satisfyingly chewy, coconutty, and chocolatey experience that rivals the original. Don’t be intimidated by the multiple steps – each one is simple and yields incredibly rewarding results. Gather your ingredients, preheat your oven, and prepare to embark on a baking adventure that will transport you back to those carefree Girl Scout cookie days (without the door-to-door sales!). I encourage you to give this recipe a try, share your creations, and let me know what you think. Maybe next time, pair them with a cold glass of milk for the ultimate nostalgic treat!