
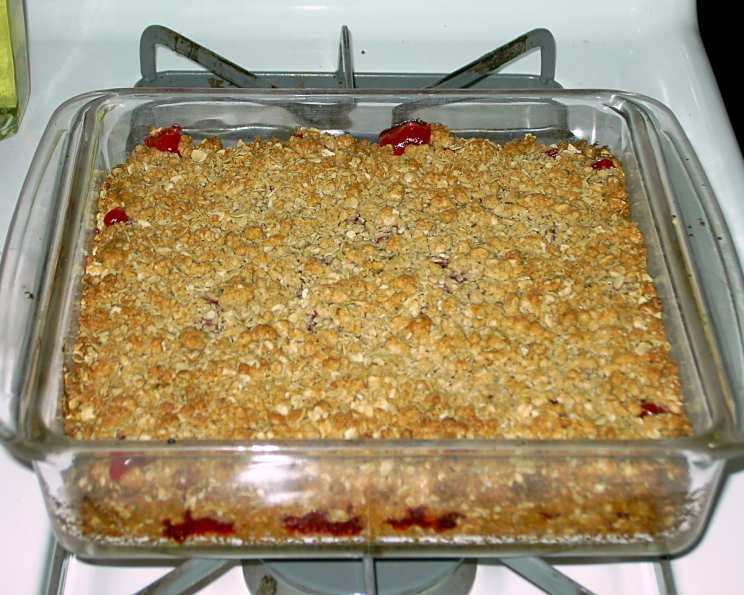
Satisfying Cherry Crunch: A Slice of Nostalgia
My grandmother, bless her heart, wasn’t much for complicated baking. She preferred simple, comforting desserts, and this Cherry Crunch was one of her absolute staples. I can still picture her in her floral apron, humming a jaunty tune as she pressed the buttery oat mixture into her well-worn baking dish. The aroma of warm cherries and cinnamon always filled her kitchen, a scent that instantly transported you to a place of pure happiness and simple pleasures. This recipe isn’t just a dessert; it’s a warm hug from Grandma.
Recipe Overview
- Prep Time: 15 minutes
- Cook Time: 40 minutes
- Total Time: 55 minutes
- Servings: 10
- Yield: 1 nine inch square pan
- Dietary Type: Vegetarian
Ingredients
- 1 cup rolled oats
- 1 cup all-purpose flour
- ¾ cup brown sugar
- ½ teaspoon ground cinnamon
- ½ cup butter, cold and cut into cubes
- 1 (21 ounce) can cherry pie filling
Equipment Needed
- 9 inch square baking dish
- Medium mixing bowl
- Pastry blender or fork
- Oven
Instructions
-
Preheat your oven to 375 degrees F (190 degrees C). Make sure the oven rack is in the center position for even baking.
-
In a medium bowl, combine the rolled oats, all-purpose flour, brown sugar, and cinnamon. Whisk these dry ingredients together until they are evenly distributed. This ensures a consistent flavor throughout the crunchy topping.
-
Add the cold, cubed butter to the dry ingredients. Using a pastry blender or a fork, cut the butter into the mixture. The goal is to create a crumbly texture resembling coarse crumbs. This process works best when the butter is cold; if it gets too warm, the mixture will become greasy. You can also use your fingers, but work quickly to prevent the butter from melting.
-
Sprinkle one half of the crumb mixture into the bottom of a 9-inch square baking dish. Press the crumbs down lightly to form a base. This will prevent the cherry filling from making the bottom of the crunch soggy.
-
Evenly spread the entire can of cherry pie filling over the crumb base. Ensure the filling covers the entire bottom layer, reaching all edges of the pan.
-
Sprinkle the remaining crumb mixture evenly over the cherry pie filling. Make sure to cover the cherries completely for a uniform topping that will bake to a golden brown.
-
Bake in the preheated oven for 40 minutes, or until the topping is golden brown and the cherry filling is bubbling slightly around the edges. Keep an eye on it during the last few minutes to prevent the topping from burning. Ovens can vary, so adjust baking time accordingly.
-
Remove the Cherry Crunch from the oven and let it cool slightly before serving. This allows the filling to set a bit and prevents burning your tongue on the molten cherries.
Expert Tips & Tricks
- Cold Butter is Key: Using cold butter is crucial for achieving the perfect crumbly topping. If the butter is too soft, the mixture will be greasy and the topping won’t have the desired texture. Consider chilling the butter and dry ingredients in the freezer for 15 minutes before starting.
- Spice it Up: Feel free to add a pinch of nutmeg or allspice to the oat mixture for an extra layer of flavor.
- Nutty Crunch: Add ¼ cup of chopped nuts (such as pecans or walnuts) to the oat mixture for added texture and flavor.
- Homemade Pie Filling: If you’re feeling ambitious, you can make your own cherry pie filling from fresh or frozen cherries. This will elevate the dessert to a whole new level. Simply adjust the sugar and thickening agents to your liking.
- Prevent Burning: If the topping starts to brown too quickly, loosely tent the baking dish with aluminum foil during the last 10-15 minutes of baking.
- Gluten-Free Option: Substitute the all-purpose flour with a gluten-free all-purpose blend. Be sure to choose a blend that contains xanthan gum for the best results.
- Vegan Option: Replace the butter with a vegan butter substitute. Many high-quality vegan butters are available these days and work beautifully in this recipe.
- Make Ahead: The crumb mixture can be prepared ahead of time and stored in the refrigerator for up to 2 days. Simply assemble the crunch just before baking.
Serving & Storage Suggestions
Serve the Cherry Crunch warm, either on its own or with a scoop of vanilla ice cream or a dollop of whipped cream. A light dusting of powdered sugar can also add a touch of elegance.
Leftovers can be stored in an airtight container at room temperature for up to 2 days, or in the refrigerator for up to 4 days. To reheat, simply warm individual portions in the microwave or bake in a preheated oven at 350 degrees F (175 degrees C) for 10-15 minutes.
For longer storage, the Cherry Crunch can be frozen for up to 2 months. Wrap individual slices tightly in plastic wrap and then place them in a freezer-safe container. Thaw overnight in the refrigerator before reheating.
Nutritional Information
| Nutrient | Amount per Serving | % Daily Value |
|---|---|---|
| Calories | 289.1 kcal | N/A |
| Calories from Fat | 89 g | 31% |
| Total Fat | 9.9 g | 15% |
| Saturated Fat | 6 g | 29% |
| Cholesterol | 24.4 mg | 8% |
| Sodium | 97.1 mg | 4% |
| Total Carbohydrate | 48 g | 15% |
| Dietary Fiber | 1.6 g | 6% |
| Sugars | 16.1 g | 64% |
| Protein | 2.7 g | 5% |
Note: Nutritional information is an estimate and may vary based on specific ingredients and portion sizes.
Variations & Substitutions
- Berry Medley: Instead of cherry pie filling, use a mixed berry pie filling for a different flavor profile.
- Peach Cobbler Crunch: Substitute peach pie filling for a classic peach cobbler flavor. Add a touch of almond extract to the oat mixture to complement the peach flavor.
- Apple Cinnamon Crunch: Use apple pie filling and increase the amount of cinnamon in the oat mixture. You can also add a pinch of nutmeg or cloves for a warm, comforting flavor.
- Chocolate Cherry Crunch: Mix a tablespoon of unsweetened cocoa powder into the oat mixture for a hint of chocolate.
- Tropical Twist: Use pineapple pie filling and add shredded coconut to the oat mixture.
- Maple Pecan Crunch: Substitute maple syrup for some of the brown sugar and add chopped pecans to the oat mixture.
FAQs (Frequently Asked Questions)
Q: Can I use quick-cooking oats instead of rolled oats?
A: While you can use quick-cooking oats, the texture of the topping will be slightly different. Rolled oats provide a more substantial and chewy texture.
Q: Can I make this in a different size pan?
A: Yes, you can adjust the recipe to fit a different size pan. If using a larger pan, you may need to increase the baking time slightly. If using a smaller pan, reduce the baking time accordingly.
Q: How do I know when the Cherry Crunch is done?
A: The Cherry Crunch is done when the topping is golden brown and the cherry filling is bubbling slightly around the edges.
Q: Can I add nuts to the topping?
A: Absolutely! Adding ¼ cup of chopped nuts (such as pecans or walnuts) to the oat mixture will add texture and flavor.
Q: Can I freeze the Cherry Crunch?
A: Yes, the Cherry Crunch can be frozen for up to 2 months. Wrap individual slices tightly in plastic wrap and then place them in a freezer-safe container. Thaw overnight in the refrigerator before reheating.
Final Thoughts
This Cherry Crunch is more than just a dessert; it’s a comforting reminder of simpler times and cherished memories. It’s incredibly easy to make, wonderfully adaptable to your own tastes, and guaranteed to bring a smile to anyone’s face. So, gather your ingredients, preheat your oven, and let the warm aroma of cherries and cinnamon fill your kitchen. I hope this recipe becomes a staple in your home, just as it has been in mine for generations. Don’t hesitate to experiment with different fillings and spices to create your own signature version. And most importantly, share your creations with loved ones!