
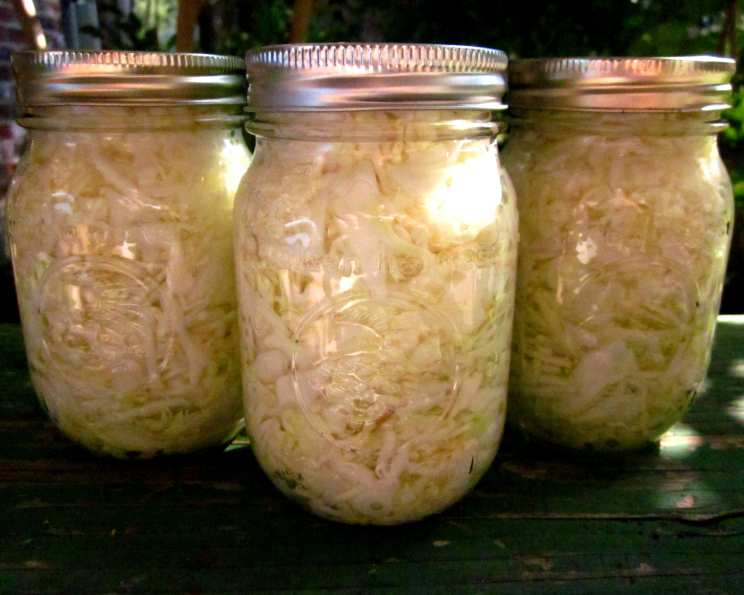
Sauerkraut in a Bottle: A Simple Path to Homemade Goodness
The first time I tasted truly great sauerkraut, it wasn’t in a fancy restaurant, but at a family picnic. My grandfather, a man of few words but immense culinary skill, had pulled out a jar from the depths of his basement. The earthy aroma, a mix of tangy brine and slightly fermented cabbage, filled the air. It wasn’t just the taste – the perfectly sour crunch against a backdrop of grilled bratwurst – but the story it told: of time, patience, and a connection to tradition. Making sauerkraut always felt intimidating, like a task reserved for experts with specialized equipment. But this recipe changed everything.
Recipe Overview
- Prep Time: 30 minutes
- Cook Time: 6 weeks (curing time)
- Total Time: 6 weeks, 30 minutes
- Yields: 1 quart
- Serves: 4
- Dietary Type: Vegan, Gluten-Free, Dairy-Free
Ingredients
- 1 quart shredded cabbage
- 2 teaspoons salt
- 3 teaspoons cider vinegar
- Boiling water
Equipment Needed
- Sterilized quart jars
- Fork
- Tongs
- Standard self-sealing lids (snap lids)
- Jar bands
- Tea towel
Instructions
- Begin by preparing your cabbage. Quarter it, remove the core, and shred it finely. A food processor can expedite this process, but a sharp knife and some elbow grease work just as well.
- Ensure your quart jars are thoroughly sterilized. This is crucial for safe fermentation and preventing unwanted bacterial growth. You can sterilize them by boiling them in water for 10 minutes or by running them through a hot cycle in your dishwasher.
- Now, pack the shredded cabbage tightly into the sterilized quart jars. Use a fork or tongs to tamp the cabbage down firmly, removing any air pockets. Leave approximately 1 inch of headspace at the top of the jar.
- To each jar, add 2 teaspoons of salt and 3 teaspoons of cider vinegar. The salt helps to draw out moisture from the cabbage and inhibits the growth of undesirable bacteria, while the vinegar adds a touch of acidity that contributes to the characteristic tangy flavor of sauerkraut.
- Carefully pour boiling water into each jar, covering the cabbage to within 1/2 inch of the rim. Pour the water slowly, allowing it to seep through the cabbage and work out any remaining air bubbles with a fork.
- Wipe the rims of the jars clean with a damp cloth. Place the standard self-sealing lids (snap lids) on top of the jars, ensuring they are properly centered.
- Apply the jar bands firmly, but not so tightly that you can’t easily remove them later.
- Turn the jars upside down on a tea towel for 24 hours. This helps to create a vacuum seal.
- After 24 hours, check the seals. The lids should be concave and should not flex when pressed. If a lid doesn’t seal, refrigerate that jar and consume it within a few weeks.
- Store the sealed jars in a cool, dark place and let them cure for 6 weeks. This is the key step in developing the characteristic flavor and texture of sauerkraut. The longer it cures, the more intense the flavor will become.
- Note: Approximately 2 heads of cabbage will yield about 6 1/2 quarts of sauerkraut. Plan accordingly if you intend to make a larger batch.
Expert Tips & Tricks
- Massage the cabbage with the salt before packing it into the jars. This helps to break down the cell walls and release more liquid, which is essential for fermentation.
- Use filtered water for the boiling water step to avoid any unwanted flavors or chemicals in your sauerkraut.
- Weigh down the cabbage during the fermentation process by placing a smaller jar filled with water inside the larger jar. This helps to keep the cabbage submerged in the brine, preventing mold growth.
- If you notice any scum or mold forming on the surface of the sauerkraut during fermentation, don’t panic. Simply skim it off with a clean spoon and discard it. The sauerkraut underneath is usually still safe to eat.
- Experiment with different seasonings. Add caraway seeds, juniper berries, or dill seeds to the cabbage before packing it into the jars for a unique flavor twist.
- For an extra layer of flavor, consider adding thinly sliced onions or garlic to the cabbage mixture.
Serving & Storage Suggestions
Sauerkraut is incredibly versatile. Serve it warm as a side dish with sausages, pork chops, or roasted meats. It’s a classic topping for hot dogs and Reuben sandwiches. Add it to soups, stews, and salads for a tangy kick.
Once opened, store the sauerkraut in the refrigerator. It will keep for several weeks. The flavor may continue to develop over time, becoming more sour. Properly sealed jars that have not been opened should be stored in a cool, dark place for up to a year.
Nutritional Information
| Nutrient | Amount per Serving | % Daily Value |
|---|---|---|
| Calories | 18 kcal | 1% |
| Total Fat | 0.1g | 0% |
| Saturated Fat | 0g | 0% |
| Cholesterol | 0mg | 0% |
| Sodium | 1175.5 mg | 48% |
| Total Carbohydrate | 4.1g | 1% |
| Dietary Fiber | 1.8g | 7% |
| Sugars | 2.2g | 9% |
| Protein | 0.9g | 1% |
Variations & Substitutions
- Spice it up: Add a pinch of red pepper flakes or a finely chopped chili pepper to the cabbage mixture for a spicy kick.
- Sweet and sour: Add a tablespoon of brown sugar or maple syrup to the brine for a sweeter sauerkraut.
- Herbaceous: Incorporate fresh herbs like thyme, rosemary, or oregano for an aromatic twist.
- Cabbage Variety: Try using red cabbage instead of green cabbage for a vibrant color and slightly different flavor profile. Napa cabbage also works well.
- Vinegar Variations: While cider vinegar is the classic choice, you can experiment with white vinegar or rice vinegar for subtle flavor differences.
FAQs (Frequently Asked Questions)
Q: Why is it important to sterilize the jars?
A: Sterilizing the jars eliminates harmful bacteria and microorganisms that could spoil the sauerkraut and cause illness.
Q: What happens if the lids don’t seal properly?
A: If the lids don’t seal, the sauerkraut is not shelf-stable and must be stored in the refrigerator and consumed within a few weeks.
Q: Can I use iodized salt instead of non-iodized salt?
A: It’s best to use non-iodized salt for sauerkraut because iodine can inhibit fermentation and affect the flavor.
Q: How do I know when the sauerkraut is ready to eat?
A: The sauerkraut is typically ready to eat after 6 weeks of fermentation, but you can taste it periodically to determine if it has reached your desired level of sourness.
Q: Can I reuse the brine from a previous batch of sauerkraut?
A: It’s not recommended to reuse the brine from a previous batch of sauerkraut, as it may contain undesirable bacteria or mold spores.
Final Thoughts
Embarking on the journey of making sauerkraut in a bottle is more than just following a recipe; it’s about connecting with a culinary tradition, embracing the magic of fermentation, and creating something truly special with your own hands. Don’t be intimidated by the seemingly long curing time – the result is well worth the wait. So gather your cabbage, sterilize your jars, and prepare to experience the satisfaction of crafting homemade sauerkraut that will tantalize your taste buds and impress your friends. Share your creations, experiment with flavors, and let the tangy goodness of this simple yet extraordinary dish brighten your table.