
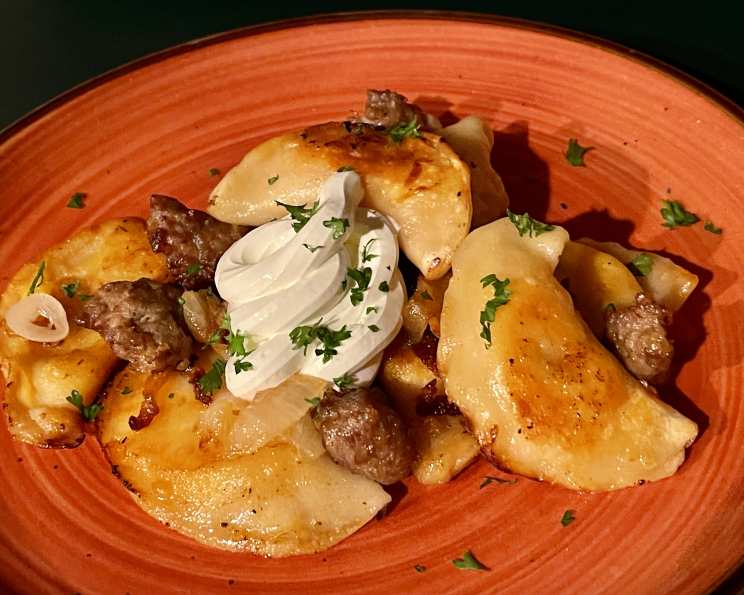
Sauerkraut, Potato and Cheese Pierogi with Onions
My grandmother’s kitchen was a magical place, always smelling of something delicious, but especially on those days when she made pierogi. I remember standing on a stool next to her, mesmerized as she deftly pinched and sealed each one. The anticipation of that first bite, the warm, savory filling bursting in my mouth, is a memory I cherish. This recipe brings back those feelings, recreating the authentic taste of pierogi made with love and simple ingredients, just like Babcia used to make.
Recipe Overview
- Prep Time: 1 hour
- Cook Time: 31 minutes
- Total Time: 1 hour 31 minutes
- Yields: 4 dozen
- Serves: 12
- Dietary Type: Vegetarian
Ingredients
Pierogi Dough
- 3 cups all-purpose flour, plus extra as needed
- 1 teaspoon salt
- 1 large egg
- ¼ cup sour cream
- ¾ cup water
Pierogi Filling
- 1 lb potato (red-skinned, russet, or Yukon Gold potatoes work well)
- 2 tablespoons sour cream
- ¼ teaspoon salt
- 1 cup drained sauerkraut
- 2 cups shredded sharp cheddar cheese
To Serve
- 3 tablespoons butter
- 1 small yellow onion, sliced thinly
Equipment Needed
- Standing mixer (optional, but recommended)
- Mixing bowls
- Saucepan
- Potato masher or fork
- Dinner plate
- Baking sheet
- Rolling pin
- 3-inch biscuit cutter or drinking glass
- Large skillet
- Large pot
Instructions
-
Prepare the dough: In the bowl of a standing mixer (or a regular mixing bowl), whisk together the flour and salt.
-
In a separate bowl, whisk together the egg, sour cream, and water until well combined. Then, pour this mixture over the flour.
-
Stir together the liquids and the flour with a wooden spoon or spatula until a shaggy dough forms.
-
Knead the dough in the mixer on low speed using the dough hook attachment until the dough is very smooth and soft, about 5 minutes. Alternatively, knead by hand against the counter for about 8 minutes. If the dough seems very sticky after a few minutes of kneading, add flour, a tablespoon at a time, until it starts coming together into a smooth ball.
-
Cover the dough and set aside to rest on the counter while you make the filling. Resting allows the gluten to relax, making the dough easier to roll out.
-
Prepare the potatoes: Scrub the potatoes clean, cut them into 1-2″ chunks, and place them in a 2- or 4-quart saucepan. Cover with an inch or two of water and set over high heat.
-
When the water comes to a boil, reduce the heat to medium-low and simmer until the potatoes are tender when pierced with a fork, about 6 to 10 minutes.
-
Transfer the potatoes to a mixing bowl with a slotted spoon. Remove the peels if desired (leaving the peels on adds a rustic flavor and texture).
-
Mash the potatoes into large chunks with a potato masher or a dinner fork.
-
Add the sour cream and salt, and continue mashing until the potatoes are smooth.
-
Add the sauerkraut and cheese, and stir to combine.
-
Taste the filling and add more salt if needed. Remember, the flavor will be diluted slightly by the dough.
-
Shape the filling: Shape the filling into 1″ balls (roughly the diameter of a quarter) and arrange them on a dinner plate. Pre-shaping the filling makes it easier and quicker to shape the pierogi later.
-
Prepare the workspace: Sprinkle a baking sheet generously with flour. Set this near your workspace.
-
Divide the dough: Divide the pierogi dough in half, working with one half at a time and keeping the other half covered to prevent it from drying out.
-
Roll out the dough: Sprinkle your work surface with flour and roll out the pierogi dough to 1/8″ thick. Stop occasionally to lift the dough and make sure it’s not sticking to the work surface; use more flour as needed. If the dough shrinks back as you roll, let it sit for 5 minutes and then roll again. This allows the gluten to relax.
-
Cut the dough: Use a 3″ biscuit cutter or drinking glass to cut the dough into rounds.
-
Gather the scraps: Gather the scraps and set them aside.
-
Shape the pierogi: To shape the pierogi, hold one of the rounds of dough in the palm of your hand and set a ball of filling in the middle. Fold the round in half, pinching it closed at the top and then working your way along the sides to form a half-moon shape. Make sure the edges of the dough are completely sealed to prevent the filling from leaking out during cooking.
-
Place the pierogi: Set the pierogi on the floured baking sheet.
-
Repeat: Continue to shape pierogi with the remaining rounds of dough. Lay them close together on the baking sheet, but don’t let them touch. Roll out the second half of the dough, and cut and shape the pierogi as described.
-
Use the scraps: When finished with the initial dough portions, roll the scrapes and continue to make as many pierogi as you can. You should end up with roughly 4 dozen pierogi.
-
Freeze (optional): At this point, the pierogi can be boiled and served right away or frozen. To freeze, place the sheet pan of pierogi in the freezer and freeze until solid. Transfer the frozen pierogi to a freezer container and freeze for up to three months. Pierogi can be cooked straight from the freezer.
-
Cook the onions: When ready to cook the pierogi, melt the butter in a large skillet over medium heat. Add the onions and cook until the onions are translucent, very soft, and beginning to brown, about 8 to 10 minutes. Push the onions to the edges of the pan where they will stay warm and continue to caramelize.
-
Boil the pierogi: Meanwhile, bring a large pot of water to a boil. Salt generously. Working in batches, add 10 or so pierogi to the boiling water and stir to make sure they don’t stick to the bottom.
-
Cook until floating: Cook the pierogi until all the pierogi have floated to the surface and then 1 to 2 minutes longer to make sure the filling gets hot — about 8 to 10 minutes total.
-
Transfer to skillet: Transfer the pierogi to the pan with the onions. Turn the heat to medium-high.
-
Crisp the pierogi: Cook the pierogi without moving until they are golden and crispy on the bottoms, about 2 to 3 minutes. If you’re cooking more batches, transfer the pierogi to a serving dish.
-
Serve: Once all the pierogi have been boiled and crisped, scrape the onions over the pierogi and gently stir to coat the pierogi with butter and onions. Serve immediately while hot.
-
Cook extra onions (optional): If you are cooking a lot of them, have more onion sliced and ready to brown in butter. Once the original onion has been depleted or gets too browned, start again with the fresh onion.
Expert Tips & Tricks
- Don’t overwork the dough. Over-kneading can make the pierogi tough.
- Make sure the edges are well-sealed to prevent the filling from leaking.
- Don’t overcrowd the pot when boiling. This can lower the water temperature and cause the pierogi to stick together.
- For extra crispy pierogi, add a tablespoon of oil to the butter when frying.
- If you find the dough is too sticky when rolling, try chilling it in the refrigerator for 15-20 minutes.
Serving & Storage Suggestions
Serve the pierogi hot, garnished with extra sour cream, chopped fresh dill, or a dollop of applesauce. Leftovers can be stored in an airtight container in the refrigerator for up to 3 days. To reheat, pan-fry them in a little butter until heated through and crispy. Frozen pierogi can be reheated in the same way, or boiled briefly and then pan-fried. They are best consumed soon after cooking.
Nutritional Information
| Nutrient | Amount per Serving | % Daily Value |
|---|---|---|
| Calories | 267.9 kcal | N/A |
| Calories from Fat | N/A | N/A |
| Total Fat | 11.2 g | 17% |
| Saturated Fat | 6.8 g | 33% |
| Cholesterol | 46.4 mg | 15% |
| Sodium | 477.7 mg | 19% |
| Total Carbohydrate | 32 g | 10% |
| Dietary Fiber | 2.1 g | 8% |
| Sugars | 1.2 g | 4% |
| Protein | 9.6 g | 19% |
Note: These values are estimates based on available data and may vary depending on specific ingredients and portion sizes.
Variations & Substitutions
- Vegan Pierogi: Substitute the egg and sour cream in the dough with plant-based alternatives like applesauce or mashed potatoes for binding and richness. Use vegan sour cream and cheese for the filling.
- Gluten-Free Pierogi: Use a gluten-free flour blend specifically designed for baking, adding a binder like xanthan gum to improve texture.
- Different Fillings: Experiment with other fillings like mushroom and onion, spinach and feta, or even sweet fillings like farmer’s cheese and fruit.
- Regional Variations: In some regions, pierogi are served with crumbled bacon or caramelized onions.
FAQs (Frequently Asked Questions)
Q: Can I make the dough ahead of time?
A: Yes, you can make the dough a day in advance. Wrap it tightly in plastic wrap and store it in the refrigerator. Let it come to room temperature before rolling it out.
Q: Can I use pre-made sauerkraut?
A: Yes, you can use store-bought sauerkraut, but make sure to drain it well to prevent the filling from being too wet.
Q: How do I prevent the pierogi from sticking to the bottom of the pot when boiling?
A: Make sure the water is boiling rapidly and that you stir the pierogi gently as soon as you add them to the pot.
Q: Can I bake the pierogi instead of boiling them?
A: While boiling is traditional, you can bake them for a different texture. Brush with melted butter and bake at 375°F (190°C) for 20-25 minutes, or until golden brown.
Q: What’s the best way to reheat leftover pierogi?
A: Pan-frying in butter is the best way to reheat leftover pierogi, as it restores their crispy texture. You can also microwave them, but they may become a bit soggy.
Final Thoughts
Making pierogi might seem like a labor of love, and it is, but the reward is well worth the effort. The comforting aroma filling your kitchen, the satisfaction of crafting each little dumpling, and the joy of sharing them with loved ones make it an experience to savor. Don’t be afraid to experiment with different fillings and toppings to create your own family tradition. Gather your ingredients, put on some music, and let the pierogi-making begin!