
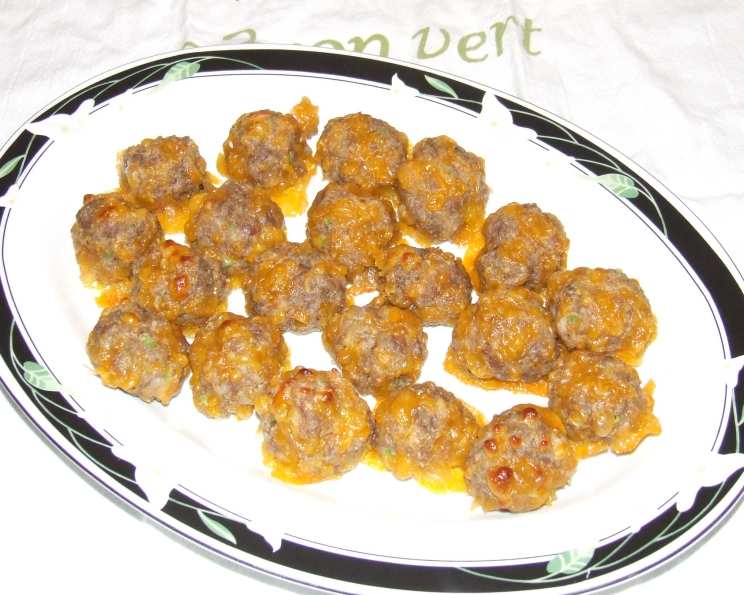
The Ultimate Sausage Cheese Balls: A Crowd-Pleasing Classic
The aroma of sausage and cheddar, baking and swirling through the kitchen, instantly transports me back to countless holiday gatherings. My Aunt Carol was the undisputed queen of appetizers, and her sausage cheese balls were legendary. They were always the first to disappear, leaving a trail of cheesy crumbs and happy smiles in their wake. I can still picture her, apron-clad and beaming, as she pulled tray after tray of these golden-brown delights from the oven, a true testament to their irresistible charm. I’ve taken that memory and used it to develop my own version.
Recipe Overview
- Prep Time: 20 minutes
- Cook Time: 15 minutes
- Total Time: 35 minutes
- Yields: Approximately 6 dozen
- Dietary Type: Not Gluten-Free
Ingredients
- 3 lbs uncooked Jimmy Dean fresh sausage (2 packages)
- 16 ounces sharp cheddar cheese, shredded
- 1 1/2 cups biscuit mix
- 1/2 cup finely chopped celery
- 1/2 cup finely chopped onion
- 1/2 teaspoon garlic powder
Equipment Needed
- Large Mixing Bowl
- Measuring Cups and Spoons
- Baking Sheet
- Parchment Paper (optional)
Instructions
-
Preheat your oven to 375°F (190°C). This is crucial for even cooking and achieving that perfect golden-brown color. Make sure your oven is properly calibrated, as temperature variations can affect the outcome.
-
In a large bowl, combine all the ingredients. This includes the uncooked Jimmy Dean fresh sausage, shredded sharp cheddar cheese, biscuit mix, finely chopped celery, finely chopped onion, and garlic powder. Ensure the cheddar is freshly shredded and not pre-shredded, as it will melt much better and provide a creamier texture.
-
Using your hands (or a sturdy spoon or spatula), mix all the ingredients together thoroughly. The key is to ensure the sausage is evenly distributed throughout the cheese and biscuit mix. Avoid overmixing, as this can make the sausage cheese balls tough. You’re aiming for a cohesive mixture where all the ingredients are well incorporated.
-
Form the mixture into 1-inch balls. This can be done by hand. A small cookie scoop can also ensure consistent sizing. If the mixture is too sticky, lightly dampen your hands with water.
-
Place the formed sausage cheese balls on an ungreased baking sheet. For easier cleanup, you can line the baking sheet with parchment paper. Make sure the balls are spaced evenly to allow for proper air circulation, preventing them from sticking together.
-
Bake for 15 minutes, or until golden brown. Keep a close eye on them during the last few minutes of baking to prevent burning. The internal temperature of the sausage should reach 160°F (71°C) for food safety.
-
Remove from the oven and let cool slightly before serving. This allows the cheese to set and prevents burning your mouth.
Expert Tips & Tricks
- Cheese Choice: While sharp cheddar is classic, feel free to experiment! Try a blend of cheddar and Monterey Jack for a milder flavor or add a touch of pepper jack for a spicy kick.
- Sausage Selection: Jimmy Dean sausage is a classic choice, but you can use other breakfast sausage brands. Opt for a sausage with a good fat content for moisture and flavor. You could even use Italian sausage (mild or hot) for a different flavor profile entirely. Ensure you remove the casings from any sausages that have them before mixing.
- Mix-Ins: Get creative with your mix-ins! Add a pinch of red pepper flakes for heat, some chopped green onions for freshness, or even some cooked and crumbled bacon for extra smokiness.
- Make-Ahead Magic: These sausage cheese balls can be made ahead of time. Assemble them, place them on a baking sheet, cover tightly with plastic wrap, and refrigerate for up to 24 hours. Bake as directed when ready to serve, adding a few extra minutes to the cooking time if necessary. You can also freeze them before baking. Place the unbaked balls on a baking sheet and freeze until solid. Then, transfer them to a freezer bag and store for up to 2 months. Bake directly from frozen, adding 5-10 minutes to the cooking time.
- Biscuit Mix Hack: If you don’t have biscuit mix on hand, you can substitute it with a homemade version. Combine flour, baking powder, salt, and shortening, then cut in the shortening until the mixture resembles coarse crumbs.
- Preventing Flatness: To prevent the sausage cheese balls from flattening out during baking, make sure your baking sheet is cold and use parchment paper.
Serving & Storage Suggestions
Serve these delicious sausage cheese balls warm as an appetizer, snack, or even as part of a brunch spread. They pair perfectly with honey mustard, ranch dressing, or a spicy aioli for dipping.
Leftovers can be stored in an airtight container in the refrigerator for up to 3 days. Reheat them in the oven at 350°F (175°C) for 5-10 minutes, or until heated through. You can also reheat them in the microwave, but they may become slightly softer.
These can be served at room temperature for up to 2 hours. Beyond that, refrigerate them to prevent bacterial growth.
Nutritional Information
| Nutrient | Amount per Serving | % Daily Value* |
|---|---|---|
| Calories | 1166.4 kcal | N/A |
| Calories from Fat | 853 g | 73% |
| Total Fat | 94.9 g | 145% |
| Saturated Fat | 39.3 g | 196% |
| Cholesterol | 211.5 mg | 70% |
| Sodium | 2925.6 mg | 121% |
| Total Carbohydrate | 27.2 g | 9% |
| Dietary Fiber | 1 g | 3% |
| Sugars | 4.7 g | N/A |
| Protein | 48.7 g | 97% |
- Percent Daily Values are based on a 2000 calorie diet. Your daily values may be higher or lower depending on your calorie needs. Servings calculated based on 6 dozen sausage balls.
Variations & Substitutions
- Spicy Sausage Cheese Balls: Use hot sausage instead of mild sausage. Add 1/4 teaspoon of cayenne pepper to the mixture.
- Vegetarian Sausage Cheese Balls: Substitute the sausage with a vegetarian sausage alternative. Be sure to adjust the seasoning accordingly.
- Gluten-Free Sausage Cheese Balls: Substitute the biscuit mix with a gluten-free biscuit mix. Make sure all other ingredients are also gluten-free.
- Dairy-Free Sausage Cheese Balls: Substitute the cheddar cheese with a dairy-free cheddar alternative. Look for a variety that melts well.
- Italian Sausage Cheese Balls: Use Italian sausage (mild or hot) instead of breakfast sausage. Add 1 teaspoon of Italian seasoning to the mixture.
- Mini Sausage Cheese Balls: Form the mixture into smaller, bite-sized balls for a more elegant presentation. Reduce the baking time accordingly.
FAQs (Frequently Asked Questions)
Q: Can I use pre-shredded cheese?
A: While you can use pre-shredded cheese, freshly shredded cheese will melt more smoothly and create a creamier texture in the sausage cheese balls.
Q: Can I freeze these sausage cheese balls?
A: Yes, these are perfect for freezing! Freeze them before baking on a baking sheet, then transfer them to a freezer bag for up to 2 months. Bake directly from frozen, adding a few extra minutes to the cooking time.
Q: What can I use instead of biscuit mix?
A: If you don’t have biscuit mix on hand, you can substitute it with a homemade version or use a combination of flour, baking powder, and salt.
Q: How do I prevent the sausage cheese balls from being dry?
A: Using sausage with a good fat content and avoiding overmixing the ingredients will help prevent the sausage cheese balls from being dry.
Q: Can I add other vegetables to the mixture?
A: Absolutely! Feel free to experiment with other vegetables like chopped bell peppers, mushrooms, or spinach. Just make sure they are finely chopped to ensure even distribution.
Final Thoughts
These sausage cheese balls are more than just an appetizer; they’re a tradition, a memory, and a delicious bite of comfort. Whether you’re hosting a party, need a quick snack, or just want to relive some nostalgic flavors, this recipe is sure to be a winner. Gather your ingredients, preheat your oven, and get ready to create a batch of golden-brown perfection. Don’t be afraid to experiment with different cheeses, spices, and mix-ins to create your own unique twist on this classic recipe. I encourage you to try this recipe and share your experiences with me. Enjoy!