
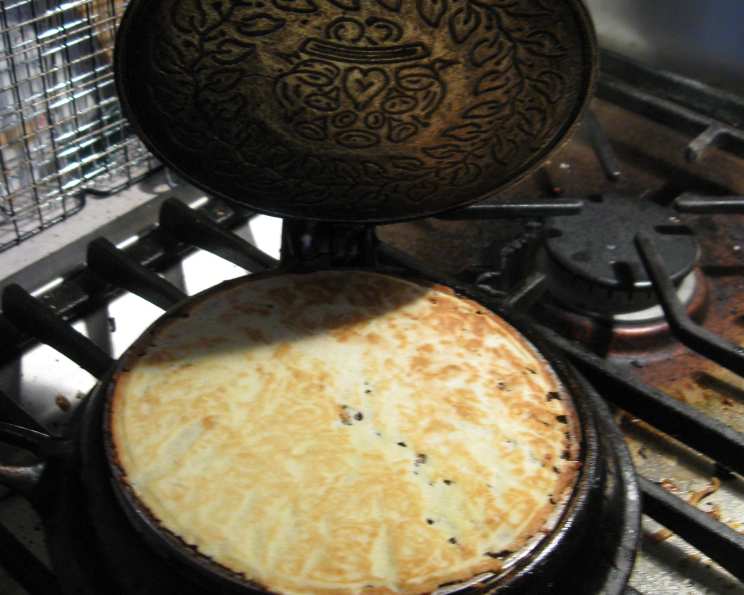
Scandinavian Christmas Crispy Krumkake
The first time I tasted krumkake, I was visiting my grandmother during the holidays. The scent of warm butter and cardamom filled her cozy kitchen, a stark contrast to the snowy landscape outside. She carefully lifted a delicate, golden cone from a special iron, its intricate patterns a testament to years of tradition. The moment that crisp, sweet cookie melted on my tongue, I knew it was more than just a treat; it was a taste of home, of family, and of pure Christmas magic.
Recipe Overview
- Prep Time: 30 minutes
- Cook Time: 20-30 minutes
- Total Time: 50-60 minutes
- Yields: Approximately 2 dozen
- Dietary Type: Not specified (can be adapted for gluten-free or dairy-free)
Ingredients
- 1 cup sugar
- 1/2 cup softened butter
- 2 eggs
- 1 cup milk
- 1 1/2 cups all-purpose flour
- Water, if necessary
- Shortening, oil, or melted butter, for greasing the krumkake iron
Equipment Needed
- Medium bowl
- Krumkake iron (either stovetop or electric)
- Whisk or electric mixer
- Spoon
- Knife or thin spatula
- Cooling rack
- Airtight containers for storage
Instructions
-
In a medium bowl, cream together the sugar and softened butter until light and fluffy. This is a crucial step for incorporating air into the batter, leading to a lighter, crisper cookie.
-
Beat in the eggs, one at a time, until the mixture is light and lemon-colored. This might take a few minutes; ensure each egg is fully incorporated before adding the next.
-
Gradually beat in the milk and flour until the batter is blended and smooth. Be careful not to overmix, as this can develop the gluten in the flour, resulting in a tougher krumkake.
-
Let the batter stand for 30 minutes. This allows the flour to fully hydrate, resulting in a more cohesive and easier-to-work-with batter.
-
Preheat your krumkake iron over medium heat on the stovetop (if using a stovetop iron) until a drop of water sizzles when dropped onto the surface. The temperature is crucial. Too hot, and the krumkake will burn before it cooks through. Too cool, and it won’t crisp up properly. For an electric iron, follow the manufacturer’s instructions for preheating.
-
Open the iron and lightly brush the inside of both the top and bottom plates with shortening, oil, or melted butter. This prevents the krumkake from sticking and ensures easy removal.
-
Spoon 1 tablespoon of batter onto the center of the hot iron. Be careful not to overfill, as the batter will spread when the iron is closed.
-
Close the iron and bake for about 1 minute on each side, or until the krumkake is lightly browned. The exact baking time will depend on the heat of your iron, so keep a close eye on it.
-
Insert the tip of a knife or thin spatula under the edge of the cookie to gently remove it from the iron. Work quickly, as the krumkake needs to be pliable for shaping.
-
Immediately roll the hot cookie into a cigar or cone shape. Krumkake cones can be made by wrapping the cookie around a cone-shaped mold, or simply rolling it by hand. Work quickly because the cookies harden fast. If it is too hot to handle, use gloves or kitchen towel for protection.
-
Place the shaped krumkake on a cooling rack to cool completely. As they cool, they will crisp up.
-
Repeat with the remaining batter.
-
As you use the batter, it will thicken. Add water a tablespoon at a time as necessary to thin it to the consistency of thick cream. This will ensure that each krumkake is thin and delicate.
-
Store the baked cookies in airtight containers to maintain their crispness.
Expert Tips & Tricks
- Invest in a good krumkake iron: A quality iron will heat evenly and create beautiful, consistent cookies.
- Don’t overfill the iron: Too much batter will result in a thick, misshapen krumkake.
- Work quickly: The krumkake needs to be shaped while it’s still hot and pliable.
- If the krumkake is too brittle to roll, it may be overbaked. Try reducing the baking time slightly.
- For extra flavor, add a pinch of cardamom or a teaspoon of vanilla extract to the batter.
- Practice makes perfect! Don’t be discouraged if your first few krumkake aren’t perfect. With a little practice, you’ll be a krumkake pro in no time.
- Use a digital thermometer to help you gauge the heat of your stovetop iron for more consistent results.
Serving & Storage Suggestions
Krumkake are traditionally served during the Christmas season as part of a Scandinavian dessert platter. They are often enjoyed with coffee or tea. They can also be filled with whipped cream, lingonberry jam, or other sweet fillings.
Store krumkake in an airtight container at room temperature. They will stay crisp for several days. You can also freeze them for several months. To thaw, simply remove them from the freezer and let them come to room temperature. Be careful not to stack them too high in storage, as they are quite delicate and can easily break.
Nutritional Information
| Nutrient | Amount per Serving (estimated) | % Daily Value (estimated) |
|---|---|---|
| Calories | 100 kcal | 5% |
| Total Fat | 5g | 8% |
| Saturated Fat | 3g | 15% |
| Cholesterol | 25mg | 8% |
| Sodium | 20mg | 1% |
| Total Carbohydrate | 12g | 4% |
| Dietary Fiber | 0g | 0% |
| Sugars | 7g | N/A |
| Protein | 1g | 2% |
Note: Nutritional information is an estimate and may vary depending on specific ingredients and portion sizes.
Variations & Substitutions
- Gluten-Free Krumkake: Substitute the all-purpose flour with a gluten-free all-purpose flour blend. You may need to experiment with the amount of liquid to achieve the correct batter consistency.
- Dairy-Free Krumkake: Replace the butter with a dairy-free butter alternative and the milk with a plant-based milk such as almond milk or oat milk.
- Spiced Krumkake: Add 1/2 teaspoon of ground cardamom, cinnamon, or nutmeg to the batter for a warm, festive flavor.
- Lemon Krumkake: Add 1 teaspoon of lemon zest to the batter for a bright, citrusy flavor.
- Chocolate Krumkake: Add 2 tablespoons of unsweetened cocoa powder to the batter for a chocolatey twist.
FAQs (Frequently Asked Questions)
Q: Why is my krumkake not crisping up?
A: The iron may not be hot enough, or the batter may be too thick. Ensure the iron is properly preheated and add a tablespoon of water at a time to thin the batter to a thick cream consistency.
Q: My krumkake is sticking to the iron, what should I do?
A: Make sure you are greasing the iron thoroughly before each batch. Also, ensure the iron is hot enough, as this helps to prevent sticking.
Q: Can I make the batter ahead of time?
A: Yes, you can prepare the batter a few hours in advance and store it in the refrigerator. However, it is best to use it within the same day. You may need to add a little water to thin it out if it thickens while chilling.
Q: How do I clean my krumkake iron?
A: Allow the iron to cool completely, then wipe it clean with a dry cloth. Avoid immersing it in water, as this can damage the electrical components or cause rust.
Q: What can I use if I don’t have a krumkake iron?
A: While a krumkake iron is essential for the traditional shape and texture, you could try using a pizzelle iron as a substitute, though the results will differ.
Final Thoughts
Now that you’re armed with this detailed guide, I encourage you to embark on your own krumkake adventure! The process may seem a bit daunting at first, but the reward of creating these delicate, crispy treats is well worth the effort. Imagine the smiles on your loved ones’ faces as they savor each bite, a taste of tradition and warmth that embodies the spirit of the season. So, gather your ingredients, preheat your iron, and let the magic of krumkake fill your kitchen with the aroma of Christmas. And don’t be shy – share your creations and experiences! Let’s keep this beloved tradition alive for generations to come. Perhaps pair your krumkake with a warm cup of gløgg for the ultimate Scandinavian Christmas experience. Happy baking!