
Recreating a Classic: The Schlotzsky’s “Original” Sandwich at Home
My earliest memories of Schlotzsky’s are intertwined with family road trips. The aroma of those warm, slightly tangy rolls, piled high with meats and cheese, filled the car, a welcome reward after hours on the road. Each bite was a perfect balance of savory, salty, and tangy flavors, a symphony of textures that etched itself into my culinary memory. Recreating this iconic sandwich at home is a nostalgic journey, a chance to relive those cherished moments and share them with a new generation.
Recipe Overview: The “Original” Sandwich
- Prep Time: 30 minutes
- Cook Time: 20 minutes
- Total Time: 50 minutes
- Servings: 5 sandwiches
- Yield: 5 rolls + sandwich assembly
- Dietary Type: Not specified (contains meat, dairy, and gluten)
Ingredients
For the Schlotzsky’s Sandwich Rolls:
- 1/2 cup warm water
- 1 tablespoon sugar
- 1 package fast-rising active dry yeast
- 6 ounces warm milk
- 1/2 teaspoon salt
- 1/4 teaspoon baking soda, softened in 1 tablespoon water
- 2 1/2 cups flour
For the Large Original Sandwich (Per Sandwich):
- 1/2 ounce garlic Caesar salad dressing
- 1/2 ounce Parmesan cheese, grated
- 2 1/2 ounces Cheddar cheese, shredded
- 2 1/2 ounces Mozzarella cheese, shredded
- 2 ounces honey cured ham slices
- 1 ounce cotto salami, slices
- 1 ounce genoa salami, slices
- 1 1/2 ounces marinated olives, sliced
- 1/2 ounce yellow mustard
- Shredded lettuce, as needed
- Tomatoes, slices
- White onion, slices
Equipment Needed
- Large mixing bowl
- Wire whisk
- 5 oven-proof soup bowls (5″ diameter) or 5 greased cans (1-1/2 lb Dinty Moore Stew size)
- Pam cooking spray
- Cornmeal
- Saran wrap
- Baking sheet
- Cooling rack
- Lightly buttered hot griddle or broiler
Instructions
-
Activate the Yeast: In a large mixing bowl, combine the warm water, sugar, and yeast. Let stand for about 5 minutes, or until very bubbly. This indicates that the yeast is active and ready to leaven the dough.
-
Combine Wet and Dry Ingredients: Using a wire whisk, add the warm milk, salt, and baking soda mixture to the yeast mixture. Gradually add only 1 cup of the flour, beating until a smooth dough forms.
-
Incorporate Remaining Flour: Beat in the rest of the flour until the batter is thick, sticky, and smooth, ensuring all the flour is dissolved. The dough should be relatively wet but hold its shape somewhat.
-
Prepare Baking Containers: Divide the dough evenly between 5 oven-proof soup bowls (5″ in diameter) that have been sprayed with Pam and dusted with cornmeal (shake out any excess). Alternatively, for a more authentic shape, divide the batter equally between 5 greased cans (from 1-1/2 lb Dinty Moore Stew), ensuring the insides are also dusted with cornmeal.
-
First Rise: Cover each bowl or can with a square of Saran wrap that has been sprayed with Pam (Pam side down). Let the dough rise for almost an hour, or until it reaches above the rim of the bowls or cans. The rising time may vary depending on the ambient temperature; a warm environment will accelerate the process.
-
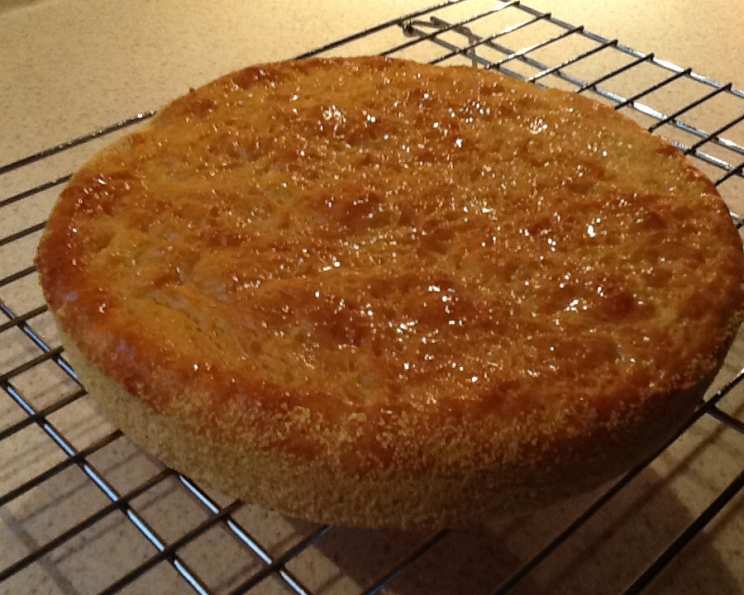
Bake the Rolls: Preheat the oven to 375°F (190°C). Discard the Saran wrap pieces. Bake the rolls on the center rack of the preheated oven for about 20 minutes, or until golden brown. The internal temperature of the rolls should reach around 200°F (93°C).
-
Cool the Rolls: Let the rolls cool in their containers on a cooling rack, spraying the tops with a bit of Pam while they cool to keep the crusts soft. This helps prevent the crust from becoming too hard and ensures a pleasant texture.
-
Prepare for Sandwich Assembly: Once the rolls have cooled enough to handle, slice them in half horizontally.
-
Toast the Rolls: Grill the sliced rolls on a lightly buttered hot griddle (as you would for a grilled cheese sandwich) or broiler toast them until golden. This step adds a delightful crispness and warmth to the sandwich.
-
Dress the Bottom Bun: Spread garlic Caesar dressing over both sides of the bun. Sprinkle Parmesan cheese and Cheddar cheese on the bottom bun.
-
Dress the Top Bun: Spread yellow mustard and Mozzarella cheese on the top bun.
-
Toast to Melt the Cheese: Toast the dressed buns under a broiler or on a griddle until the cheese is melted and bubbly. Watch carefully to prevent burning.
-
Heat the Meats: Gently heat the honey cured ham slices, cotto salami, and genoa salami. You can do this in a skillet, microwave, or broiler.
-
Assemble the Sandwich: Place the heated meats on the bottom bun, with the ham on the bottom and the salamis on top.
-
Add Toppings: Build the sandwich with marinated olives, tomato slices, shredded lettuce, and white onion slices.
-
Serve Immediately: Serve the “Original” sandwich warm and enjoy!
Expert Tips & Tricks
- Yeast Activation: Make sure your water is warm, not hot, to avoid killing the yeast. A temperature of 105-115°F (40-46°C) is ideal.
- Dough Consistency: The dough is meant to be sticky. Avoid adding too much flour, as this will result in a dry, dense roll.
- Cornmeal Substitution: If you don’t have cornmeal, you can use semolina flour for dusting the baking containers.
- Cheese Meltdown: For optimal cheese melting, preheat your broiler and keep a close watch to prevent burning.
- Make-Ahead Tip: The rolls can be baked ahead of time and stored in an airtight container at room temperature for up to 2 days or frozen for longer storage. Reheat before slicing and assembling.
Serving & Storage Suggestions
Serve the “Original” sandwich immediately while the rolls are warm and the cheese is melted. It pairs perfectly with a side of chips, a pickle, or a crisp green salad.
Leftovers can be stored in an airtight container in the refrigerator for up to 2 days. The sandwich is best enjoyed fresh, as the lettuce and tomatoes may become soggy over time. To reheat, remove the lettuce and tomatoes and microwave the sandwich for a short time, or toast it in a toaster oven until warmed through.
Nutritional Information
| Nutrient | Amount per Serving | % Daily Value (Estimated) |
|---|---|---|
| Calories | 2222.6 kcal | N/A |
| Total Fat | 81.2 g | 125% |
| Saturated Fat | 38.4 g | 192% |
| Cholesterol | 230.3 mg | 76% |
| Sodium | 4649 mg | 193% |
| Total Carbohydrate | 272.2 g | 90% |
| Dietary Fiber | 12.6 g | 50% |
| Sugars | 15.3 g | 61% |
| Protein | 96.2 g | 192% |
Note: Nutritional information is an estimate and can vary based on specific ingredients and serving sizes.
Variations & Substitutions
- Vegetarian Option: Substitute the meats with marinated portobello mushrooms or grilled vegetables.
- Spicier Kick: Add a drizzle of hot sauce or some sliced jalapeños to the sandwich.
- Cheese Variations: Experiment with different cheeses, such as provolone, pepper jack, or Swiss.
- Roll Alternative: If you can’t make the rolls from scratch, try using ciabatta rolls or French bread as a substitute.
- Dressing Swap: If you don’t have garlic Caesar dressing, a creamy Italian dressing can be used as a close substitute.
FAQs (Frequently Asked Questions)
Q: Can I use regular active dry yeast instead of fast-rising yeast?
A: Yes, but you’ll need to increase the rising time. Let the dough rise for a longer period, about 1.5-2 hours, or until doubled in size.
Q: The dough is too sticky. What should I do?
A: Resist the urge to add too much flour. A sticky dough results in a softer roll. Lightly flour your hands when handling the dough.
Q: Can I make the rolls ahead of time and freeze them?
A: Absolutely! Wrap the cooled rolls tightly in plastic wrap and then in foil. They can be frozen for up to 2 months. Thaw them completely before slicing and grilling.
Q: What can I use if I don’t have soup bowls or stew cans?
A: You can use ramekins or even muffin tins, but be sure to adjust the baking time accordingly.
Q: My cheese isn’t melting properly. What am I doing wrong?
A: Make sure your broiler is preheated and that you’re keeping a close eye on the buns. Move the rack closer to the broiler if needed, but watch carefully to avoid burning.
Final Thoughts
Recreating the Schlotzsky’s “Original” sandwich at home is more than just making a sandwich; it’s about capturing a memory, a feeling, a taste of nostalgia. While it requires a few steps, the resulting symphony of flavors and textures is well worth the effort. I encourage you to try this recipe, experiment with your own variations, and share the joy with your loved ones. Don’t hesitate to adjust the ingredients to your liking, and most importantly, enjoy the process of bringing this classic sandwich to your own kitchen. Perhaps pair it with a crisp lemonade or an ice-cold beer for the full experience!