
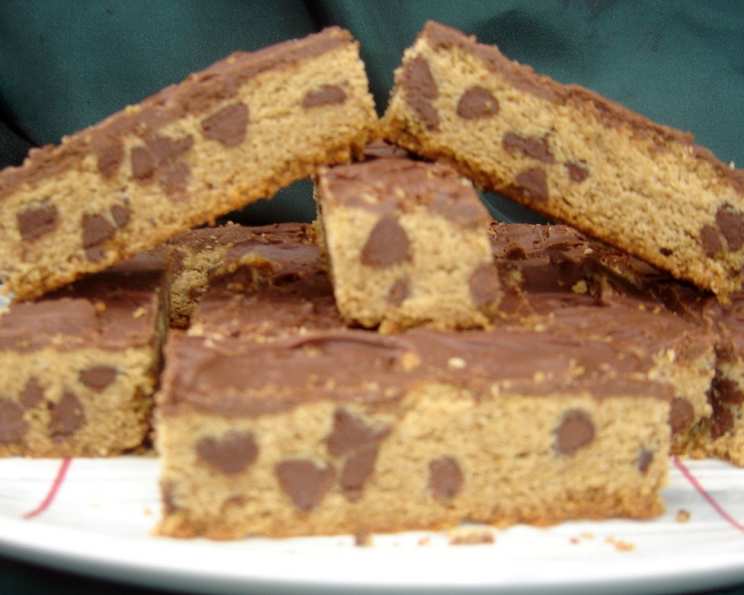
School Cafeteria Peanut Butter Bars: A Nostalgic Treat
The aroma of freshly baked peanut butter still pulls me back to Mrs. Nelson’s sixth-grade classroom. Every Friday, the scent would drift from the cafeteria, a siren song promising a sweet reward for surviving another week of fractions and spelling tests. Those simple, flat peanut butter bars, slightly crumbly and intensely peanut-buttery, were pure gold in a world of mystery meat and questionable vegetables. I remember trading my milk carton for an extra corner piece, savoring every single bite, dreaming of the day I could recreate that magic at home.
Recipe Overview
- Prep Time: 10 minutes
- Cook Time: 15-18 minutes
- Total Time: 25-28 minutes
- Yields: 1 batch of bars
- Dietary Type: Vegetarian
Ingredients
- 2 cups flour
- 1 teaspoon baking soda
- 1/4 teaspoon salt
- 1 cup (2 sticks) butter, softened
- 3/4 cup peanut butter (such as Jif or Skippy, smooth or chunky, NOT reduced fat, “natural peanut butter”)
- 1/2 cup granulated sugar
- 1/2 cup packed dark brown sugar
- 1 teaspoon vanilla extract
- 1 egg
- 2 cups semi-sweet chocolate chips (optional)
- 1 cup milk chocolate chips (optional)
Equipment Needed
- 13x9x2 inch baking pan
- Large mixing bowl
- Electric mixer (handheld or stand mixer)
- Measuring cups and spoons
- Rubber spatula
- Cooling rack
Instructions
-
Preheat your oven to 375°F (190°C). Ensure the oven rack is positioned in the center for even baking.
-
In a medium bowl, whisk together the dry ingredients: flour, baking soda, and salt. Set this aside. This ensures that the baking soda and salt are evenly distributed throughout the flour, which is crucial for the bars’ texture and rise.
-
In a large mixing bowl, cream together the softened butter, peanut butter, granulated sugar, brown sugar, and vanilla extract. Use an electric mixer on medium speed until the mixture is light and fluffy. This process incorporates air into the mixture, creating a tender final product. Ensure the butter is properly softened, but not melted, for best results.
-
Beat in the egg, mixing until just combined. Avoid overmixing at this stage, as it can lead to a tougher bar.
-
Gradually add the flour mixture to the wet ingredients, beating on low speed until just combined. Be careful not to overmix; a few streaks of flour are okay. Overmixing develops gluten, resulting in a dense, less tender bar.
-
Now comes the optional, but highly recommended, step: gently fold in the 2 cups of semi-sweet chocolate chips into the batter. This adds a delightful chocolatey contrast to the peanut butter flavor. If you are feeling especially decadent, you can use chopped peanut butter cups instead!
-
Spread the batter evenly into the prepared 13x9x2 inch baking pan. A slightly damp spatula can help to smooth the surface.
-
Bake in the preheated oven for 15 to 18 minutes. The bars are done when the edges are golden brown and the center is set. A toothpick inserted into the center should come out with a few moist crumbs attached, but no wet batter. Ovens vary, so start checking for doneness at 15 minutes.
-
Remove the pan from the oven. If desired, sprinkle the 1 cup of milk chocolate chips evenly over the surface of the hot bars. The heat from the bars will melt the chocolate chips slightly. Let them sit for a minute or two, then use a spatula to spread the melted chocolate into a smooth, even layer. This creates a rich, glossy topping that takes these bars to the next level.
-
Let the bars cool completely in the pan on a wire rack. This allows them to firm up and makes them easier to cut.
-
Once cooled, cut the bars into squares or rectangles. The size is up to you – think cafeteria-style portions!
-
Enjoy your nostalgic trip down memory lane!
Expert Tips & Tricks
- Use Room Temperature Ingredients: Ensure your butter and egg are at room temperature for optimal creaming and emulsification. This results in a smoother, more evenly textured batter.
- Don’t Overbake: Overbaking is the enemy of moist, chewy peanut butter bars. Keep a close eye on them during the last few minutes of baking.
- Pressing Chocolate Chips: If you’re adding chocolate chips, press them gently into the batter before baking to prevent them from falling off when the bars are cut.
- Chill the Dough: For a slightly denser, chewier bar, chill the dough for 30 minutes before baking. This also helps prevent the bars from spreading too much in the oven.
- Line the Pan: For easy removal, line the baking pan with parchment paper, leaving an overhang on the sides. This creates “handles” that you can use to lift the entire batch of bars out of the pan.
Serving & Storage Suggestions
These peanut butter bars are best enjoyed at room temperature. They’re perfect as an afternoon snack, a lunchbox treat, or a simple dessert. Serve them with a glass of cold milk or a scoop of vanilla ice cream for an extra indulgent experience.
To store, place the cooled bars in an airtight container. They will keep at room temperature for up to 3 days, in the refrigerator for up to a week, or in the freezer for up to 2 months. If freezing, wrap the bars individually in plastic wrap to prevent freezer burn. To thaw, simply leave them at room temperature for a few hours.
Nutritional Information
(Estimated per serving, assuming 24 bars per batch and using both chocolate chip options)
| Nutrient | Amount per Serving | % Daily Value |
|---|---|---|
| Calories | 290 kcal | 15% |
| Total Fat | 15g | 23% |
| Saturated Fat | 9g | 45% |
| Cholesterol | 20mg | 7% |
| Sodium | 150mg | 6% |
| Total Carbohydrate | 35g | 12% |
| Dietary Fiber | 1g | 4% |
| Sugars | 20g | N/A |
| Protein | 4g | 8% |
Variations & Substitutions
- Gluten-Free: Substitute the all-purpose flour with a gluten-free blend for a gluten-free version. Be sure to add 1/2 teaspoon of xanthan gum to help bind the ingredients.
- Dairy-Free: Use a dairy-free butter substitute.
- Nut-Free: Use sunflower seed butter (SunButter) instead of peanut butter for a nut-free option.
- Peanut Butter Swirl: Before baking, swirl a spoonful of peanut butter across the top of the batter for a marbled effect.
- Add-ins: Experiment with different add-ins like chopped nuts, pretzels, or dried fruit.
FAQs (Frequently Asked Questions)
Q: Can I use natural peanut butter for this recipe?
A: It’s not recommended. Natural peanut butter tends to separate and can make the bars dry and crumbly.
Q: Can I reduce the sugar in this recipe?
A: While you can slightly reduce the sugar, it will affect the texture and sweetness of the bars. Start with a small reduction and adjust to your preference.
Q: My bars are too crumbly. What did I do wrong?
A: Overbaking is a common culprit. Also, using too much flour or not enough fat can lead to crumbly bars.
Q: Can I double this recipe?
A: Yes, you can easily double this recipe. Simply double all the ingredients and use a larger baking pan (e.g., a 15×10 inch pan).
Q: How do I prevent the chocolate chips from sinking to the bottom?
A: Gently toss the chocolate chips with a tablespoon of flour before adding them to the batter. This helps them stay suspended during baking.
Final Thoughts
These School Cafeteria Peanut Butter Bars are more than just a recipe; they’re a taste of nostalgia, a reminder of simpler times and cherished memories. Whether you’re craving a sweet treat or looking to recreate a childhood favorite, I encourage you to try this recipe. It’s a simple, satisfying bake that’s sure to bring a smile to your face. Don’t be afraid to experiment with variations and make it your own. And most importantly, share these bars with friends and family – because good food is always better when enjoyed together. Happy baking!