
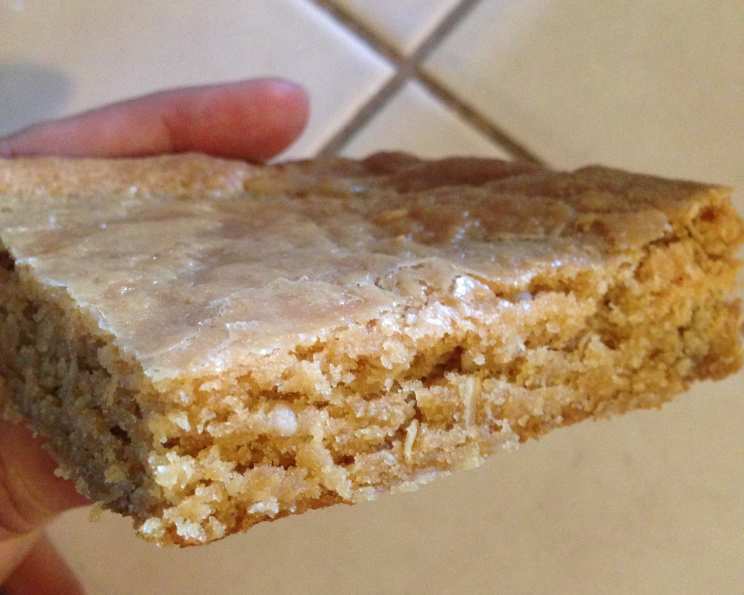
School Days Peanut Butter Chews: A Nostalgic Treat
The scent of peanut butter and warm sugar can instantly transport me back to Mrs. Davis’s fourth-grade classroom. Every Friday, a few lucky students would bring in homemade treats, and those were the days when suddenly everyone wanted to be your friend. Buttery, peanutty, and just a little bit chewy, these peanut butter bars were the gold standard – and even then, I knew they were something special. These simple bars, so humble in their appearance, held within them a magic that only a childhood craving can truly understand.
Recipe Overview
- Prep Time: 15 minutes
- Cook Time: 25-30 minutes
- Total Time: 40-45 minutes
- Yields: 32 bars
- Dietary Type: Not specified (contains gluten, dairy, and eggs)
Ingredients
- 1 cup butter or 1 cup shortening, plus
- 2 tablespoons butter or 2 tablespoons shortening, plus
- 2 teaspoons butter or 2 teaspoons shortening
- 2 cups granulated sugar
- 1 cup brown sugar
- 1 cup peanut butter
- 4 eggs
- 2 teaspoons vanilla
- 2 1/2 cups all-purpose flour
- 2 teaspoons baking powder
- 1 teaspoon salt
- 1 cup rolled oats
GLAZE
- 3 tablespoons powdered sugar
- 1 1/2 teaspoons peanut butter
- 4 1/2 teaspoons very hot water
Equipment Needed
- Large mixing bowl
- Electric mixer (optional, but recommended)
- Measuring cups and spoons
- Sifter or fine-mesh sieve
- 12-by-18-inch cookie pan with sides
- Rubber spatula or wooden spoon
- Oven
- Wire cooling rack
Instructions
-
Preheat your oven to 350 degrees Fahrenheit (175 degrees Celsius). Grease a 12-by-18-inch cookie pan with sides generously. This is crucial to prevent the bars from sticking and ensure easy removal after baking. Use the 2 tablespoons and 2 teaspoons of butter/shortening for this step. I suggest using butter for greasing, as it lends a richer flavor.
-
In a large mixing bowl, combine the 1 cup of butter (or shortening), granulated sugar, brown sugar, and peanut butter. If using butter, ensure it’s softened to room temperature for easier creaming.
-
Using an electric mixer (or a sturdy spoon and some elbow grease!), mix the ingredients together until they are light and fluffy. This is called creaming. Properly creaming the butter and sugar incorporates air, which contributes to the chewy texture of the bars. Don’t rush this step; aim for a pale and airy mixture.
-
Add the eggs, one at a time, to the creamed mixture, mixing well after each addition. Make sure each egg is fully incorporated before adding the next to ensure a smooth batter.
-
Stir in the vanilla. Vanilla extract enhances the other flavors in the bars, so don’t skip it! A high-quality vanilla will make a difference.
-
In a separate bowl, sift together the all-purpose flour, baking powder, and salt. Sifting ensures that there are no lumps in your flour and that the baking powder is evenly distributed, leading to a more consistent rise. If you don’t have a sifter, a fine-mesh sieve works just as well.
-
Add the rolled oats to the dry ingredients and mix well to combine. The oats provide a wonderful textural contrast to the chewiness of the bars.
-
Gradually add the dry ingredients to the creamed mixture, mixing until just well blended. Be careful not to overmix, as this can develop the gluten in the flour and result in tough bars. Mix until the flour disappears.
-
Spread the batter evenly into the prepared 12-by-18-inch cookie pan. Use a spatula to ensure the batter is spread to all corners of the pan for even baking.
-
Bake in the preheated oven for 25 to 30 minutes. The bars are done when the edges are golden brown and a toothpick inserted into the center comes out with a few moist crumbs. Be careful not to over-bake, as this will result in dry, crumbly bars.
-
While the bars are baking, prepare the glaze. In a small bowl, combine the powdered sugar and peanut butter.
-
Gradually add the very hot water, mixing until a smooth glaze forms. Add the water a little at a time to achieve the desired consistency. The glaze should be thin enough to spread easily but thick enough to coat the bars.
-
Once the Peanut Butter Chews are out of the oven, let them cool for a few minutes (5-10 minutes) before spreading the glaze evenly over the warm bars. Glazing the bars while they are still warm allows the glaze to melt slightly and adhere better.
-
Cut the bars into squares while they are still warm. This will prevent the glaze from cracking and make for cleaner cuts.
-
Allow the Peanut Butter Chews to cool completely on a wire rack before serving.
Expert Tips & Tricks
- For extra peanut butter flavor: Use a natural-style peanut butter (the kind you need to stir) in both the bars and the glaze. The oil separation adds richness.
- Prevent sticking: Line the baking pan with parchment paper, leaving an overhang on the sides for easy removal.
- Chewy texture secret: Don’t overbake! Err on the side of slightly underbaked for maximum chewiness.
- Make-ahead tip: The bars can be baked and stored at room temperature for a couple of days. Glaze them just before serving.
- Even bars: Use an offset spatula to get the batter as even as possible in the pan. This promotes uniform baking.
Serving & Storage Suggestions
Serve these School Days Peanut Butter Chews slightly warm or at room temperature. They are perfect with a glass of cold milk or a cup of coffee.
Store leftover bars in an airtight container at room temperature for up to 3 days. For longer storage, keep them in the refrigerator for up to a week. You can also freeze them for up to 2 months. Thaw in the refrigerator before serving. To prevent sticking during storage, you can place a sheet of parchment paper between layers of bars.
Nutritional Information
| Nutrient | Amount per Serving | % Daily Value |
|---|---|---|
| Calories | 215.1 kcal | N/A |
| Calories from Fat | N/A | 79% |
| Total Fat | 8.8 g | 13% |
| Saturated Fat | 1.9 g | 9% |
| Cholesterol | 23.2 mg | 7% |
| Sodium | 189.2 mg | 7% |
| Total Carbohydrate | 31 g | 10% |
| Dietary Fiber | 1 g | 4% |
| Sugars | 20.8 g | 83% |
| Protein | 4.3 g | 8% |
Note: Nutritional information is an estimate and can vary based on specific ingredients and portion sizes.
Variations & Substitutions
- Gluten-Free: Substitute the all-purpose flour with a gluten-free all-purpose blend. Be sure to use a blend that contains xanthan gum for binding.
- Dairy-Free: Use a plant-based butter substitute, such as coconut oil or vegan butter sticks.
- Nut-Free: Replace the peanut butter with sunflower seed butter (sunbutter) for a similar flavor profile.
- Chocolate Chips: Add 1 cup of chocolate chips to the batter for a chocolate peanut butter twist.
- Sprinkles: Add sprinkles to the glaze for extra fun and color.
FAQs (Frequently Asked Questions)
Q: Can I use chunky peanut butter?
A: While you can use chunky peanut butter, the texture of the bars will be different. Smooth peanut butter will result in a more uniform and chewy consistency.
Q: Can I reduce the amount of sugar?
A: Reducing the sugar significantly will affect the texture of the bars. However, you can try reducing it by a 1/4 cup for both granulated and brown sugar.
Q: What if I don’t have a 12×18 inch pan?
A: You can use a smaller pan, but the bars will be thicker and may require a longer baking time. Keep a close eye on them to prevent overbaking.
Q: My bars are too crumbly. What did I do wrong?
A: Overbaking is the most common cause of crumbly bars. Also, ensure you’re measuring the flour accurately; too much flour can also lead to a crumbly texture.
Q: Can I make these ahead of time?
A: Absolutely! These bars are great for making ahead of time. Bake them, let them cool completely, and store them in an airtight container at room temperature for up to 3 days. Glaze them just before serving.
Final Thoughts
These School Days Peanut Butter Chews are more than just a recipe; they are a portal to a simpler time, filled with laughter, friendships, and the pure joy of a homemade treat. I encourage you to bake a batch and share them with your loved ones. Whether you are reliving childhood memories or creating new ones, these bars are sure to bring a smile to everyone’s face. Let me know in the comments how they turned out! And why not pair them with a scoop of vanilla ice cream for an extra-special treat?