
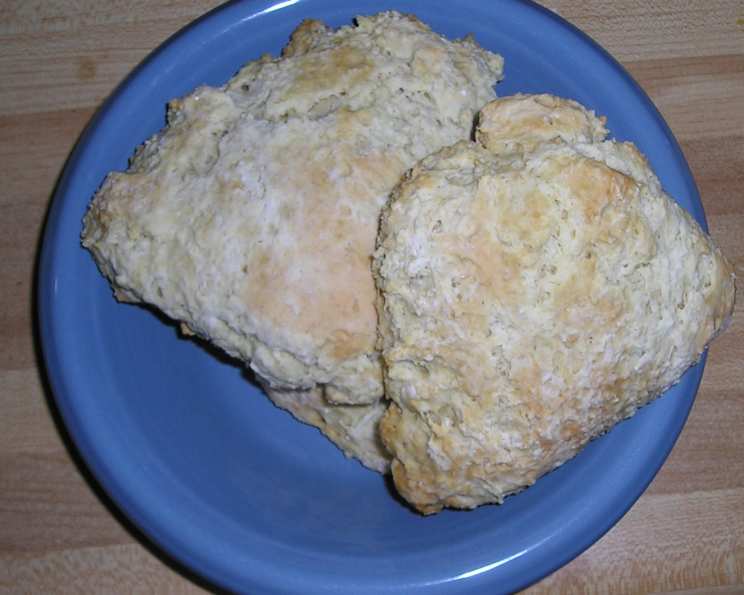
The Comfort of Home: Baking Scottish Bran Scones
The memory is etched in my mind: the scent of warm baking drifting through my grandmother’s stone cottage in the Highlands. Rain pattered softly against the windowpanes as I perched on a stool, watching her nimble hands work magic with flour and butter. The resulting treat was always a plate of freshly baked scones, the simplest kind – slightly sweet, wholesome, and utterly comforting. She always served them with a generous slab of butter, the taste of which remains an unmatched culinary treasure for me. Those were the days before artisan bakeries were ubiquitous. The taste of a truly good scone was rare and wonderful. I want to bring that same joy into my own kitchen, and now I can share that with you.
Recipe Overview
- Prep Time: 10 minutes
- Cook Time: 30-35 minutes
- Total Time: 40-45 minutes
- Yields: 1 round
- Serves: 4
- Dietary Type: Vegetarian
Ingredients
- 8 ounces self-raising flour
- 1 teaspoon baking powder
- 1 tablespoon caster sugar
- 2 tablespoons natural bran
- ¼ teaspoon salt
- 1 ½ ounces butter
- 7 fluid ounces milk
Equipment Needed
- Large mixing bowl
- Fork
- Baking sheet
Instructions
-
Preheat your oven to 170 degrees Celsius (338 degrees Fahrenheit). Make sure your oven rack is positioned in the center.
-
In a large mixing bowl, sieve together the self-raising flour, baking powder, caster sugar, natural bran, and salt. This ensures that the dry ingredients are evenly distributed, which is crucial for a consistent rise and texture in your scones.
-
Add the butter to the bowl with the dry ingredients. Using a fork, mix the butter into the flour mixture until it resembles breadcrumbs. The mixture should be light and airy, with no large chunks of butter remaining. The key here is to work quickly so that the butter doesn’t melt.
-
Gradually add the milk to the mixture, using only as much as required to form a very soft dough. Be careful not to overmix, as this can result in tough scones. The dough should be slightly sticky but still hold its shape. Aim for a consistency that is soft and pliable.
-
Lightly flour a clean surface and gently turn the dough out onto it. Shape the dough into a thick round, about 1-1.5 inches in height.
-
Using a sharp knife, score the round into quarters. This will not only make it easier to separate the scones after baking but also create visually appealing wedges.
-
Dust the top of the scone round with a little extra flour. This will help to create a golden-brown crust.
-
Place the scone round on a baking sheet and bake in the preheated oven for 30 to 35 minutes, or until golden brown and cooked through. To check for doneness, insert a toothpick into the center of the scone. If it comes out clean, the scone is ready.
-
Remove the scone from the oven and allow it to cool slightly on the baking sheet before separating the quarters.
Expert Tips & Tricks
- Cold Butter is Key: Using cold butter straight from the fridge is essential for creating flaky scones. The cold butter will create pockets of steam during baking, resulting in a lighter and more tender crumb.
- Don’t Overmix: Overmixing the dough develops the gluten in the flour, leading to tough scones. Mix just until the ingredients are combined.
- Handle with Care: Gently handle the dough when shaping it. Avoid pressing down too hard, as this can flatten the scones and prevent them from rising properly.
- Baking Sheet Matters: Line your baking sheet with parchment paper to prevent the scones from sticking and to ensure even baking.
- Egg Wash (Optional): For an extra golden and glossy crust, brush the top of the scone with a beaten egg before baking.
Serving & Storage Suggestions
Serve these Scottish Bran Scones warm, ideally straight from the oven, with a generous dollop of butter, clotted cream, or your favorite jam. They are also delicious with a cup of tea or coffee.
Leftover scones can be stored in an airtight container at room temperature for up to 2 days. For longer storage, wrap them individually in plastic wrap and freeze them for up to 2 months. To reheat frozen scones, thaw them at room temperature and then warm them in a low oven or microwave until heated through.
Nutritional Information
Here’s an approximate nutritional breakdown per serving (one quarter of the round):
| Nutrient | Amount per Serving | % Daily Value |
|---|---|---|
| Calories | 342.8 kcal | N/A |
| Calories from Fat | N/A | N/A |
| Total Fat | 11.2 g | 17% |
| Saturated Fat | 6.8 g | 33% |
| Cholesterol | 30.3 mg | 10% |
| Sodium | 340.7 mg | 14% |
| Total Carbohydrate | 52.1 g | 17% |
| Dietary Fiber | 1.8 g | 7% |
| Sugars | 3.4 g | N/A |
| Protein | 8.1 g | 16% |
Note: Nutritional information is an estimate and may vary based on specific ingredients and portion sizes.
Variations & Substitutions
- Raisin Bran Scones: Add a handful of raisins to the dough for a touch of sweetness and texture.
- Whole Wheat Bran Scones: Replace half of the self-raising flour with whole wheat flour for a nuttier flavor.
- Vegan Bran Scones: Substitute the butter with a vegan butter alternative and use plant-based milk (such as almond, soy, or oat milk) instead of dairy milk.
- Spiced Bran Scones: Add a pinch of cinnamon, nutmeg, or ginger to the dry ingredients for a warm and comforting flavor.
- Citrus Bran Scones: Add the zest of an orange or lemon to the dough for a bright and refreshing twist.
FAQs (Frequently Asked Questions)
Q: Can I use all-purpose flour instead of self-raising flour?
A: Yes, but you’ll need to add baking powder. Use 8 ounces of all-purpose flour and increase the baking powder to 2 teaspoons.
Q: Can I make these scones ahead of time?
A: Yes, you can prepare the dough ahead of time and store it in the refrigerator for up to 24 hours. Just be sure to wrap it tightly to prevent it from drying out.
Q: Why are my scones not rising properly?
A: This could be due to several factors, such as using old baking powder, overmixing the dough, or not having the oven hot enough. Make sure your ingredients are fresh and follow the recipe instructions carefully.
Q: Can I freeze the baked scones?
A: Yes, you can freeze baked scones for up to 2 months. Wrap them individually in plastic wrap and then place them in a freezer bag. Thaw at room temperature before reheating.
Q: How do I prevent the scones from becoming dry?
A: Avoid overbaking the scones, and be sure to store them in an airtight container. You can also brush the top of the scones with melted butter or milk after baking to help keep them moist.
Final Thoughts
These Scottish Bran Scones are more than just a recipe; they are a connection to the past, a taste of home, and a simple pleasure to be shared with loved ones. I encourage you to try baking them and experience the comforting aroma and delicious flavor for yourself. Feel free to experiment with variations and make them your own. And please, share your creations and feedback – I’d love to hear how they turn out for you. Perhaps serve them alongside a steaming bowl of Cullen Skink for a truly authentic Scottish experience!