
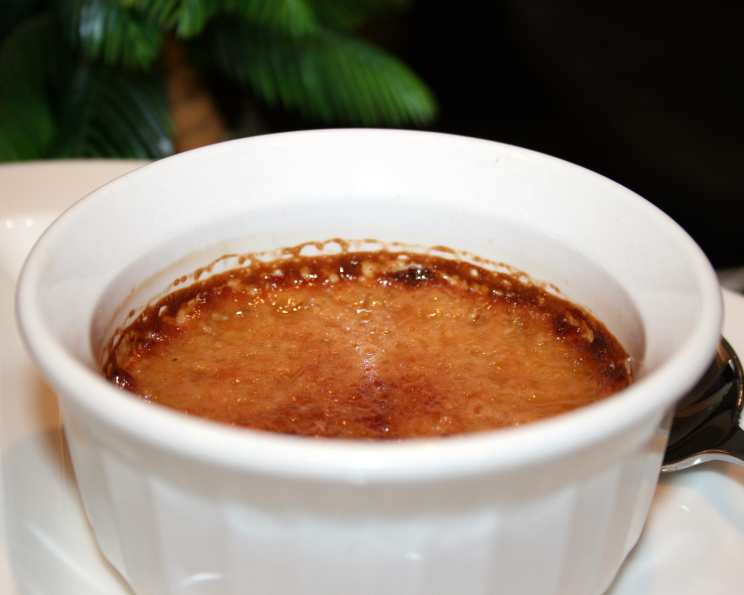
Scott’s Original Burnt Cream: A Culinary Journey
The first time I tasted Scott’s Burnt Cream, it was a revelation. The rich, velvety custard, perfectly balanced between sweet and creamy, was then crowned with a brittle, smoky sugar crust. It was at a small family gathering, and the tension of the day melted away with each spoonful of that decadent treat. I remember thinking, “This is comfort in a dish,” and I knew I had to recreate it. It became a personal quest, a delicious experiment in capturing that pure, unadulterated joy.
Recipe Overview
- Prep Time: 15 minutes
- Cook Time: 45 minutes
- Total Time: 1 hour
- Servings: 6
- Yield: 6 servings
- Dietary Type: Not Gluten-Free
Ingredients
- 2 cups heavy cream
- 4 egg yolks
- 1/2 cup granulated sugar
- 1 tablespoon vanilla
Sugar Topping
- 4 tablespoons granulated sugar
- 1 teaspoon brown sugar
Equipment Needed
- Saucepan
- Whisk
- Mixing bowl
- 6 six-ounce custard cups or creme brulee dishes
- Baking dish
- Broiler
Instructions
-
Begin by preheating your oven to 350 degrees Fahrenheit (175 degrees Celsius). This ensures that the custard bakes evenly.
-
In a saucepan, gently heat the heavy cream over low heat. You want it to become hot, but not boil. Watch carefully for tiny bubbles forming around the edge of the pan – this is your signal to remove it from the heat. Scalding the cream is the goal; boiling it is not.
-
While the cream is heating, prepare the egg yolk mixture. In a mixing bowl, combine the egg yolks and granulated sugar. Use a whisk to beat them together vigorously until the mixture becomes noticeably thicker and paler in color, approximately 3 minutes. This incorporates air, which will contribute to the light and creamy texture of the final product.
-
The next step is crucial for a smooth custard. Gradually and slowly pour the hot heavy cream into the egg yolk and sugar mixture, whisking constantly as you pour. This process is called tempering and prevents the eggs from scrambling due to the heat. Once all the cream has been incorporated, stir in the vanilla. The vanilla not only enhances the flavor but also adds a lovely aroma.
-
Carefully pour the custard mixture into six individual six-ounce custard cups or creme brulee dishes. Ensure each dish is filled evenly.
-
Now, create a water bath, also known as a bain-marie. Place the filled custard cups into a baking dish. Pour about 1/2 cup of water into the bottom of the baking dish. The water should reach about halfway up the sides of the custard cups. This gentle, moist heat helps the custard cook evenly and prevents it from cracking.
-
Place the baking dish with the custard cups and water bath into the preheated oven. Bake until the custards are set, but still have a slight jiggle in the center, about 45 minutes. Don’t overbake them; they will continue to set as they cool.
-
Once baked, carefully remove the custard cups from the water bath. Allow them to cool slightly at room temperature before transferring them to the refrigerator. Refrigerate for at least 2 hours, or preferably overnight, until thoroughly chilled. This allows the custard to fully set and develop its rich flavor.
-
Just before serving, prepare the sugar topping. In a small bowl, stir together the granulated sugar and brown sugar. The brown sugar adds a subtle caramel note to the topping.
-
Remove the chilled custard cups from the refrigerator. Sprinkle about 2 teaspoons of the sugar blend evenly over the surface of each custard. Ensure the entire surface is covered for even browning.
-
Now for the “burnt” part! Place the sugared custards on the top rack under the broiler. Watch them very closely, as the sugar can burn quickly. Broil until the sugar topping is melted and a medium brown color, about 1-3 minutes. The timing will vary depending on the strength of your broiler, so keep a watchful eye. A kitchen torch can also be used if you don’t have a broiler.
-
Immediately remove the burnt cream from the broiler and allow it to chill again briefly before serving. This allows the sugar crust to harden and become brittle.
Expert Tips & Tricks
- Tempering is Key: Pay close attention when tempering the eggs with the hot cream. Pour the cream in a slow, steady stream while whisking vigorously to prevent the eggs from curdling.
- Don’t Overbake: Overbaking will result in a rubbery custard. Look for a slight jiggle in the center when they’re done. They will continue to set as they cool.
- Chill Thoroughly: Chilling the custards for at least 2 hours, or preferably overnight, is crucial for the best flavor and texture.
- Broiler Vigilance: The broiler is a powerful tool, but it requires constant attention. Don’t walk away while the sugar is browning, as it can go from perfectly caramelized to burnt in seconds.
- Even Sugar Distribution: Ensure an even layer of sugar on top of the custard for consistent browning under the broiler.
Serving & Storage Suggestions
Scott’s Burnt Cream is best served chilled, with the contrast of the cold custard and the brittle, warm sugar crust. The presentation is key! Serve immediately after broiling for the best textural experience.
Leftover custards should be stored in the refrigerator, covered, for up to 2 days. The sugar crust may soften over time, but the flavor will remain delicious. It is not recommended to freeze this dessert, as freezing will alter the texture of the custard.
Nutritional Information
| Nutrient | Amount per Serving | % Daily Value |
|---|---|---|
| Calories | 412 kcal | 21% |
| Total Fat | 32.1g | 49% |
| Saturated Fat | 19.2g | 96% |
| Cholesterol | 234.6mg | 78% |
| Sodium | 35.5mg | 1% |
| Total Carbohydrate | 28.7g | 9% |
| Dietary Fiber | 0g | 0% |
| Sugars | 26.2g | 104% |
| Protein | 3.2g | 6% |
Variations & Substitutions
- Infused Cream: For a subtle flavor variation, infuse the heavy cream with citrus zest (lemon, orange, or lime) or spices (cinnamon, cardamom, or star anise) while heating it.
- Coffee Infusion: Add coffee beans to the cream to make a coffee infused Burnt Cream.
- Sweetener Alternatives: While granulated sugar provides the classic flavor, you could experiment with other sweeteners like maple sugar or coconut sugar, though this will affect the color and flavor of the burnt topping.
- Dairy-Free: Sadly there are not many good options to make this desert dairy free. The heavy cream is a major player in the taste and texture of the recipe.
FAQs (Frequently Asked Questions)
Q: Why is it important to use a water bath?
A: The water bath helps to regulate the temperature around the custard cups, ensuring gentle and even cooking. This prevents the custard from curdling or cracking and results in a silky smooth texture.
Q: Can I use a kitchen torch instead of a broiler?
A: Absolutely! A kitchen torch is an excellent alternative for creating the burnt sugar topping. It gives you more control over the browning process and can result in a more evenly caramelized crust.
Q: What if my sugar topping burns too quickly under the broiler?
A: If the sugar is browning too fast, move the custard cups further away from the broiler or reduce the broiler’s heat setting. Watch it carefully and remove it as soon as the sugar reaches a medium brown color.
Q: Can I make this dessert ahead of time?
A: Yes, you can prepare the custards up to 2 days in advance. Store them in the refrigerator, covered, and add the sugar topping and broil just before serving.
Q: Why did my custard curdle?
A: Curdling can happen if the eggs are cooked too quickly or at too high a temperature. Make sure to temper the eggs properly and use a water bath to regulate the cooking temperature.
Final Thoughts
Scott’s Original Burnt Cream is more than just a dessert; it’s an experience. The rich, creamy custard, perfectly balanced with the brittle, caramelized sugar crust, is a symphony of textures and flavors that will delight your senses. Don’t be intimidated by the seemingly complex steps – with a little patience and attention to detail, you can easily recreate this decadent treat in your own kitchen. So, gather your ingredients, preheat your oven, and embark on this delicious culinary journey. Share your creation with friends and family, and prepare to be showered with compliments. I encourage you to experiment with different flavor infusions to make this recipe your own. Cheers to creating unforgettable memories, one spoonful of burnt cream at a time!