
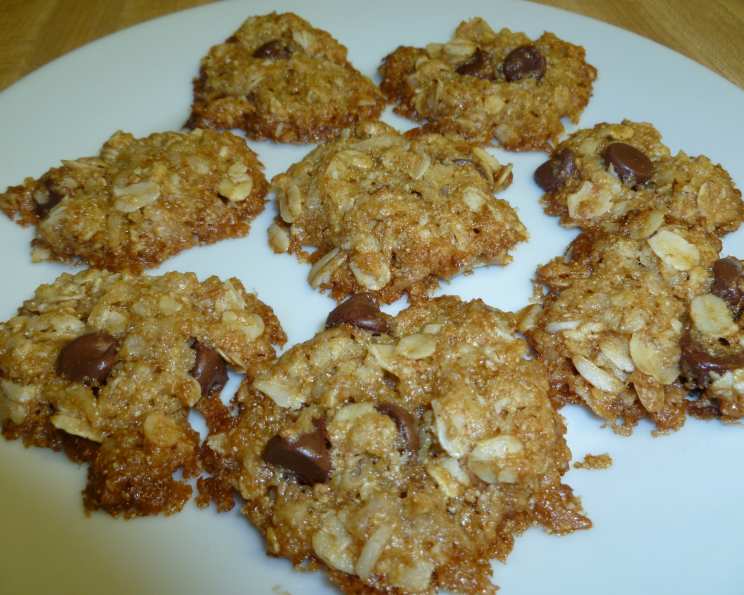
Scratch Me Back Cookies: A Taste of Home
The aroma of baking cookies has always transported me back to my grandmother’s kitchen. I can almost feel the warmth of the oven on my face, hear the gentle hum of her old mixer, and see her hands, dusted with flour, carefully arranging cookies on a cooling rack. These weren’t just any cookies; they were her famous “Scratch Me Back” cookies – a delightful mix of oatmeal, coconut, and chocolate chips that always seemed to disappear in minutes. They were a simple joy, a comforting treat that made every day feel a little bit brighter, and the memory of them continues to bring a smile to my face.
Recipe Overview
- Prep Time: 15 minutes
- Cook Time: 7-10 minutes
- Total Time: 22-25 minutes
- Yields: 24-36 cookies
- Serves: 24
- Dietary Type: Vegetarian
Ingredients
- 1 cup oats
- 2 cups coconut
- 1 cup shortening
- 1 cup flour
- 1 large egg
- 1 cup firmly packed brown sugar
- ½ teaspoon salt
- ½ teaspoon baking soda
- ½ teaspoon baking powder
- 1 teaspoon vanilla
- 1 cup chocolate chips (or more, to taste)
Equipment Needed
- Mixing Bowls
- Measuring Cups and Spoons
- Pastry Cutter (optional, but recommended)
- Cookie Sheets
- Grease or Parchment Paper
- Fork
- Milk (for dipping fork)
- Cooling Rack
Instructions
-
Preheat your oven to 350°F (175°C). Ensure the racks are positioned in the center for even baking.
-
In a large mixing bowl, combine all the dry ingredients: the oats, coconut, flour, salt, baking soda, and baking powder. Whisk or stir thoroughly to ensure everything is evenly distributed. This step is crucial for a consistent texture and flavor.
-
Create a well in the center of the dry ingredients. This is where you’ll add the wet ingredients.
-
Into the well, add the egg and vanilla.
-
Now comes the blending. Add the shortening. You can use a pastry cutter to break it down into smaller pieces before incorporating it with the other ingredients. This will make it easier to blend everything together.
-
Work the shortening into the dry ingredients. The goal is to achieve a crumbly mixture. While a pastry cutter is helpful, you can also use your hands to fully blend the shortening, ensuring there are no large lumps. The mixture should resemble coarse crumbs. This step is vital for creating a tender cookie.
-
Add the brown sugar and chocolate chips. Incorporate thoroughly.
-
Prepare your cookie sheets by greasing them lightly or lining them with parchment paper. This will prevent the cookies from sticking and make cleanup a breeze.
-
Drop teaspoonfuls of the batter onto the prepared cookie sheets, leaving some space between each cookie to allow for spreading.
-
Flatten each cookie gently with a fork that has been dipped in milk. Dipping the fork in milk helps prevent the fork from sticking to the dough and creates a slightly shiny surface on the cookies.
-
Bake in the preheated oven for 7-10 minutes, or until the edges begin to brown. Keep a close eye on them, as they can burn quickly. Ovens can vary, so it’s best to start checking for doneness around the 7-minute mark. The cookies should be golden brown around the edges and slightly soft in the center.
-
Remove the cookie sheets from the oven and let the cookies cool on the sheets for a few minutes before transferring them to a cooling rack to cool completely. This prevents them from breaking apart while they are still soft.
Expert Tips & Tricks
- Shortening vs. Butter: While shortening contributes to a softer texture, you can experiment with using half butter and half shortening for a richer flavor. Be mindful that butter may cause the cookies to spread more during baking.
- Coconut Toasting: For a deeper coconut flavor, lightly toast the coconut flakes in a dry skillet over medium heat until golden brown before adding them to the batter. This will enhance their natural sweetness and add a subtle nutty note.
- Chocolate Chip Variations: Don’t be afraid to experiment with different types of chocolate chips, such as dark chocolate, white chocolate, or even peanut butter chips. You can also add chopped nuts or dried fruit for added texture and flavor.
- Brown Sugar Matters: Using firmly packed brown sugar is crucial for the right moisture and chewiness. Light or dark brown sugar can be used, with dark brown sugar adding a slightly more molasses-like flavor.
- Cold Dough Tip: If you find the dough is too sticky to handle, chill it in the refrigerator for 15-20 minutes before shaping the cookies.
Serving & Storage Suggestions
These Scratch Me Back Cookies are delicious served warm with a glass of cold milk or a cup of hot coffee. They also make a wonderful addition to a dessert platter or a homemade gift for friends and family.
To store, place the cooled cookies in an airtight container at room temperature. They will stay fresh for up to 3-4 days. For longer storage, you can freeze the cookies in a freezer-safe container for up to 2-3 months. Thaw them at room temperature before serving. If you want to serve them warm after freezing, pop them into a preheated oven at 300°F (150°C) for a few minutes to refresh their texture.
Nutritional Information
| Nutrient | Amount per Serving | % Daily Value |
|---|---|---|
| Calories | 238.6 kcal | N/A |
| Calories from Fat | 143 g | 60% |
| Total Fat | 15.9 g | 24% |
| Saturated Fat | 7.6 g | 37% |
| Cholesterol | 7.8 mg | 2% |
| Sodium | 91.4 mg | 3% |
| Total Carbohydrate | 23.5 g | 7% |
| Dietary Fiber | 2.4 g | 9% |
| Sugars | 13.3 g | 53% |
| Protein | 2.7 g | 5% |
Note: Nutritional information is an estimate and may vary based on specific ingredients and portion sizes.
Variations & Substitutions
- Gluten-Free: Substitute the all-purpose flour with a gluten-free blend for a gluten-free version. Ensure the blend contains xanthan gum for proper binding.
- Vegan: Replace the egg with a flax egg (1 tablespoon ground flaxseed mixed with 3 tablespoons of water, let sit for 5 minutes to thicken). Use vegan chocolate chips and ensure the shortening is plant-based.
- Nutty Twist: Add ½ cup of chopped walnuts, pecans, or almonds to the batter for a nutty crunch.
- Spice It Up: Incorporate a pinch of cinnamon, nutmeg, or ginger for a warm, spiced flavor.
- Citrus Zest: Add the zest of one orange or lemon to the batter for a bright, citrusy note.
FAQs (Frequently Asked Questions)
Q: Why are my cookies burning on the bottom?
A: This could be due to uneven heat distribution in your oven or using a dark-colored cookie sheet. Try using a lighter-colored cookie sheet and consider placing another cookie sheet underneath to insulate the bottoms.
Q: My cookies are spreading too thin. What can I do?
A: This can happen if your shortening is too soft or your oven is too hot. Try chilling the dough for 15-20 minutes before baking and making sure your oven is at the correct temperature.
Q: Can I use butter instead of shortening?
A: Yes, but be aware that butter may cause the cookies to spread more during baking. You can also use half butter and half shortening.
Q: How do I prevent the fork from sticking to the dough when flattening the cookies?
A: Dipping the fork in milk or a little bit of water before flattening each cookie will help prevent sticking.
Q: Can I make the dough ahead of time and bake the cookies later?
A: Absolutely! The dough can be stored in the refrigerator for up to 2 days. Just bring it to room temperature slightly before baking for easier handling.
Final Thoughts
These Scratch Me Back Cookies are more than just a recipe; they’re a slice of nostalgia, a taste of home, and a reminder of simpler times. I encourage you to try baking a batch and share them with your loved ones. Whether you stick to the original recipe or experiment with your own creative twists, I hope these cookies bring you as much joy as they have brought me over the years. Don’t hesitate to share your feedback and any variations you try – happy baking!