
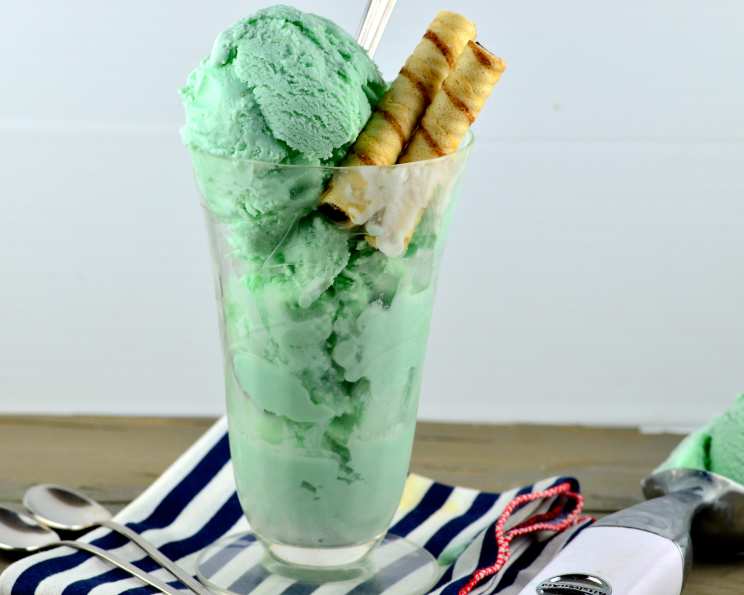
The Enchanting World of Sea Salt Ice Cream
The first time I tasted sea salt ice cream, it was a revelation. I was on vacation at a small seaside town in Brittany, France, and the local artisan glacier had a flavor I’d never seen before. The initial sweetness was immediately followed by a surprising, almost savory, wave of salt that danced on my tongue. It was unexpected, intriguing, and utterly addictive. I knew instantly I needed to recreate that magic at home.
Recipe Overview
- Prep Time: 30 minutes
- Cook Time: 15 minutes
- Total Time: 3 hours 45 minutes (including chilling and freezing)
- Servings: 3-5
- Yield: Approximately 1 quart
- Dietary Type: Not specified, contains dairy and eggs
Ingredients
- 2 eggs
- 2 cups milk
- 1/3 cup sugar
- 1 teaspoon vanilla
- 1 cup heavy whipping cream
- Sea salt (use sparingly)
- Blue food coloring (optional)
- Green food coloring (optional)
Equipment Needed
- Two good sized bowls
- Whisk
- Saucepan
- Ice cream maker (or metal cake pans)
Instructions
-
Begin by separating the eggs. Place the egg whites into one of the bowls and the egg yolks into the other.
-
Using a whisk or electric mixer, beat the egg whites until they form stiff peaks. This step is essential for creating a light and airy texture in the final ice cream. Set aside.
-
In the bowl with the egg yolks, add the sugar. Mix vigorously until the mixture becomes thick and pale yellow. This process, known as “ribboning,” incorporates air and helps to dissolve the sugar for a smoother ice cream base.
-
In a saucepan, slowly bring the milk to a boil over medium heat. Stir frequently to prevent scorching and to ensure even heating. Keep a close watch; you want small bubbles forming around the edges, not a rolling boil.
-
Once the milk is hot, carefully pour it in a slow, steady stream into the yolk/sugar mixture, while whisking constantly. This technique, called tempering, gradually raises the temperature of the yolks to prevent them from scrambling.
-
Pour the milk/yolk/sugar mixture back into the saucepan. Place it over medium heat and continue to heat until the mixture thickens into a custard. Stir constantly to prevent scorching and to promote even thickening. It should coat the back of a spoon – when you run your finger across the coated spoon, the line should remain visible. This process can take about 5-10 minutes. Important: Do NOT let the custard boil, as this will cause the eggs to curdle. If you’re struggling to get it to a custard thickness, don’t worry too much; just get it as thick as you can without boiling.
-
Pour the custard into the bowl with the beaten egg whites and mix gently but thoroughly to combine. Be careful not to deflate the egg whites too much.
-
Now comes the key step: adding the sea salt. Start with a small pinch, about 1/8 teaspoon, and add salt gradually, tasting as you go. The goal is to achieve a salty-sweet flavor profile. Be very cautious not to add too much, as a little goes a long way. You want a subtle, pleasant saltiness that enhances the sweetness, not overpowers it.
-
Place the mixture in the refrigerator to cool completely. This will take at least 2 hours, or preferably overnight. Cooling the base allows the flavors to meld and improves the texture of the final ice cream.
-
Once the mixture is thoroughly chilled, add the heavy whipping cream and vanilla. Stir well to combine.
-
(Optional) If you want to add a touch of color, now is the time. Add 12 drops of blue food coloring and 3 drops of green food coloring. Adjust the amounts to achieve your desired shade. This step is purely for aesthetics and can be omitted if you prefer a natural color.
-
Freeze the mixture according to your ice cream maker’s instructions. This usually involves pouring the mixture into the machine’s canister and churning for 20-30 minutes, or until it reaches a soft-serve consistency.
-
If you don’t have an ice cream maker, you can still make this ice cream! Pour the mixture into one or two metal cake pans. Place the pans in the freezer and let them sit until the edges become firm, about 30-45 minutes. Then, remove the pans from the freezer and mix the partially frozen mixture thoroughly with a fork or whisk. This helps to break up the ice crystals and create a smoother texture. Repeat this process every 30-45 minutes until the ice cream is uniformly frozen. This method takes longer but yields surprisingly good results.
Expert Tips & Tricks
- Use high-quality sea salt. The type of sea salt you use will affect the flavor of the ice cream. Flaky sea salt, such as Maldon, dissolves nicely and provides a subtle crunch.
- Don’t over-churn. Over-churning the ice cream can result in a grainy texture. Stop churning when the ice cream has reached a soft-serve consistency.
- Chill the ice cream maker canister thoroughly. Make sure the ice cream maker canister is completely frozen before you start churning. This will help the ice cream freeze more quickly and evenly.
- For a richer flavor, use brown sugar instead of granulated sugar.
- If your custard curdles, don’t panic! Simply strain the mixture through a fine-mesh sieve to remove the solids.
Serving & Storage Suggestions
Serve the sea salt ice cream in bowls or cones, garnished with a sprinkle of extra sea salt or a drizzle of caramel sauce. It’s also delicious paired with fresh fruit, such as berries or peaches.
Store leftover ice cream in an airtight container in the freezer. It will keep for up to 2 weeks. If the ice cream becomes too hard to scoop, let it sit at room temperature for a few minutes before serving.
Nutritional Information
| Nutrient | Amount per Serving | % Daily Value |
|---|---|---|
| Calories | 515 kcal | N/A |
| Calories from Fat | 346 kcal | N/A |
| Total Fat | 38.5 g | 59% |
| Saturated Fat | 23 g | 115% |
| Cholesterol | 255.5 mg | 85% |
| Sodium | 157.5 mg | 6% |
| Total Carbohydrate | 32.4 g | 10% |
| Dietary Fiber | 0 g | 0% |
| Sugars | 22.5 g | N/A |
| Protein | 11.2 g | 22% |
Note: These values are estimates and may vary depending on specific ingredients and serving sizes.
Variations & Substitutions
- Dairy-Free: Substitute the milk and heavy cream with coconut milk or other non-dairy alternatives. Be aware that this will alter the flavor and texture.
- Vegan: In addition to using dairy-free milk and cream, use a vegan egg substitute.
- More Intense Salt Flavor: Add a pinch of fleur de sel on top of each serving for a burst of saltiness.
- Flavor Enhancements: Infuse the milk with herbs like rosemary or thyme for a unique twist.
FAQs (Frequently Asked Questions)
Q: Can I use table salt instead of sea salt?
A: While you can, sea salt provides a more nuanced and complex flavor compared to regular table salt, which can taste harsh. Opt for sea salt if possible.
Q: My ice cream is too icy. What did I do wrong?
A: The most common cause is large ice crystal formation. Make sure your ice cream maker canister is fully frozen and consider adding a tablespoon of vodka to the mixture, as alcohol inhibits ice crystal formation.
Q: How can I make this recipe without an ice cream maker?
A: Follow the instructions for the metal pan method detailed in the instructions section, ensuring you mix the partially frozen mixture every 30-45 minutes.
Q: Can I add other flavors to this ice cream?
A: Absolutely! Extracts like almond or coconut can add depth. Just be mindful of how they complement the salty-sweet base.
Q: How long will the ice cream last in the freezer?
A: Properly stored in an airtight container, your homemade sea salt ice cream should last for up to 2 weeks in the freezer.
Final Thoughts
Don’t be intimidated by the seemingly complex steps; making sea salt ice cream at home is a rewarding experience. The unique combination of sweet and salty will delight your taste buds and impress your friends and family. I encourage you to experiment with different types of sea salt and flavorings to create your signature version. Share your creations and let me know what you think! This ice cream pairs beautifully with a warm slice of apple pie or a refreshing glass of iced coffee. Happy churning!