
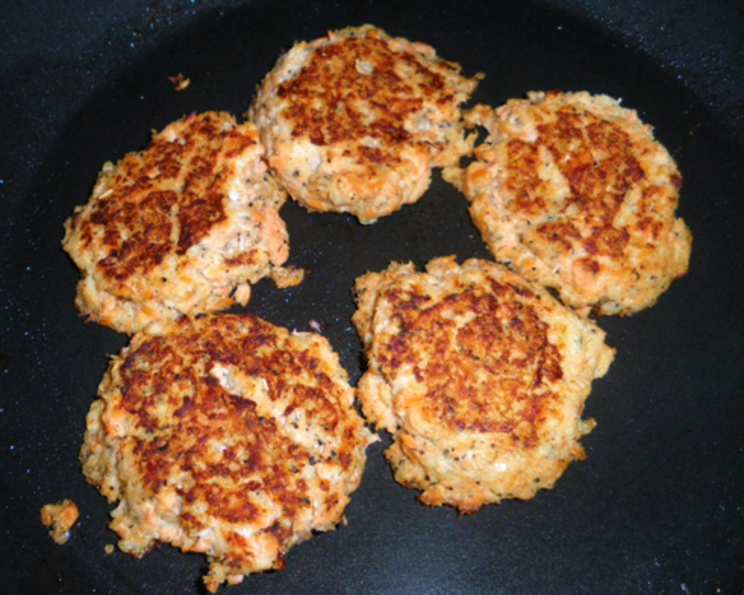
Seared Salmon Cakes with Dill: A Taste of Coastal Comfort
My earliest memories of salmon cakes involve rainy summer afternoons spent at my grandmother’s cottage on the Puget Sound. The scent of dill hung heavy in the air, mingling with the salty tang of the sea. While the wind howled outside, we’d gather around her worn kitchen table, feasting on these simple, comforting cakes. Each bite was a little piece of warmth, a reminder of home and the enduring power of simple, honest food. This recipe, tweaked over the years to my own tastes, carries that same sense of comfort and connection.
Recipe Overview
- Prep Time: 10 minutes
- Cook Time: 30 minutes
- Total Time: 40 minutes
- Servings: 6
- Yield: 6 cakes or muffins
- Dietary Type: Pescatarian, Gluten-Free (check cornmeal), Dairy-Optional
Ingredients
- 1 (14 3/4 ounce) can salmon, Red Salmon is best but Pink Salmon is fine
- 1/4 cup cornmeal
- 1/2 cup 1% low-fat milk (or your milk of choice)
- 1 teaspoon dried dill
- 2 egg whites
- 2-3 tablespoons cooking oil (olive oil or other oil of choice, for frying only)
- Non-stick cooking spray (for baking only)
Equipment Needed
- Medium bowl
- Fork
- 6-cup muffin tin (for baking) or
- Skillet (for frying)
Instructions
- Begin by thoroughly draining the water from the canned salmon. Transfer the salmon to a medium bowl.
- Add the dried dill to the bowl with the salmon. Use a fork to gently stir the dill into the salmon, breaking up the larger pieces as you go. This ensures the dill is evenly distributed throughout the mixture.
- Pour the 1% low-fat milk (or your preferred milk) into the bowl. Follow this with the cornmeal and the egg whites.
- Using the fork, carefully stir all of the ingredients together until they are well blended. Ensure there are no large clumps of cornmeal remaining. The mixture should be relatively homogenous.
- For Baking (Muffin Tin Method): Preheat your oven to 350°F (175°C).
- Thoroughly grease a 6-cup standard muffin tin. A non-stick cooking spray works best for this to ensure the salmon cakes release easily after baking.
- Divide the salmon mixture evenly among the 6 muffin cups. Each cup should be filled approximately to the same level.
- Place the muffin tin in the preheated 350°F oven and bake for 30 minutes. The salmon cakes should be lightly golden brown on top and firm to the touch.
- For Frying (Skillet Method): Form the salmon mixture into 5 or 6 patties. Be careful not to make them too thin, as they may fall apart during frying. Aim for a thickness of about 1/2 to 3/4 inch.
- Place a skillet over medium heat. Add 2 to 3 tablespoons of cooking oil (such as olive oil or your preferred oil) to the preheated skillet. Allow the oil to heat up before adding the patties.
- Carefully place the salmon patties in the preheated skillet, ensuring there is enough space between them to prevent overcrowding.
- Fry the patties for approximately 4 minutes on one side, until they are golden brown and slightly crispy.
- Gently turn the patties over using a spatula and fry for another 4 minutes on the other side, until they are cooked through and golden brown.
Expert Tips & Tricks
- Boosting Flavor: For an extra burst of flavor, consider adding a squeeze of fresh lemon juice to the salmon mixture before cooking. A pinch of red pepper flakes can also add a subtle kick.
- Binders: If the salmon mixture seems too loose, add a tablespoon or two more of cornmeal to help bind it together. Breadcrumbs can also be used.
- Even Cooking: When frying, make sure the skillet is evenly heated before adding the patties. This will ensure they cook uniformly and don’t burn in spots.
- Testing for Doneness: To ensure the salmon cakes are cooked through, insert a toothpick into the center of one of the cakes. If it comes out clean, the cakes are done.
- Make-Ahead Prep: The salmon mixture can be prepared ahead of time and stored in the refrigerator for up to 24 hours. This is a great time-saver for busy weeknights.
Serving & Storage Suggestions
Serve the seared salmon cakes warm, straight from the oven or skillet. They pair beautifully with a dollop of plain Greek yogurt or sour cream, a sprinkle of fresh dill, and a side of lemon wedges for squeezing. They also make a fantastic addition to a salad or alongside roasted vegetables.
Leftover salmon cakes can be stored in an airtight container in the refrigerator for up to 3 days. To reheat, gently warm them in a skillet over low heat, or bake them in a preheated oven at 350°F until heated through. You can also microwave them, but they may lose some of their crispness. For longer storage, you can freeze the cooked salmon cakes. Wrap them individually in plastic wrap, then place them in a freezer bag. They can be stored in the freezer for up to 2 months. Thaw them in the refrigerator overnight before reheating.
Nutritional Information
| Nutrient | Amount per Serving | % Daily Value |
|---|---|---|
| Calories | 113.9 kcal | N/A |
| Calories from Fat | 25 g | 22% |
| Total Fat | 2.8 g | 4% |
| Saturated Fat | 0.5 g | 2% |
| Cholesterol | 37.2 mg | 12% |
| Sodium | 76 mg | 3% |
| Total Carbohydrate | 5.1 g | 1% |
| Dietary Fiber | 0.4 g | 1% |
| Sugars | 1.2 g | N/A |
| Protein | 16.2 g | 32% |
Note: Nutritional information is an estimate and may vary based on specific ingredients and preparation methods.
Variations & Substitutions
- Herbs: If you’re not a fan of dill, try using other fresh herbs such as parsley, chives, or thyme.
- Spices: Experiment with different spice blends to customize the flavor. Cajun seasoning, Old Bay seasoning, or smoked paprika all work well.
- Dairy-Free: Substitute the milk with your favorite non-dairy alternative, such as almond milk, soy milk, or oat milk.
- Adding Vegetables: Finely chopped celery, bell pepper, or onion can be added to the salmon mixture for extra texture and flavor.
- Spicy: Add a pinch of cayenne pepper or a dash of hot sauce to the mixture for a spicy kick.
FAQs (Frequently Asked Questions)
Q: Can I use fresh salmon instead of canned salmon?
A: Absolutely! If you have leftover cooked fresh salmon, you can definitely use it in this recipe. Just flake the cooked salmon into the bowl instead of using canned.
Q: Can I make these salmon cakes ahead of time?
A: Yes, the salmon mixture can be prepared up to 24 hours in advance. Store it covered in the refrigerator and then cook as directed when you’re ready.
Q: How can I prevent the salmon cakes from falling apart when frying?
A: Make sure the patties are not too thin, and that the skillet and oil are properly heated before adding the patties. Adding a bit more cornmeal or breadcrumbs can also help bind the mixture.
Q: Are these salmon cakes gluten-free?
A: As written, the recipe is gluten-free, provided the cornmeal you use is certified gluten-free. Some cornmeal can be processed in facilities that also handle wheat.
Q: What’s the best way to serve these salmon cakes?
A: They’re delicious served with a dollop of plain Greek yogurt or sour cream and a sprinkle of fresh dill. They also pair well with a green salad, roasted vegetables, or even on a bun as a salmon burger.
Final Thoughts
I hope this recipe brings you as much comfort and joy as it has brought me over the years. Don’t be afraid to experiment with different herbs and spices to make it your own. And, most importantly, don’t hesitate to share this simple pleasure with the people you love. I’d love to hear about your experience and any variations you try – happy cooking!