
Season’s Easiest Fruit Cobbler
The memory still warms me like a sun-baked peach. As a kid, summer meant endless games of tag in the humid backyard, punctuated by the siren call of my grandmother’s voice announcing cobbler was ready. We’d pile into her kitchen, the air thick with the scent of cinnamon and melting butter, and devour warm spoonfuls straight from the baking dish, sticky fingers and contented sighs the only sounds. This simple fruit cobbler, reminiscent of those cherished afternoons, captures the essence of carefree summers and the unparalleled joy of home-baked goodness.
Recipe Overview
- Prep Time: 10 minutes
- Cook Time: 45-50 minutes
- Total Time: 55-60 minutes
- Servings: 6
- Yield: 1 cobbler
- Dietary Type: Vegetarian (easily adaptable to vegan)
Ingredients
- 2 (20 ounce) cans fruit (drained of all juice) or 2-3 cups fresh fruit (drained of all juice)
- ½ cup butter or ½ cup margarine, melted
- 1 cup Bisquick
- 1 cup sugar
- ¾ cup milk
Equipment Needed
- 8×8 inch casserole dish
- Mixing bowl
- Measuring cups and spoons
- Oven
Instructions
- Begin by preparing your chosen fruit. If using canned fruit, ensure it is thoroughly drained of all juice. If opting for fresh fruit, wash, pit (if necessary), and slice into bite-sized pieces. Then, drain any excess juice that accumulates.
- Preheat your oven to 350 degrees Fahrenheit (175 degrees Celsius).
- Place the drained fruit in the bottom of an 8×8 inch casserole dish. Distribute the fruit evenly across the dish.
- In a mixing bowl, melt the butter (or margarine). You can do this in the microwave in short bursts, or gently in a saucepan on the stovetop. Be careful not to burn it.
- To the melted butter, add the Bisquick, sugar, and milk. Mix well until a smooth batter forms. There should be no large lumps.
- Pour the Bisquick batter evenly over the fruit in the casserole dish. Try to distribute it as uniformly as possible, so each bite gets a good mix of fruit and topping.
- Bake in the preheated oven for 45-50 minutes. The cobbler is done when the topping is golden brown and a toothpick inserted into the center comes out clean (or with just a few moist crumbs).
- Let the cobbler cool slightly before serving. This allows the flavors to meld and the topping to set a bit.
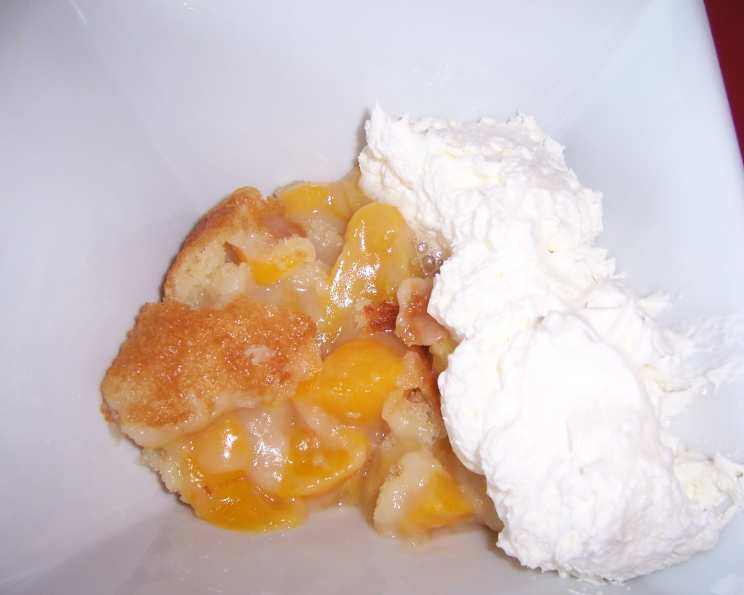
- Serve warm, optionally with a dollop of Cool Whip or a scoop of your favorite ice cream.
Expert Tips & Tricks
- Fruit selection is key: While this recipe is versatile, some fruits work better than others. Peaches, berries, apples, and cherries are all excellent choices. Avoid fruits that release a lot of water during baking, unless you compensate by adding a bit of cornstarch to the fruit to thicken the juices.
- Don’t overmix the batter: Overmixing can lead to a tough topping. Mix just until the ingredients are combined. A few small lumps are perfectly fine.
- Customize the sweetness: Adjust the amount of sugar to your liking, depending on the sweetness of the fruit you’re using. If your fruit is very sweet, you might want to reduce the sugar by a tablespoon or two.
- Spice it up: Add a pinch of cinnamon, nutmeg, or ginger to the batter for extra flavor. You can also add a splash of vanilla extract.
- Make it ahead: You can assemble the cobbler a few hours in advance and keep it covered in the refrigerator until you’re ready to bake it. Add about 5-10 minutes to the baking time if baking from cold.
- Prevent burning: If the topping is browning too quickly, tent the cobbler with foil for the last 15-20 minutes of baking.
- Vegan Variation: easily made vegan by using vegan butter or margarine and non-dairy milk, like almond or soy milk. Make sure your Bisquick does not have any animal products.
Serving & Storage Suggestions
This fruit cobbler is best served warm, ideally within a few hours of baking. A scoop of vanilla ice cream or a dollop of whipped cream (or a vegan alternative) complements the warm fruit and crispy topping perfectly.
Leftovers can be stored in an airtight container at room temperature for up to 2 days, or in the refrigerator for up to 4 days. To reheat, microwave individual portions for about 30-60 seconds, or warm in a preheated oven at 300 degrees Fahrenheit for about 10-15 minutes.
For longer storage, the cobbler can be frozen. Let it cool completely, then wrap it tightly in plastic wrap and foil, or place it in a freezer-safe container. It can be frozen for up to 2-3 months. Thaw overnight in the refrigerator before reheating.
Nutritional Information
Note: Nutritional information is an estimate and can vary based on specific ingredients used.
| Nutrient | Amount per Serving | % Daily Value |
|---|---|---|
| Calories | 375.5 kcal | N/A |
| Calories from Fat | 177 g | 47% |
| Total Fat | 19.7 g | 30% |
| Saturated Fat | 11.3 g | 56% |
| Cholesterol | 45.4 mg | 15% |
| Sodium | 366.2 mg | 15% |
| Total Carbohydrate | 48.3 g | 16% |
| Dietary Fiber | 0.5 g | 1% |
| Sugars | 35.8 g | N/A |
| Protein | 2.9 g | 5% |
Variations & Substitutions
- Gluten-Free Cobbler: Use a gluten-free baking mix instead of Bisquick. You may need to adjust the amount of liquid slightly to achieve the right consistency.
- Berry Cobbler: Use a mixture of fresh or frozen berries (strawberries, blueberries, raspberries, blackberries) for a colorful and flavorful variation.
- Peach and Almond Cobbler: Add a few drops of almond extract to the batter and sprinkle sliced almonds over the top before baking.
- Apple Cinnamon Cobbler: Use sliced apples as the fruit and add 1 teaspoon of cinnamon to the batter.
- Vegan Cobbler with Coconut Milk: Substitute the milk with canned full-fat coconut milk for a richer and creamier texture.
- Citrus Zest: Add the zest of a lemon or orange to the batter for a bright and refreshing flavor.
- Spice it up: Add a pinch of cardamon to the fruit.
FAQs (Frequently Asked Questions)
Q: Can I use frozen fruit?
A: Yes, you can use frozen fruit! Be sure to thaw it slightly and drain any excess liquid before adding it to the casserole dish.
Q: Can I reduce the amount of sugar?
A: Absolutely! Adjust the sugar to your preference, especially if using very sweet fruit. Start with ¾ cup and add more if needed.
Q: How do I know when the cobbler is done?
A: The topping should be golden brown and a toothpick inserted into the center should come out clean or with just a few moist crumbs.
Q: Can I use a different size baking dish?
A: Yes, but you may need to adjust the baking time. A larger dish will require less baking time, while a smaller dish will require more.
Q: Can I add nuts to the topping?
A: Yes, you can sprinkle chopped nuts (like pecans or walnuts) over the topping before baking for added texture and flavor.
Final Thoughts
This simple fruit cobbler is a celebration of seasonal flavors and effortless baking. Its rustic charm and comforting taste make it a perfect dessert for any occasion, from casual weeknight dinners to festive gatherings. Don’t be afraid to experiment with different fruits, spices, and variations to create your own signature cobbler. So, preheat your oven, gather your ingredients, and get ready to experience the simple joy of homemade cobbler. I hope this recipe brings as much warmth and happiness to your kitchen as it has to mine! Please share your feedback and any creative twists you add to this classic recipe. Enjoy!