
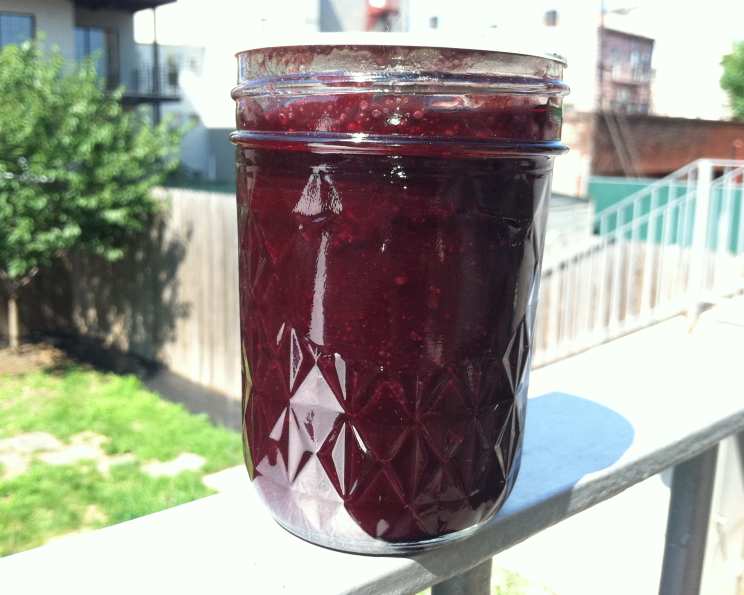
Seedless Blackberry Jam: A Taste of Summer Preserved
Blackberry season was always a highlight of my childhood summers. We’d venture into the thorny patches behind my grandmother’s house, armed with buckets and wearing long sleeves despite the heat. The scratches were worth it, though, because those sun-ripened, juicy blackberries were unlike anything you could buy in a store. My grandmother, a true kitchen sorceress, always transformed our haul into jars of glistening jam – a taste of summer captured and enjoyed throughout the year. This seedless version, a slightly more refined take on her classic recipe, brings back those memories with every spoonful.
Recipe Overview
- Prep Time: 20 minutes
- Cook Time: 30-45 minutes
- Total Time: 50-65 minutes
- Yields: 4 half-pint jars
- Dietary Type: Vegan, Gluten-Free
Ingredients
- 2 ½ lbs blackberries
- 1 cup green apple pectin stock
- 3 cups sugar
- 2 tablespoons lemon juice
Equipment Needed
- Blender
- Mesh strainer
- Preserving pan (or large, heavy-bottomed pot)
- Small plates or saucers
- Canning jars (4 half-pint jars)
- Jar lifter
- Boiling water bath canner
Instructions
-
Begin by preparing the blackberries. Place them in a blender and blend until they are completely crushed. Depending on the size of your blender, you may need to do this in two batches to avoid overflow.
-
Now, it’s time to remove the seeds. Strain the blackberry puree through a mesh strainer. Use a spatula or the back of a spoon to stir and press on the puree, ensuring you extract as much of the flavorful juice as possible. Discard the remaining seeds.
-
Measure the strained blackberry puree. You should have approximately 4 cups. If you have less than 4 cups, add water to the puree until you reach the 4-cup mark. This ensures the proper ratio of fruit to pectin.
-
Prepare for the cold plate test. Place 3 small plates or saucers in the freezer. These will be used to check the jam’s set later.
-
In a preserving pan, combine the blackberry puree, 1 cup of Green Apple Pectin Stock, 3 cups of sugar, and 2 tablespoons of lemon juice. Place the pan over medium heat, stirring gently until the sugar is completely dissolved. It’s crucial to stir continuously at this stage to prevent the sugar from sticking and burning.
-
Once the sugar is dissolved, raise the heat to medium-high and bring the mixture to a boil. Continue to boil the jam for 15 minutes, stirring occasionally to prevent scorching.
-
After 15 minutes, it’s time to check the set. Remember that the total cooking time might vary; it can take up to 30 minutes of simmering over medium-high heat to reach the set stage. This depends on the type of pan you’re using and the intensity of the heat.
-
Perform the cold plate test to determine if the jam is ready. Remove the pot of jam from the heat; leaving it on the heat while testing can lead to overcooking, resulting in a rubbery or hard jam.
-
Place a drop of the jam mixture on one of the chilled saucers from the freezer, and immediately return the plate to the freezer for 1 minute.
-
After 1 minute, take the saucer out of the freezer and nudge the drop of jam with your finger. If the surface of the jam “wrinkles” when nudged, it indicates that the jam is set. If the jam is not set, continue cooking over medium-high heat, checking the set again every 5 minutes using a fresh, chilled saucer.
-
Once the jam has reached the set stage, carefully ladle it into prepared canning jars, leaving ¼ inch of headspace at the top of each jar.
-
Before sealing, wipe the rims of the jars with damp paper towels to remove any jam that may have splattered on the rims or threads. This step is crucial for ensuring a proper seal.
-
Place the lids on the jars, followed by the bands. Tighten the bands until they are fingertip tight; avoid over-tightening, as this can prevent a proper seal.
-
Process the filled jars in a boiling water bath canner for 10 minutes. Ensure that the water covers the jars by at least 1 inch. Adjust processing time for altitude if necessary, adding more time for higher altitudes.
-
After processing, carefully remove the jars from the canner using a jar lifter and place them on a towel-lined surface, leaving space between the jars. Let the jars sit, undisturbed, for at least 12 hours before checking the seals. This allows the sealing compound on the lids to cool and harden, completing the seal.
-
During the cooling process, you should hear a “plink” sound from each jar, indicating that the vacuum seal is being formed as the final air escapes.
-
After 12 hours, remove the bands from the jars and check the lids. Press down on the center of each lid. If the lid does not flex or “give” when pressed, the jar is properly sealed. If the lid flexes or you can push it down slightly, the jar did not seal.
-
For any unsealed jars, you have two options: either replace the lid and band and reprocess the jar in the boiling water bath for another 10 minutes, or simply store the jam in the refrigerator and use it within 3 months.
Expert Tips & Tricks
- Patience is key: Don’t rush the jam-making process. Allowing the jam to simmer gently is essential for developing a rich, concentrated flavor.
- Use a heavy-bottomed pan: This helps to distribute heat evenly and prevent scorching.
- Adjust the sugar to your taste: If your blackberries are particularly tart, you may need to add a bit more sugar. Start with the recommended amount and adjust as needed, tasting as you go.
- Don’t overcook: Overcooked jam can become rubbery and lose its bright fruit flavor. Use the cold plate test frequently to ensure you catch it at the perfect set.
- Ensure proper sterilization: Sterilizing your canning jars and lids is crucial for preventing spoilage. Boil them in water for at least 10 minutes before filling.
Serving & Storage Suggestions
This seedless blackberry jam is incredibly versatile. It’s delicious spread on toast, scones, or biscuits. It can also be used as a filling for pastries, a topping for yogurt or ice cream, or even as a glaze for roasted meats.
Store properly sealed jars of jam in a cool, dark place for up to 1 year. Once opened, refrigerate and consume within a few weeks. Unsealed jars should always be refrigerated and used within 3 months.
Nutritional Information
| Nutrient | Amount per Serving | % Daily Value |
|---|---|---|
| Calories | 352 kcal | 18% |
| Total Fat | 0.1 g | 0% |
| Saturated Fat | 0 g | 0% |
| Cholesterol | 0 mg | 0% |
| Sodium | 1 mg | 0% |
| Total Carbohydrate | 89 g | 30% |
| Dietary Fiber | 3 g | 12% |
| Sugars | 83 g | N/A |
| Protein | 0.7 g | 1% |
Note: Nutritional information is an estimate and may vary based on specific ingredients and preparation methods.
Variations & Substitutions
- Add a spice: A pinch of ground cinnamon or a few star anise pods during cooking can add warmth and complexity to the jam. Remember to remove the star anise before jarring.
- Infuse with herbs: Fresh mint or basil leaves can be added during the last few minutes of cooking for a unique herbal flavor. Remove the herbs before jarring.
- Use other berries: This recipe can be adapted for other types of berries, such as raspberries or mixed berries. Adjust the sugar and cooking time as needed.
- Boozy Blackberry Jam: Add a tablespoon or two of blackberry liqueur or brandy after the jam has reached its setting point. This adds an extra layer of flavor and warmth.
FAQs (Frequently Asked Questions)
Q: Why do I need green apple pectin stock?
A: Green apple pectin stock provides natural pectin, allowing the fruit’s flavor to shine through more intensely than when using commercial pectin powder.
Q: How do I know when the jam is set without a thermometer?
A: The cold plate test is a reliable method. If the jam wrinkles when nudged on a cold plate, it’s ready.
Q: Can I use frozen blackberries?
A: Yes, you can use frozen blackberries. Just make sure to thaw them completely and drain any excess liquid before using them in the recipe.
Q: My jam is too runny. What did I do wrong?
A: The most common reason for runny jam is not cooking it long enough. Continue to simmer it over medium-high heat, checking the set every 5 minutes until it reaches the desired consistency.
Q: How long does homemade jam last?
A: Properly sealed jars of homemade jam can last for up to a year in a cool, dark place. Once opened, store in the refrigerator and consume within a few weeks.
Final Thoughts
Making your own seedless blackberry jam is a rewarding experience that fills your kitchen with the sweet aroma of summer. This recipe, passed down with a slight twist, is more than just a method; it’s a way to capture memories and create new ones. So, gather your ingredients, embrace the process, and enjoy the delicious taste of homemade goodness. Don’t be afraid to experiment with variations to make it your own, and please, share your creations and feedback! This jam pairs perfectly with a warm, flaky scone and a cup of Earl Grey tea for a delightful afternoon treat.