
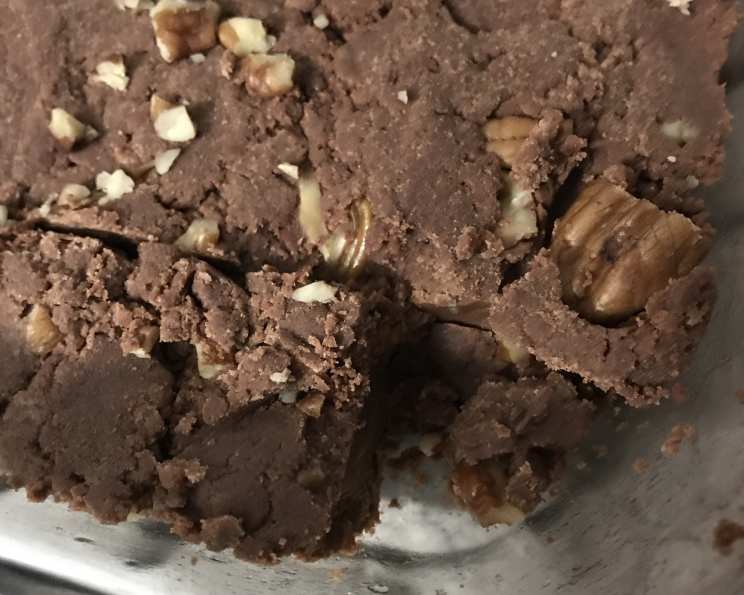
The “Original” See’s Fudge: A Taste of Sweet History
My grandmother, bless her heart, had a sweet tooth that could rival any child’s. Every Christmas, without fail, she’d painstakingly craft a huge batch of fudge, its rich, chocolatey aroma filling her small kitchen with warmth and anticipation. It was always a little grainy, a little too sweet, but utterly perfect in its imperfection. Years later, I discovered a recipe claiming to be the very foundation of See’s Candies’ iconic fudge, and I couldn’t help but wonder if this was the secret inspiration behind Grandma’s beloved, albeit slightly less refined, holiday treat. The thought of recreating a piece of candy history, and perhaps even unlocking a forgotten memory, made this recipe irresistible.
Recipe Overview
- Prep Time: 15 minutes
- Cook Time: 7-8 minutes
- Total Time: Approximately 2 hours (includes chilling)
- Servings: Varies based on cut size, approximately 25-30 pieces
- Yield: About 5 pounds of fudge
- Dietary Type: Not suitable for vegan, dairy-free, or gluten-free diets
Ingredients
- 4 ½ cups sugar
- 3 (12 ounce) packages chocolate chips (semi-sweet or milk chocolate, depending on preference)
- ½ lb (8 ounces) margarine
- 1 teaspoon vanilla extract
- 1 (12 ounce) can evaporated milk
- 7 ounces marshmallow cream (one standard jar)
- 2 cups nuts (walnuts or pecans, chopped)
Equipment Needed
- Large saucepan
- Large mixing bowl
- Measuring cups and spoons
- Wooden spoon or spatula
- Butter knife
- Baking pans (9×13 inch or similar), buttered
Instructions
- In a large saucepan, combine the 4 ½ cups of sugar with the 12-ounce can of evaporated milk.
- Bring the mixture to a rolling boil over medium heat, stirring constantly to prevent scorching. A rolling boil means the mixture continues to boil even while you are stirring.
- Continue to boil for 7 to 8 minutes, stirring often. It’s crucial to maintain a consistent boil and stir diligently to ensure the sugar dissolves properly and the mixture doesn’t burn.
- While the sugar and milk mixture is boiling, prepare the chocolate base. In a large mixing bowl, combine the 3 packages of chocolate chips, the 7 ounces of marshmallow cream, and the ½ pound of margarine.
- Cream together the margarine and marshmallow cream until well combined. Then add the chocolate chips. Do not melt at this stage.
- Once the sugar and milk mixture has boiled for the specified time, immediately pour the hot mixture over the chocolate chip mixture in the large bowl.
- Let the hot liquid sit for a minute or two to allow the chocolate chips to melt.
- Gently stir the mixture until the chocolate chips are fully melted and the fudge is smooth and well combined. It is important to scrape the sides and bottom of the bowl to ensure all ingredients are incorporated.
- Add the 2 cups of nuts and 1 teaspoon of vanilla extract. Blend thoroughly to distribute the nuts evenly throughout the fudge.
- Pour the fudge into buttered baking pans. Ensure the fudge is spread evenly for consistent thickness.
- Chill the fudge in the refrigerator until firm. This typically takes at least 2 hours, or preferably overnight.
- Once the fudge is firm, cut it into squares before it becomes too hard. Use a sharp knife and wipe it clean between cuts for neat edges.
Expert Tips & Tricks
- Temperature is Key: Achieving the correct boiling point is essential for fudge. Use a candy thermometer if you’re unsure to reach the soft-ball stage (around 235-240°F or 112-115°C).
- Chocolate Choice: Experiment with different types of chocolate chips for varied flavor profiles. Dark chocolate will create a richer, less sweet fudge.
- Nut Variations: Don’t be afraid to swap out the walnuts or pecans for other nuts like almonds, macadamia nuts, or even toffee pieces for added crunch and flavor.
- Prevent Graininess: Constant stirring during the boiling process is key to prevent sugar crystals from forming, which can lead to a grainy texture.
- Margarine Substitution: While the original recipe calls for margarine, you can use butter for a richer flavor. Be aware that butter may slightly alter the texture.
- Marshmallow Cream Alternative: In a pinch, you can use miniature marshmallows, but melt them slightly before adding them to the chocolate mixture.
Serving & Storage Suggestions
Serve the See’s fudge chilled or at room temperature, cut into squares. It makes a wonderful gift, dessert, or addition to a holiday candy platter.
- Storage: Store the fudge in an airtight container at room temperature for up to a week, or in the refrigerator for up to two weeks.
- Freezing: For longer storage, wrap the fudge tightly in plastic wrap and then place it in a freezer-safe bag or container. It can be frozen for up to 2-3 months. Thaw in the refrigerator before serving.
- Presentation: Arrange the fudge squares on a decorative plate or in a gift box lined with parchment paper for an elegant presentation.
Nutritional Information
Please note that these values are estimates and can vary based on specific ingredients and portion sizes.
| Nutrient | Amount per Serving (Estimated) | % Daily Value (Estimated) |
|---|---|---|
| Calories | 450 kcal | 23% |
| Total Fat | 24g | 37% |
| Saturated Fat | 12g | 60% |
| Cholesterol | 5mg | 2% |
| Sodium | 150mg | 7% |
| Total Carbohydrate | 60g | 20% |
| Dietary Fiber | 2g | 8% |
| Sugars | 50g | N/A |
| Protein | 4g | 8% |
Variations & Substitutions
- Chocolate Swirl Fudge: Melt white chocolate and swirl it into the fudge before chilling for a visually appealing variation.
- Peanut Butter Fudge: Add a cup of peanut butter to the chocolate mixture for a creamy, nutty flavor.
- Espresso Fudge: Add a tablespoon of instant espresso powder to the hot sugar mixture for a caffeine kick.
- Spiced Fudge: Incorporate a teaspoon of cinnamon, nutmeg, or other warm spices for a festive holiday flavor.
- No-Nut Fudge: Simply omit the nuts for a smooth, nut-free fudge.
- Mint Chocolate Fudge: Add a teaspoon of peppermint extract to the melted chocolate.
FAQs (Frequently Asked Questions)
Q: Why is my fudge grainy?
A: Graininess is often caused by undissolved sugar crystals. Ensure you stir the sugar and milk mixture constantly while boiling and avoid any crystals forming on the sides of the pan.
Q: Can I use butter instead of margarine?
A: Yes, you can substitute butter for margarine. However, butter has a higher fat content and may result in a slightly softer fudge.
Q: How do I prevent the fudge from sticking to the pan?
A: Butter the baking pan thoroughly before pouring in the fudge mixture. You can also line the pan with parchment paper, leaving an overhang to easily lift the fudge out once it’s set.
Q: How long does the fudge need to chill?
A: The fudge needs to chill for at least 2 hours, but preferably overnight, to fully firm up. This allows the flavors to meld together and the texture to set properly.
Q: Can I add other toppings to the fudge?
A: Absolutely! Consider adding sprinkles, sea salt, dried fruit, or crushed candy pieces to the top of the fudge before it sets for extra flavor and visual appeal.
Final Thoughts
Whether this recipe is truly the original See’s Fudge or not, it offers a delightful glimpse into the past and a chance to create a truly decadent treat. The simplicity of the ingredients combined with the precise cooking method results in a classic fudge that’s sure to impress. So, gather your ingredients, dust off your apron, and embark on a sweet journey. Share your creations with friends and family, and perhaps even start a new holiday tradition of your own. Don’t hesitate to experiment with variations and substitutions to create a fudge that is uniquely yours!