
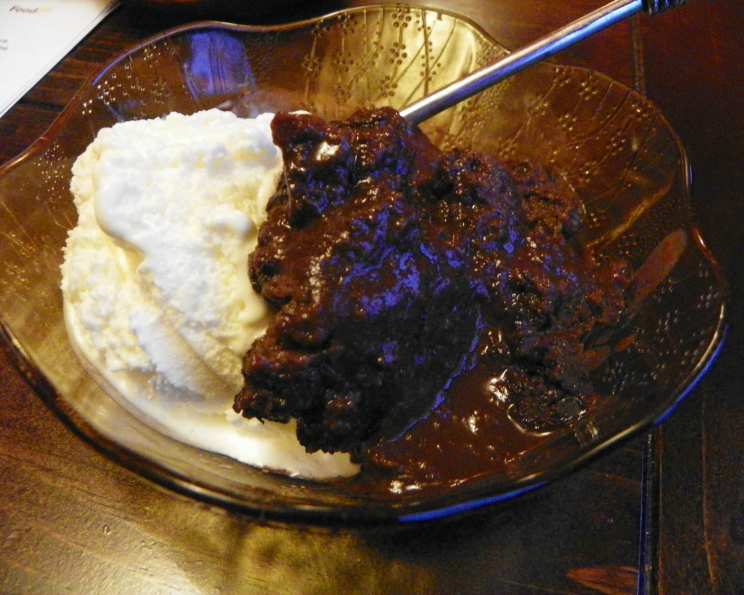
Self-Saucing Chocolate Pudding: A Nostalgic Delight
The memory is so vivid: the scent of warm chocolate filling the kitchen, the gentle bubbling sounds from the oven, and the eager faces of my cousins gathered around the table. My grandmother, a woman of few words but immense culinary talent, would always pull out this self-saucing chocolate pudding recipe on chilly evenings. It wasn’t just dessert; it was an experience – a comforting hug in a bowl, a symbol of love and togetherness that transcended generations. This recipe, adapted from a classic, brings back those cherished moments, and I’m thrilled to share it with you.
Recipe Overview
- Prep Time: 20 minutes
- Cook Time: 35-40 minutes
- Total Time: 55-60 minutes
- Servings: 6
- Yield: 6 servings
- Dietary Type: Vegetarian (easily adaptable to dairy-free with substitutions)
Ingredients
For the Pudding:
- 3 ounces self-raising flour
- 2 tablespoons cocoa powder
- 1 ½ teaspoons instant coffee powder
- 1 pinch salt
- 4 ounces (113g) butter or margarine, softened
- 4 ounces (113g) caster sugar
- 2 eggs
- ½ teaspoon vanilla essence
- 1-2 tablespoons milk
- Optional: 1 tablespoon chopped walnuts
For the Sauce:
- ⅔ cup brown sugar, firmly packed
- 1 tablespoon cocoa powder
- 1 ½ cups hot water
Equipment Needed
- 6-cup oven-proof dish
- Mixing bowls
- Electric mixer or whisk
- Jug
- Sifter
Instructions
-
Preheat your oven to 180°C (350°F). Make sure your oven rack is positioned in the center for even baking.
-
Thoroughly grease your 6-cup oven-proof dish. This step is crucial to prevent the pudding from sticking and ensuring easy removal after baking. A light dusting of cocoa powder after greasing can also help create a beautiful crust.
-
Prepare the sauce: In a jug, combine the brown sugar and cocoa powder. Pour in the hot water and stir well until the sugar is completely dissolved. The mixture will be quite liquid, but don’t worry, this is exactly what you want for that magical self-saucing effect!
-
Prepare the dry ingredients for the pudding: Sift together the self-raising flour, cocoa powder, instant coffee powder, and salt in a mixing bowl. Sifting is important to remove any lumps and ensure a light and airy pudding. The instant coffee powder enhances the chocolate flavor without making the pudding taste overtly like coffee.
-
Cream the butter (or margarine) and caster sugar in a separate mixing bowl until light and fluffy. This step incorporates air into the mixture, which will contribute to the pudding’s soft texture. An electric mixer makes this easier, but a whisk and some elbow grease will work just as well.
-
Gradually beat in the eggs, one at a time, followed by the vanilla essence. Make sure each egg is fully incorporated before adding the next. The vanilla essence adds a subtle warmth and complexity to the flavor.
-
Add the sifted dry ingredients to the creamed mixture, alternating with the milk. Begin and end with the dry ingredients. Add a little flour, then some milk, and continue alternating, keeping a soft consistency. You might not need to use all the milk, so add it gradually until you reach the desired consistency. The batter should be smooth and easily spoonable.
-
Spoon the pudding mixture into the prepared oven dish and spread it evenly. If you’re using walnuts, sprinkle them evenly over the top of the pudding mixture at this stage.
-
Now comes the crucial step: Gently spoon the prepared sauce over the pudding mixture. First, create a thin layer of sauce covering the entire surface of the pudding. Then, pour the remaining sauce over the back of a spoon to avoid disturbing the pudding layer. This technique helps ensure the sauce settles beneath the pudding as it bakes, creating the signature self-saucing effect.
-
Bake in the preheated oven for 35-40 minutes, or until the pudding is set and the sauce is bubbling. To check for doneness, insert a skewer into the center of the pudding. If it comes out clean (or with just a few moist crumbs), it’s ready. If the top is browning too quickly, you can loosely cover the dish with foil during the last 10-15 minutes of baking.
-
Remove from the oven and let it cool slightly before serving. This allows the sauce to thicken a little.
Expert Tips & Tricks
- For a richer chocolate flavor: Use dark cocoa powder instead of regular.
- If you don’t have self-raising flour: You can make your own by adding 1 ½ teaspoons of baking powder and ½ teaspoon of salt to 1 cup of plain flour.
- To prevent a soggy pudding: Make sure your oven temperature is accurate. An oven thermometer can be a valuable tool.
- Make-ahead tip: The sauce can be prepared ahead of time and stored in the refrigerator. Reheat gently before pouring it over the pudding.
- Troubleshooting: If the sauce is too thin, you can thicken it slightly by simmering it on the stovetop after baking. If the pudding is too dry, try adding a little more milk to the batter next time.
Serving & Storage Suggestions
Serve the self-saucing chocolate pudding warm, straight from the oven, for the ultimate comforting experience. It’s delicious on its own, but even better with a dollop of whipped cream or a scoop of vanilla ice cream. A sprinkle of walnut halves adds a nice textural contrast.
Leftovers can be stored in an airtight container in the refrigerator for up to 3 days. Reheat gently in the microwave or oven before serving. The pudding is best enjoyed fresh, as the texture may change slightly upon refrigeration. While freezing is possible, it’s not recommended as it can affect the texture of both the pudding and the sauce.
Nutritional Information
(Estimated values per serving)
| Nutrient | Amount per Serving | % Daily Value* |
|---|---|---|
| Calories | 420 kcal | 21% |
| Total Fat | 20g | 31% |
| Saturated Fat | 12g | 60% |
| Cholesterol | 110mg | 37% |
| Sodium | 210mg | 9% |
| Total Carbohydrate | 60g | 20% |
| Dietary Fiber | 2g | 8% |
| Sugars | 45g | – |
| Protein | 5g | 10% |
*Based on a 2000-calorie diet.
Variations & Substitutions
- Dairy-Free: Substitute the butter with a dairy-free margarine or coconut oil, and use a plant-based milk alternative like almond, soy, or oat milk.
- Gluten-Free: Use a gluten-free self-raising flour blend. You may need to add a binder like xanthan gum to help with the texture.
- Spiced Chocolate Pudding: Add a pinch of cinnamon, nutmeg, or chili powder to the dry ingredients for a warm, spiced twist.
- Citrus Zest: Add the zest of an orange or lemon to the pudding batter for a bright, refreshing flavor.
FAQs (Frequently Asked Questions)
Q: Why is my pudding dry?
A: Overbaking is the most common cause of a dry pudding. Be sure to check for doneness regularly and don’t overbake. Also, ensure your oven temperature is accurate.
Q: Can I use regular flour instead of self-raising flour?
A: Yes, but you’ll need to add a leavening agent. For every cup of regular flour, add 1 ½ teaspoons of baking powder and ½ teaspoon of salt.
Q: My sauce is too thin, what can I do?
A: You can thicken the sauce by gently simmering it on the stovetop for a few minutes after baking. Be careful not to burn it.
Q: Can I add chocolate chips to the pudding?
A: Absolutely! Adding chocolate chips to the batter will create an even richer chocolate experience.
Q: Is it necessary to sift the dry ingredients?
A: While not strictly necessary, sifting helps to remove any lumps and ensure a lighter, more even texture in the pudding.
Final Thoughts
This self-saucing chocolate pudding is more than just a dessert; it’s a timeless classic that’s perfect for any occasion. Whether you’re seeking a comforting treat on a chilly evening or a crowd-pleasing dessert for a special gathering, this recipe is sure to delight. I encourage you to try it and share your own variations and feedback. Pair it with a strong cup of coffee or a glass of dessert wine for the ultimate indulgence. Happy baking!