
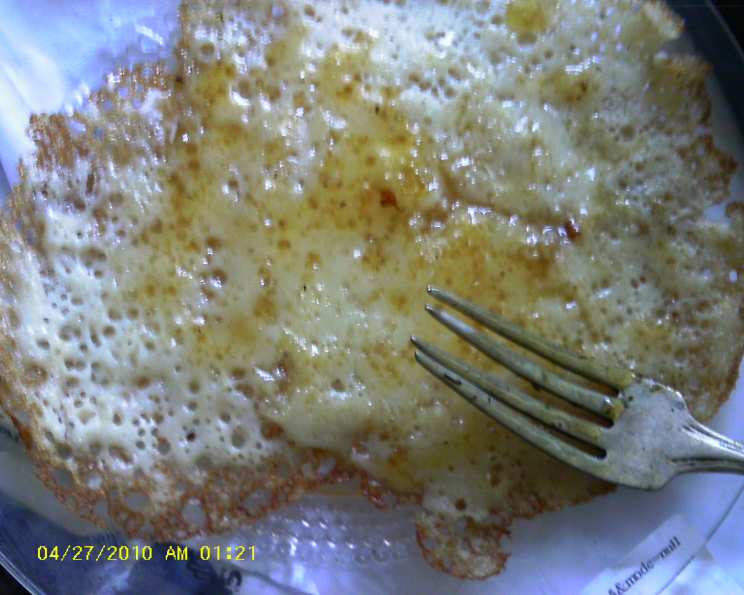
Semolina Pancakes: A Taste of Warmth and Tradition
The aroma of warm pancakes, mingled with honey and butter, has always been the essence of a cozy Sunday morning in my family. But these aren’t your ordinary buttermilk stacks. My grandmother, a master of resourcefulness and flavor, introduced me to semolina pancakes. They were subtly sweet, with a slightly chewy texture that was unlike anything I’d tasted before. Each bite was a reminder of her love and the simple joys of sharing a homemade meal.
Recipe Overview:
- Prep Time: 15 minutes
- Cook Time: 27 minutes
- Total Time: 42 minutes
- Servings: 12
- Dietary Type: Not specified
Ingredients:
- 3 cups warm water
- 2 teaspoons baking powder
- 1 3/4 cups fine semolina (see Note)
- 1/3 cup all-purpose flour
- 2 teaspoons active dry yeast
- 1 teaspoon sugar
- 1 teaspoon salt
- Vegetable oil, for cooking
- 1/3 cup honey, warmed
- 6 tablespoons unsalted butter, melted
Equipment Needed:
- Large bowl
- Kitchen towel
- Food Processor
- 10-inch nonstick skillet
- Small bowl
Instructions:
-
In a bowl, combine 1/4 cup of the warm water with the baking powder. Set aside. This mixture will activate and create a bit of a foamy reaction, which is exactly what you want for light and airy pancakes.
-
In a food processor, combine the semolina with the all-purpose flour, yeast, sugar, and the remaining 2 3/4 cups of warm water. Process for 30 seconds, until the mixture is smooth. Be sure to scrape down the sides of the food processor to ensure all the ingredients are fully incorporated.
-
Add the salt and the baking powder mixture to the food processor and process for 30 seconds longer. This second processing will fully emulsify the ingredients.
-
Pour the batter into a large bowl, cover with a kitchen towel, and let rise at room temperature until doubled in bulk, about 1 hour. This crucial step allows the yeast to do its work, creating the characteristic airy texture of these pancakes. Don’t rush this step; a full hour of rising is necessary.
-
Heat a 10-inch nonstick skillet over moderate heat. Coat it with a thin layer of vegetable oil. Using a nonstick skillet is crucial for preventing the pancakes from sticking and ensuring they cook evenly.
-
In a small bowl, blend the honey with the melted butter. Keep this honey butter mixture warm for drizzling.
-
Whisk the batter until creamy. This will deflate some of the air, but don’t worry – the pancakes will still be light and airy. It’s important to ensure a smooth batter with no lumps.
-
Ladle 1/3 cup of the batter into the hot skillet, tilting the skillet to distribute it evenly. The key here is even distribution. Don’t overcrowd the skillet; one pancake at a time yields the best results.
-
Cook the pancake over moderate heat until bubbles appear all over the surface and the bottom is pale golden, about 2 minutes. Keep an eye on the heat; too high and the pancakes will burn before they cook through.
-
Shake the skillet to loosen the pancake, then slide the pancake onto a plate. If the pancake sticks, use a thin spatula to gently release it.
-
Drizzle with the honey butter and serve right away. The warm honey butter melting into the pancake is what makes this dish so special!
-
Repeat with more vegetable oil and the remaining batter and honey butter. Remember to add a thin layer of oil to the skillet each time to prevent sticking.
Note: Fine semolina flour, sometimes also called extra-fancy durum flour, is available at Whole Foods and online at kingarthurflour.com. Using fine semolina is key for the correct texture. Coarse semolina will result in a grittier pancake.
Expert Tips & Tricks:
- Temperature Control: The heat of your skillet is crucial. If it’s too hot, the pancakes will burn on the outside before they cook through. If it’s too low, they’ll be pale and greasy. Aim for moderate heat.
- Even Cooking: Tilting the skillet to distribute the batter evenly ensures the pancakes cook uniformly.
- Patience is Key: Don’t flip the pancake until bubbles appear all over the surface and the bottom is golden brown. This indicates that the pancake is ready to be loosened and served.
- Honey Butter Perfection: For an extra luxurious touch, infuse your melted butter with a vanilla bean before adding the honey. Remove the bean before serving.
- Make-Ahead Tip: The honey butter can be made ahead of time and gently reheated before serving.
Serving & Storage Suggestions:
Serve these semolina pancakes immediately while they are still warm and the honey butter is melting. These are best enjoyed fresh.
If you happen to have leftovers (though it’s unlikely!), store them in an airtight container in the refrigerator for up to 2 days. Reheat in a skillet or microwave until warmed through. Keep in mind that they might lose some of their initial crispiness upon reheating. Freezing is not recommended as it affects the texture significantly.
Nutritional Information:
| Nutrient | Amount per Serving | % Daily Value |
|---|---|---|
| Calories | 183.7 kcal | N/A |
| Calories from Fat | 54 g | 30% |
| Total Fat | 6.1 g | 9% |
| Saturated Fat | 3.7 g | 18% |
| Cholesterol | 15.3 mg | 5% |
| Sodium | 257.9 mg | 10% |
| Total Carbohydrate | 28.9 g | 9% |
| Dietary Fiber | 1.2 g | 4% |
| Sugars | 8.1 g | 32% |
| Protein | 3.8 g | 7% |
Variations & Substitutions:
- Spice it Up: Add a pinch of cinnamon, cardamom, or nutmeg to the batter for a warm, aromatic twist.
- Citrus Zest: A teaspoon of lemon or orange zest brightens the flavor beautifully.
- Nutty Delight: Incorporate a tablespoon of finely ground almonds or pistachios into the batter.
- Fruit Infusion: Fold in fresh blueberries, raspberries, or chopped strawberries into the batter just before cooking.
- Vegan Variation: Use a plant-based butter alternative and agave nectar or maple syrup instead of honey. While the original recipe does not specify dietary type, this modification makes it closer to a vegan option.
FAQs (Frequently Asked Questions):
Q: Can I use regular semolina flour instead of fine semolina?
A: While you can, the texture will be significantly different. Fine semolina is recommended for a smoother, less gritty pancake.
Q: Why do I need to let the batter rise for an hour?
A: The rising period allows the yeast to activate, creating air pockets in the batter, which results in light and fluffy pancakes.
Q: Can I make the batter ahead of time?
A: Yes, you can prepare the batter and let it rise in the refrigerator overnight. However, it may take longer to rise due to the colder temperature. Bring it to room temperature before cooking.
Q: What if I don’t have a food processor?
A: You can whisk the ingredients together vigorously by hand, ensuring there are no lumps. The texture might be slightly different, but still delicious.
Q: My pancakes are burning before they cook through. What should I do?
A: Lower the heat of your skillet. Cooking over moderate heat is key to ensuring the pancakes cook evenly without burning.
Final Thoughts:
Semolina pancakes are more than just a breakfast dish; they’re a taste of tradition, warmth, and simple pleasures. I encourage you to try this recipe and experience the unique flavor and texture for yourself. Don’t hesitate to experiment with variations to make it your own, and share your creations with loved ones. These pancakes are a perfect way to start a cozy weekend morning, and they’re sure to bring a smile to everyone’s face. Bon appétit!