
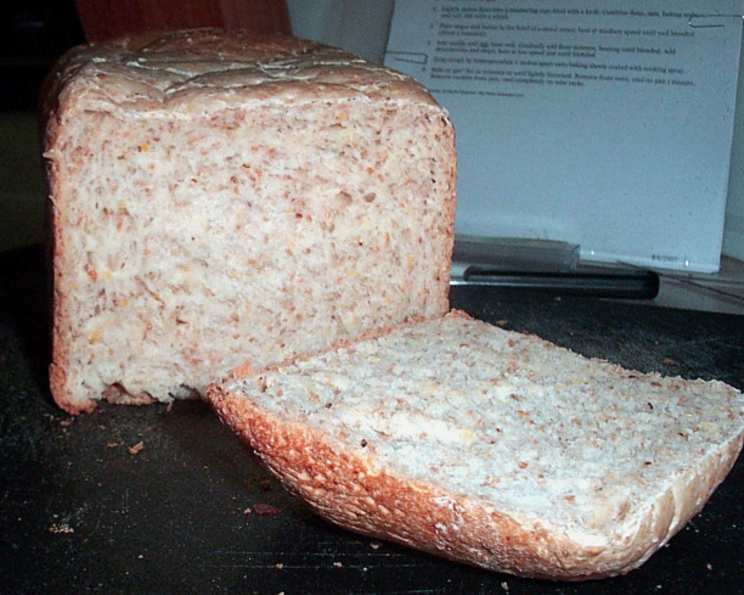
The Hearty Comfort of Seven Grain Bread
I remember my grandmother’s kitchen, a warm and welcoming space filled with the comforting aroma of baking bread. It wasn’t just any bread, but her signature multigrain loaf, studded with hearty grains that added a delightful chewiness. Each slice was a taste of home, slathered with butter and enjoyed with a steaming cup of tea. That bread wasn’t just sustenance; it was love baked into a loaf, a tradition I’m thrilled to share with you.
Recipe Overview
- Prep Time: 20 minutes
- Cook Time: According to bread machine directions
- Total Time: 50 minutes + proofing time
- Yield: 1 (2-pound) loaf
- Dietary Type: Vegetarian
Ingredients
- 1 2/3 cups water
- 2 tablespoons nonfat dry milk powder
- 2 tablespoons shortening
- 2 tablespoons honey
- 2 teaspoons salt
- 2 1/2 cups all-purpose flour
- 1 cup whole wheat flour
- 3/4 cup five-grain cereal (can substitute with seven-grain or other multigrain cereal)
- 1 1/4 teaspoons active dry yeast
Equipment Needed
- Bread machine
Instructions
- Prepare your bread machine: Ensure your bread machine pan is clean and dry.
- Add the ingredients: Place all the ingredients into the bread machine pan in the order suggested by the manufacturer of your machine. This is crucial for optimal mixing and rising. Generally, liquids go in first, followed by dry ingredients, with the yeast added last and kept separate from the liquid until the mixing process begins.
- Select the bread setting: Choose the basic bread setting on your bread machine.
- Crust color and loaf size: If your bread machine allows, select your desired crust color (light, medium, or dark) and loaf size.
- Bake: Start the bread machine and bake according to its directions. Baking times will vary depending on the machine and the settings you’ve chosen. The machine will handle the kneading, rising (proofing), and baking automatically.
- Check for doneness: Once the baking cycle is complete, check the bread for doneness. The crust should be golden brown, and the loaf should sound hollow when tapped.
- Cool the bread: Remove the bread from the machine pan immediately after baking and allow it to cool on a wire rack before slicing. This prevents the bottom of the loaf from becoming soggy.
Expert Tips & Tricks
- Flour Power: The type of flour you use significantly impacts the final texture. Using a higher protein all-purpose flour can result in a chewier loaf, while a lower protein flour will yield a softer bread. Feel free to experiment to find your perfect balance.
- Sweetness Adjustment: If you prefer a sweeter loaf, you can increase the amount of honey by a tablespoon or two. Alternatively, you can use maple syrup or molasses for a richer, more complex flavor.
- Hydration Levels: Keep an eye on the dough’s consistency during the kneading process. If it appears too dry, add a tablespoon of water at a time until it forms a smooth, slightly sticky ball. Conversely, if the dough is too wet, add a tablespoon of flour until it reaches the desired consistency.
- Grain Variety: While the recipe calls for five-grain cereal, don’t hesitate to experiment with other multigrain blends. Bob’s Red Mill 10 Grain Cereal works beautifully, as noted in the original recipe. You can also add other grains like flaxseed, sunflower seeds, or pumpkin seeds for added flavor and texture.
- Proofing in Cold Weather: Cold weather can slow down the proofing process. If your bread isn’t rising as expected, try placing the bread machine in a warmer spot in your kitchen, or use slightly warmer water (around 80-90°F) when adding the ingredients.
- Kneading is Key: While the bread machine does the kneading for you, understanding the importance of kneading is crucial. It develops the gluten in the flour, creating the structure that gives bread its elasticity and chewiness.
Serving & Storage Suggestions
This seven-grain bread is incredibly versatile and can be enjoyed in countless ways.
- Serving: Serve warm slices with butter, jam, or honey for a simple yet satisfying breakfast or snack. It’s also excellent for making sandwiches, toast, or grilled cheese. For a heartier meal, try using it to make croutons for salads or bread pudding.
- Storage: Store leftover bread in an airtight container at room temperature for up to 3 days. For longer storage, you can freeze the bread for up to 2 months. Slice the bread before freezing for easy thawing.
- Reheating: To reheat frozen bread, thaw it at room temperature or in the microwave. You can also toast it in a toaster or warm it in the oven for a few minutes to restore its crispness.
Nutritional Information
| Nutrient | Amount per Serving* | % Daily Value |
|---|---|---|
| Calories | 164 kcal | 8% |
| Total Fat | 2.6g | 4% |
| Saturated Fat | 0.6g | 3% |
| Cholesterol | 0mg | 0% |
| Sodium | 396mg | 17% |
| Total Carbohydrate | 30.8g | 10% |
| Dietary Fiber | 2.0g | 8% |
| Sugars | 3.6g | 0% |
| Protein | 4.7g | 9% |
*Based on a serving size of 1/12th of the loaf. Nutritional values are estimates and can vary based on specific ingredients and serving sizes.
Variations & Substitutions
- Gluten-Free: For a gluten-free version, substitute the all-purpose and whole wheat flours with a gluten-free bread flour blend. Be sure to use a gluten-free five-grain cereal as well.
- Dairy-Free: This recipe is already dairy-free! Just ensure that your shortening is also dairy-free.
- Vegan: To make this recipe vegan, substitute the honey with maple syrup or agave nectar.
- Seeded Bread: Add 1/4 cup of mixed seeds (such as flax, sunflower, or pumpkin seeds) to the dough for added texture and flavor.
- Herb Infusion: Mix in a tablespoon of dried herbs, such as rosemary, thyme, or oregano, for a savory twist.
- Sprouted Grains: Substitute part or all of the five-grain cereal with sprouted grains for a nuttier and more nutritious bread.
FAQs (Frequently Asked Questions)
Q: Can I make this bread without a bread machine?
A: While this recipe is specifically designed for a bread machine, you can adapt it for a conventional oven. You’ll need to knead the dough by hand or with a stand mixer, let it rise twice, and then bake it in a preheated oven at 375°F (190°C) for about 30-40 minutes.
Q: Why is my bread dense and not rising properly?
A: This can be due to several factors, including using expired yeast, not measuring the ingredients accurately, or not allowing the dough to rise long enough. Ensure your yeast is fresh, measure precisely, and give the dough ample time to rise in a warm place.
Q: Can I use bread flour instead of all-purpose flour?
A: Yes, you can use bread flour for a chewier texture. However, you may need to adjust the amount of liquid, as bread flour absorbs more water than all-purpose flour.
Q: How do I store the bread to keep it fresh longer?
A: Store the bread in an airtight container at room temperature. To prevent it from drying out, you can also wrap it tightly in plastic wrap or a reusable bread bag. Freezing is another great option for longer storage.
Q: What can I do if my bread crust is too hard?
A: To soften the crust, brush the top of the loaf with melted butter or olive oil immediately after baking. You can also store the bread in a plastic bag to trap moisture and soften the crust.
Final Thoughts
I sincerely hope this recipe for Seven Grain Bread brings as much joy to your kitchen as it has to mine. There’s something truly special about the aroma of freshly baked bread filling the air, a comforting reminder of simpler times and shared meals. Don’t hesitate to experiment with different grains and flavors to make it your own. And please, share your creations and feedback – I’d love to hear how it turns out for you. Happy baking!