
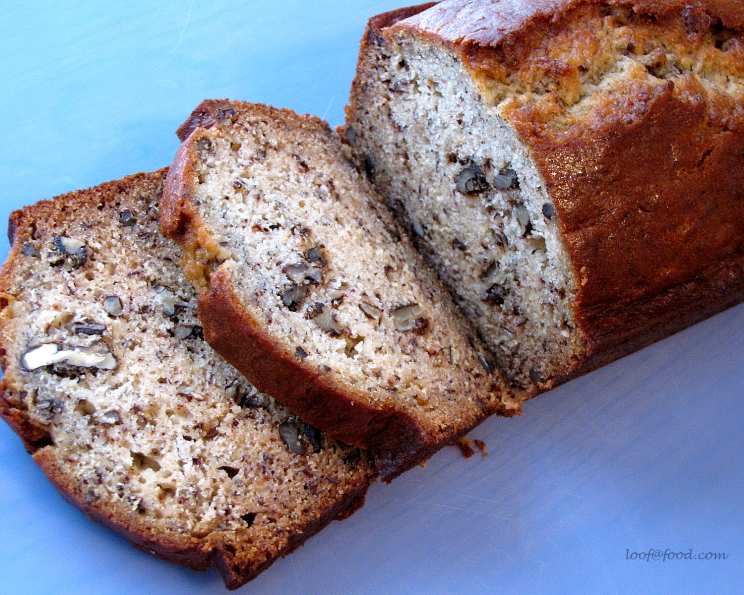
Sheila’s Banana Bread: A Family Classic
The aroma of banana bread baking in the oven is pure nostalgia for me. I remember being a little girl, perched on a stool in my grandmother’s kitchen, watching her hands transform speckled, overripe bananas into a golden-brown loaf. That warm, comforting smell, mixed with the anticipation of that first slice slathered with butter, is a memory I cherish. This recipe, a slightly adapted version of my grandmother’s, always brings me right back to her cozy kitchen.
Recipe Overview
- Prep Time: 20 minutes
- Cook Time: 1 hour 10 minutes
- Total Time: 1 hour 30 minutes
- Servings: Approximately 12 slices
- Yield: 1 loaf
- Dietary Type: Vegetarian
Ingredients
- 2 cups all-purpose flour
- 1 teaspoon baking soda
- 1 teaspoon baking powder
- 1 teaspoon salt
- 1/2 cup (1 stick) butter, softened
- 1 cup sugar
- 2 eggs
- 1 teaspoon vanilla extract
- 3 medium ripe bananas, mashed (about 1 1/2 cups)
- 1/2 cup milk
- 1 cup chopped walnuts or chopped pecans (optional)
Equipment Needed
- 9x5x3-inch loaf pan
- Mixing bowls (medium)
- Electric mixer or whisk
- Measuring cups and spoons
- Rubber spatula
- Cooling rack
- Thin knife or offset spatula
Instructions
- Preheat your oven to 350°F (175°C). Ensuring your oven is properly preheated is crucial for even baking and the correct rise.
- Grease and flour a 9x5x3-inch loaf pan. A light coating of grease (butter or cooking spray) followed by a dusting of flour will prevent the banana bread from sticking. Tap out any excess flour.
- In a medium bowl, whisk together the flour, baking soda, baking powder, and salt. This dry ingredient mixture should be well combined to ensure even leavening.
- In another medium bowl, cream together the softened butter and sugar using an electric mixer (or a sturdy whisk) until light and fluffy. This step is important for creating air pockets, resulting in a lighter, more tender bread.
- Beat in the eggs, one at a time, incorporating each fully before adding the next. This helps to emulsify the mixture and prevent curdling.
- Stir in the vanilla extract. The vanilla enhances the overall flavor profile of the banana bread.
- Gradually stir in the dry flour mixture alternately with the mashed bananas and milk, beginning and ending with the flour mixture. Mix until just combined, being careful not to overmix. Overmixing develops the gluten in the flour, which can lead to a tough bread.
- Gently fold in 3/4 cup of the chopped walnuts or pecans (if using). Reserve the remaining nuts for topping, if desired.
- Pour the batter into the prepared loaf pan, spreading it evenly.
- Sprinkle the remaining 1/4 cup of nuts over the top of the batter (optional).
- Bake for 1 hour and 10 minutes, or until a wooden pick inserted into the center comes out clean. If the top of the bread starts to brown too quickly, you can tent it with aluminum foil during the last 15-20 minutes of baking.
- Cool the bread in the pan on a wire rack for about 10 minutes.
- Run a thin knife or offset spatula around the edges of the pan to loosen the bread.
- Invert the bread onto the wire rack and allow it to cool completely.
- Once completely cooled, wrap tightly in plastic wrap or foil and store at room temperature.
Expert Tips & Tricks
- Use very ripe bananas: The riper the bananas, the sweeter and more flavorful your banana bread will be. Bananas with dark spots are ideal. If your bananas are not ripe enough, you can bake them in their peels at 300°F (150°C) for 15-20 minutes to soften them and bring out their sweetness.
- Don’t overmix: Overmixing the batter develops the gluten in the flour, resulting in a tough bread. Mix only until the ingredients are just combined. A few streaks of flour are okay.
- Adjust sugar to taste: Depending on the ripeness of your bananas and your personal preference, you can adjust the amount of sugar in the recipe.
- Toast the nuts: Toasting the nuts before adding them to the batter will enhance their flavor and aroma. Toast them in a dry skillet over medium heat for a few minutes, or in the oven at 350°F (175°C) for 5-7 minutes.
- Add chocolate chips: For an extra touch of indulgence, add 1/2 to 1 cup of chocolate chips to the batter.
- Make it ahead: Banana bread is even better the next day! The flavors meld together and the texture becomes more moist.
- Fixing a sunken middle: If your banana bread consistently sinks in the middle, it could be due to underbaking, too much leavening agent (baking soda or baking powder), or a too-wet batter. Make sure your oven temperature is accurate, measure the baking soda and baking powder precisely, and don’t add too much mashed banana.
Serving & Storage Suggestions
Sheila’s Banana Bread is delicious served warm or at room temperature. Slice and enjoy it plain, or spread it with butter, cream cheese, or a dollop of whipped cream. It’s a wonderful accompaniment to coffee or tea.
Storage:
- Room Temperature: Properly wrapped, banana bread will last for 2-3 days at room temperature.
- Refrigerator: For longer storage, keep it in the refrigerator for up to a week.
- Freezer: To freeze banana bread, wrap it tightly in plastic wrap and then in aluminum foil. It can be frozen for up to 2-3 months. Thaw overnight in the refrigerator or at room temperature.
Reheating:
You can reheat banana bread slices in the microwave for a few seconds, or in a toaster oven until warm.
Nutritional Information
(Estimated values per slice, based on 12 slices and using walnuts)
| Nutrient | Amount per Serving | % Daily Value |
|---|---|---|
| Calories | 318 kcal | 16% |
| Total Fat | 16g | 25% |
| Saturated Fat | 7g | 35% |
| Cholesterol | 36mg | 12% |
| Sodium | 350mg | 15% |
| Total Carbohydrate | 40g | 13% |
| Dietary Fiber | 2g | 8% |
| Sugars | 20g | – |
| Protein | 4g | 8% |
Note: Nutritional information is an estimate and may vary based on specific ingredients and preparation methods.
Variations & Substitutions
- Gluten-Free Banana Bread: Substitute the all-purpose flour with a gluten-free all-purpose flour blend. You may need to add a binder such as xanthan gum to help with the texture.
- Dairy-Free Banana Bread: Replace the butter with a plant-based butter alternative and the milk with almond milk, soy milk, or oat milk.
- Vegan Banana Bread: Replace the butter with a plant-based butter alternative, the milk with almond milk, soy milk, or oat milk, and the eggs with flax eggs (1 tablespoon ground flaxseed mixed with 3 tablespoons of water per egg, let sit for 5 minutes to thicken).
- Spiced Banana Bread: Add 1/2 teaspoon of ground cinnamon, nutmeg, or allspice to the dry ingredients.
- Chocolate Chunk Banana Bread: Substitute the chopped nuts with chocolate chunks.
- Tropical Banana Bread: Add 1/2 cup of shredded coconut and 1/4 cup of chopped macadamia nuts.
FAQs (Frequently Asked Questions)
Q: Can I use frozen bananas for this recipe?
A: Yes! Frozen bananas work well in banana bread. Just make sure to thaw them completely and drain off any excess liquid before mashing.
Q: How do I prevent the banana bread from sticking to the pan?
A: Thoroughly grease and flour the loaf pan before adding the batter. You can also line the pan with parchment paper, leaving an overhang to easily lift the baked bread out.
Q: Can I reduce the amount of sugar in this recipe?
A: Yes, you can reduce the sugar by up to 1/4 cup without significantly affecting the texture of the bread. Keep in mind that reducing the sugar will also reduce the sweetness.
Q: My banana bread is always gummy. What am I doing wrong?
A: A gummy texture is often caused by underbaking or overmixing. Make sure to bake the bread until a wooden pick inserted into the center comes out clean, and avoid overmixing the batter.
Q: Can I double this recipe?
A: Yes, you can easily double this recipe. You’ll need to bake it in two loaf pans or adjust the baking time if using a larger pan.
Final Thoughts
Sheila’s Banana Bread is more than just a recipe; it’s a slice of home, a comforting reminder of family and warmth. I hope this recipe brings as much joy to your kitchen as it has to mine. Don’t be afraid to experiment with variations and make it your own. And most importantly, share it with the people you love. Enjoy!