
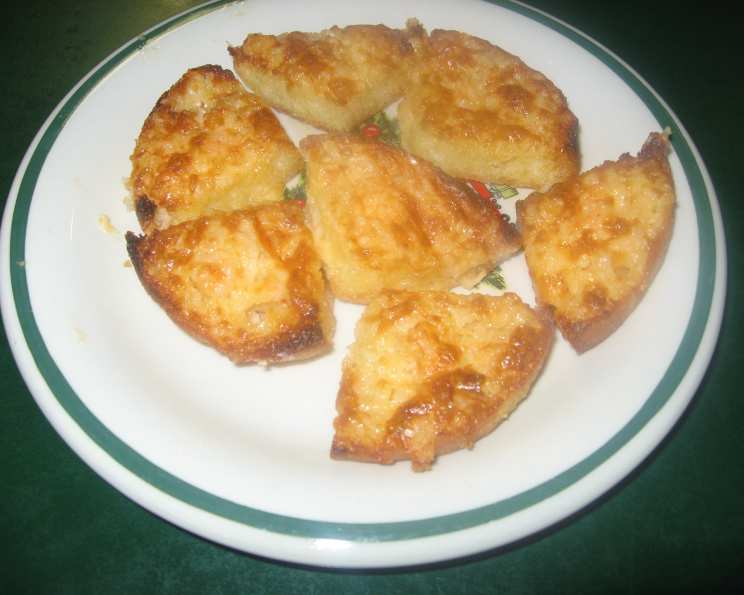
Shrimpie’s: A Nostalgic Bite of Seafood Delight
The aroma still wafts back to me sometimes – the faintly oceanic tang of tiny shrimp, mingling with the sharp, comforting scent of melted cheese and garlic. These weren’t just appetizers; they were Shrimpie’s, and they were a staple at every family gathering when I was growing up. My Aunt Carol, the queen of effortless elegance, would always bring a platter piled high with these golden-brown bites, and they’d disappear in minutes, leaving behind only cheesy crumbs and happy memories. I still make them to this day, and the taste always brings a smile to my face.
Recipe Overview
- Prep Time: 15 minutes
- Cook Time: 4-5 minutes
- Total Time: 20 minutes
- Servings: 48 Appetizers
- Yield: 48 Appetizers
- Dietary Type: Seafood
Ingredients
- 1 (4 ounce) can baby shrimp, drained well
- 1 (5 ounce) jar Kraft Old English Cheese
- ½ cup (1 stick) butter, softened
- 3 tablespoons mayonnaise
- 1 teaspoon garlic salt
- 6 English muffins
Equipment Needed
- Mixing Bowl
- Spatula or Spoon
- Baking Sheet
- Broiler
Instructions
-
Preheat your broiler. This cooking method is quick, so keep a close watch on your Shrimpie’s to prevent burning. Position the rack in the oven so the tops of the Shrimpie’s will be 4-6 inches from the broiler.
-
In a medium mixing bowl, combine the softened butter, Kraft Old English Cheese, mayonnaise, and garlic salt. Use a spatula or spoon to thoroughly mix all of the ingredients together until smooth and creamy. Ensure there are no lumps of cheese or butter remaining.
-
Next, add the drained baby shrimp to the cheese mixture. Gently fold the shrimp into the mixture, ensuring they are evenly distributed. Be careful not to overmix, as you want the shrimp to remain intact.
-
Prepare the English muffins by splitting them in half. Then, cut each half into quarters. This will give you 48 individual appetizer-sized pieces.
-
Using a teaspoon, generously spread the shrimp and cheese mixture onto each English muffin quarter. Make sure each piece is evenly coated with the mixture.
-
Arrange the prepared Shrimpie’s on a baking sheet. Place them under the preheated broiler and broil until the cheese mixture is bubbling and slightly browned on top. This usually takes about 4-5 minutes, but watch them carefully. The tops should be golden brown, but not burnt.
-
Remove the baking sheet from the broiler and let the Shrimpie’s cool slightly before serving.
-
Serve hot and watch them disappear!
Expert Tips & Tricks
-
Softening the Butter: Make sure the butter is properly softened before mixing. This will help create a smooth and creamy base for the cheese mixture. You can leave it at room temperature for about an hour, or microwave it in 10-second intervals, being careful not to melt it.
-
Freezing for Later: These Shrimpie’s freeze beautifully! Assemble them as instructed, then place them on a baking sheet lined with parchment paper. Flash freeze them until solid, about 1-2 hours. Once frozen, transfer them to a freezer-safe zip-top bag. You can then bake them directly from frozen, adding a few minutes to the broiling time. This is perfect for parties when you need appetizers at a moment’s notice.
-
Broiler Awareness: Broilers can vary significantly in heat intensity. Keep a very close eye on your Shrimpie’s while they are under the broiler to prevent burning. If they are browning too quickly, lower the baking sheet rack in the oven, or reduce the broiling time.
-
Cheese Quality: Using Kraft Old English Cheese is key to achieving the authentic flavor of Shrimpie’s. While you can experiment with other cheese spreads, the unique tang and texture of Old English is what makes this appetizer so special.
Serving & Storage Suggestions
Serve Shrimpie’s immediately while they are hot and bubbly. Arrange them on a platter lined with a paper towel to absorb any excess grease. Garnish with a sprinkle of fresh parsley or paprika for added visual appeal.
If you have any leftovers (though that’s unlikely!), store them in an airtight container in the refrigerator for up to 2 days. Reheat them in the broiler for a few minutes until heated through, or in a toaster oven for a more even result. Note that the English muffins may become slightly soggy upon reheating, but they will still be delicious.
Do not leave Shrimpie’s at room temperature for more than 2 hours, as this can increase the risk of bacterial growth.
Nutritional Information
(Note: Values are approximate and may vary based on specific ingredient brands.)
| Nutrient | Amount per Serving | % Daily Value |
|---|---|---|
| Calories | 39 kcal | 2% |
| Calories from Fat | 21 kcal | |
| Total Fat | 2.4 g | 3% |
| Saturated Fat | 1.3 g | 6% |
| Cholesterol | 9.9 mg | 3% |
| Sodium | 55.7 mg | 2% |
| Total Carbohydrate | 3.4 g | 1% |
| Dietary Fiber | 0.2 g | 1% |
| Sugars | 0.3 g | 1% |
| Protein | 1.1 g | 2% |
Variations & Substitutions
-
Spice it Up: Add a pinch of red pepper flakes or a dash of hot sauce to the cheese mixture for a spicy kick.
-
Herbaceous Delight: Mix in some finely chopped fresh herbs, such as dill, chives, or parsley, for a more complex flavor profile.
-
Garlic Lovers: For an extra garlicky punch, add a clove of minced garlic to the cheese mixture.
-
Gluten-Free Option: Use gluten-free English muffins to make this appetizer suitable for those with gluten sensitivities.
-
Seafood Swap: Substitute the baby shrimp with cooked crab meat or flaked tuna for a different seafood flavor. Adjust cooking time accordingly as these options may heat up more quickly.
FAQs (Frequently Asked Questions)
Q: Can I use regular cheddar cheese instead of Kraft Old English Cheese?
A: While you can, the Kraft Old English Cheese has a very particular, slightly tangy flavor that’s essential to the classic Shrimpie’s taste. Using cheddar will alter the flavor profile significantly.
Q: How can I prevent the Shrimpie’s from getting soggy?
A: Make sure to drain the baby shrimp very well before adding them to the cheese mixture. Also, serve the Shrimpie’s immediately after broiling.
Q: Can I prepare the cheese mixture ahead of time?
A: Yes, you can prepare the cheese mixture up to 24 hours in advance. Store it in an airtight container in the refrigerator.
Q: What if I don’t have a broiler? Can I bake these in the oven?
A: Yes, you can bake them in the oven at 350°F (175°C) for about 10-12 minutes, or until the cheese is melted and bubbly.
Q: How do I know when the Shrimpie’s are done broiling?
A: The cheese mixture should be melted, bubbly, and lightly browned on top. Keep a close eye on them, as broilers can vary in intensity.
Final Thoughts
Shrimpie’s are more than just a simple appetizer; they’re a delicious reminder of family, celebration, and the joy of sharing good food. I encourage you to try this recipe and experience the magic of this classic dish for yourself. Don’t be afraid to add your own personal touch, and most importantly, share them with the people you love. These little bites of seafood delight are guaranteed to bring a smile to everyone’s face. Cheers to good food and happy memories!