
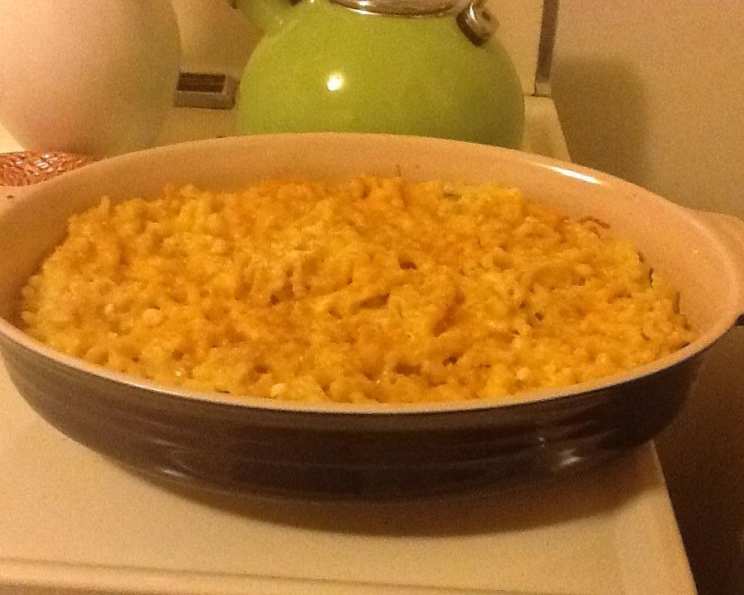
Simple and Delicious Mac ‘n’ Cheese
The scent of baking cheese and bubbling pasta… it instantly transports me back to childhood. My grandmother, a formidable woman with an even more formidable casserole dish, always made mac ‘n’ cheese for family gatherings. It wasn’t fancy, just honest-to-goodness comfort food that brought everyone to the table. While I’ve elevated my culinary skills over the years, I still strive to recreate that same sense of warmth and satisfaction in every batch I make. This recipe comes pretty darn close.
Recipe Overview
- Prep Time: 10 minutes
- Cook Time: 25 minutes
- Total Time: 35 minutes
- Servings: 6
- Dietary Type: Vegetarian
Ingredients
- 1 (16 ounce) box cavatappi pasta (if you use a smaller pasta, use 3/4 of the box)
- 2 cups sharp cheddar cheese, shredded
- 1/2 cup parmesan cheese, freshly grated
- 2 cups milk (I recommend measuring it out and letting it warm up on the counter for a few minutes so it doesn’t seize up when added to the butter and flour)
- 1/4 cup flour
- 1/4 cup butter, half a stick, preferably softened but not necessary
- Pepper to taste
- Breadcrumbs (optional)
Equipment Needed
- Large pot
- Medium sauté pan
- Whisk
- 8×8 inch casserole dish
Instructions
- Preheat your oven to 350°F (175°C).
- Cook the cavatappi pasta according to the package directions. Be sure to salt the water generously. Nobody wants bland pasta! Drain the pasta well and set aside. I usually slightly undercook my pasta for mac ‘n’ cheese since it will continue cooking in the oven.
- While the pasta is cooking, melt the butter in a medium sauté pan over medium heat.
- Once the butter is melted, stir in the flour and pepper. The pepper adds a subtle kick, but you can adjust the amount to your preference.
- Whisk the flour and butter mixture constantly until it is incorporated and bubbling. This creates a roux, which is the base for our cheese sauce. Cook for about 1-2 minutes, stirring constantly, to cook out the raw flour taste.
- Slowly add the milk, whisking constantly to prevent lumps from forming. Gradually incorporating the milk is key to a smooth sauce. Don’t dump it all in at once!
- Continue to stir often until the milk begins to thicken and bubbles form around the edges of the pan. This usually takes about 5-7 minutes. The sauce should be thick enough to coat the back of a spoon.
- Turn off the heat and add 1/4 cup of the parmesan cheese and 1 1/2 cups of the cheddar cheese.
- Whisk until all the cheese is completely combined and melted into a smooth sauce. The sauce should be luscious and creamy.
- Gently fold in the cooked pasta until it’s evenly coated with the cheese sauce.
- Transfer the cheesy pasta mixture to a baking dish, typically an 8×8 inch casserole dish.
- Top with the reserved parmesan and cheddar cheeses, distributing them evenly over the surface.
- Dust lightly with breadcrumbs for a golden, crunchy topping (optional).
- Bake in the preheated oven for about 20 minutes, or until lightly toasted on top and bubbly around the edges. The cheese should be melted and slightly browned.
- Let the mac ‘n’ cheese cool for a few minutes before serving. This allows the sauce to thicken slightly and prevents burning your mouth.
Expert Tips & Tricks
- Cheese Quality: Use high-quality cheddar cheese for the best flavor. Pre-shredded cheese often contains cellulose, which can prevent it from melting smoothly. Shredding your own cheese is always preferable.
- Preventing a Grainy Sauce: Don’t overheat the cheese sauce, as this can cause the cheese to separate and become grainy. Keep the heat low and stir constantly.
- Flavor Boost: Add a pinch of nutmeg to the cheese sauce for a warm, subtle spice. A dash of Dijon mustard can also enhance the flavor.
- Make-Ahead Option: Assemble the mac ‘n’ cheese in the baking dish, cover it tightly with plastic wrap, and refrigerate for up to 24 hours. Add a few extra minutes to the baking time when cooking from cold.
- Broiler Boost: For an extra crispy topping, broil the mac ‘n’ cheese for the last minute or two of baking, keeping a close eye to prevent burning.
Serving & Storage Suggestions
Serve the mac ‘n’ cheese hot from the oven as a comforting main course or a delicious side dish. Garnish with a sprinkle of fresh parsley or chives for a pop of color.
Leftover mac ‘n’ cheese can be stored in an airtight container in the refrigerator for up to 3-4 days. To reheat, microwave individual portions or bake in a preheated oven at 350°F (175°C) until heated through. You may need to add a splash of milk to the sauce to restore its creaminess.
Freezing mac ‘n’ cheese is not recommended, as the sauce may separate and become grainy upon thawing. However, if you must freeze it, allow it to cool completely before transferring it to a freezer-safe container. Thaw in the refrigerator overnight before reheating.
Nutritional Information
| Nutrient | Amount per Serving | % Daily Value |
|---|---|---|
| Calories | 608.5 kcal | N/A |
| Calories from Fat | 240 g | 40% |
| Total Fat | 26.7 g | 41% |
| Saturated Fat | 16.3 g | 81% |
| Cholesterol | 78.6 mg | 26% |
| Sodium | 473.4 mg | 19% |
| Total Carbohydrate | 65.3 g | 21% |
| Dietary Fiber | 2.6 g | 10% |
| Sugars | 2.3 g | N/A |
| Protein | 25.8 g | 51% |
Note: Nutritional information is an estimate and may vary based on specific ingredients and portion sizes.
Variations & Substitutions
- Gluten-Free: Use gluten-free pasta and a gluten-free all-purpose flour blend for a gluten-free version.
- Different Cheeses: Experiment with different types of cheese, such as Gruyere, Fontina, or Pepper Jack, for a unique flavor profile.
- Vegetable Additions: Stir in cooked vegetables, such as broccoli, cauliflower, peas, or spinach, for added nutrients and texture.
- Spicy Kick: Add a pinch of cayenne pepper or a dash of hot sauce to the cheese sauce for a spicy kick.
- Meat Lovers: Mix in cooked bacon, ham, or sausage for a heartier meal.
FAQs (Frequently Asked Questions)
Q: Can I use pre-shredded cheese?
A: While it’s more convenient, pre-shredded cheese often contains cellulose, which can prevent it from melting smoothly. Shredding your own cheese is always recommended for the best results.
Q: How can I prevent my cheese sauce from becoming grainy?
A: Don’t overheat the cheese sauce, and add the cheese off the heat, stirring until just melted. Overheating can cause the cheese to separate and become grainy.
Q: Can I make this mac ‘n’ cheese ahead of time?
A: Yes, you can assemble the mac ‘n’ cheese in the baking dish, cover it tightly with plastic wrap, and refrigerate for up to 24 hours before baking.
Q: Can I freeze this mac ‘n’ cheese?
A: Freezing is not recommended, as the sauce may separate and become grainy upon thawing. However, if you must freeze it, allow it to cool completely before freezing.
Q: What can I add to make this mac ‘n’ cheese more exciting?
A: Consider adding cooked bacon, broccoli, or a dash of hot sauce to customize the flavor to your liking.
Final Thoughts
Mac ‘n’ cheese is more than just a dish; it’s a symbol of comfort, family, and simple pleasures. I encourage you to try this recipe and make it your own. Experiment with different cheeses, add your favorite vegetables, and share it with the people you love. Let me know in the comments how it turns out, and what variations you tried! And if you’re looking for a beverage pairing, a crisp, dry white wine like Pinot Grigio would be a delightful complement. Happy cooking!