
Simple Cheeseburger Quesadillas: A Culinary Mashup
I remember being a kid, absolutely obsessed with cheeseburgers. But my mom, bless her heart, was all about quick and easy meals on busy weeknights. One evening, she surprised us with something completely unexpected: cheeseburger quesadillas. The warm, melty cheese oozing out, the savory beef mingling with the slightly tangy red onion… it was a revelation! It was the perfect fusion of two comfort food classics, and it’s a dish I still make today when I’m craving something both nostalgic and satisfying.
Recipe Overview
- Prep Time: 10 minutes
- Cook Time: 15 minutes
- Total Time: 25 minutes
- Servings: 6
- Dietary Type: Omnivore
Ingredients
- 6 flour tortillas, 8-inch
- 1 lb ground beef
- 1 cup mozzarella cheese, shredded
- 1 cup mild cheddar cheese, shredded
- 1 teaspoon seasoning salt
- ½ teaspoon ground black pepper
- 1 cup red onion, diced
- Cooking spray
Equipment Needed
- Large skillet
- Medium-sized bowl
- Griddle or second skillet
- Spatula
- Cutting board
- Knife
Instructions
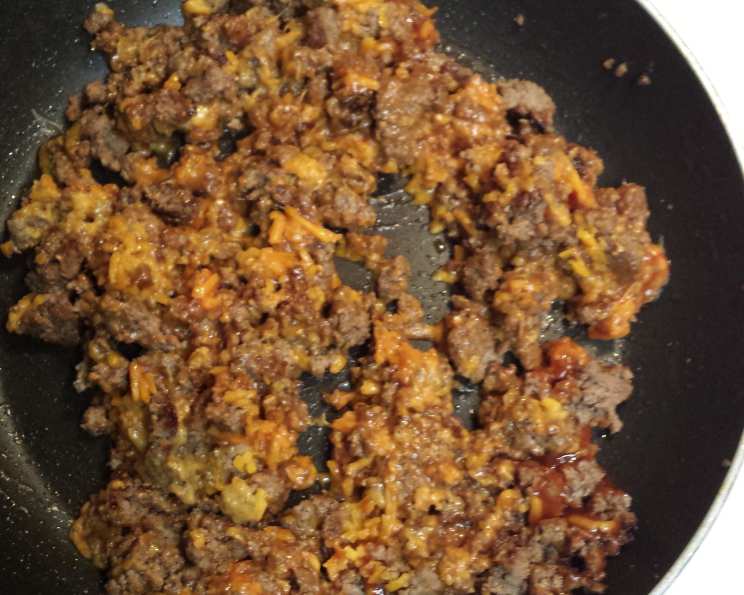
- First, cook the ground beef in a large skillet over medium-high heat. As the beef cooks, add the seasoning salt and ground black pepper. Break up the beef with a spatula as it browns, ensuring it cooks evenly. Continue cooking until the beef is completely cooked through and no longer pink. This typically takes about 7-10 minutes.
- Once the beef is cooked, drain off any excess grease from the skillet. Nobody wants soggy quesadillas! Transfer the cooked beef to a medium-sized bowl.
- Now for the cheesy goodness! Add the shredded mozzarella cheese and shredded mild cheddar cheese to the bowl with the cooked ground beef. Also, add the diced red onion.
- Using a spoon or spatula, thoroughly mix all the ingredients in the bowl until the cheese and onions are evenly distributed throughout the beef. This mixture is your delicious quesadilla filling.
- Time to assemble the quesadillas! Place an equal amount of the cheeseburger mixture onto each tortilla, spreading it evenly across one half of the tortilla. Try not to overfill them, or the filling will squish out when you fold them.
- Fold each tortilla over to create a “half moon” shape. Press down lightly on the folded quesadilla to help seal it and ensure the filling is evenly distributed.
- Coat a skillet or griddle with cooking spray and warm it over medium heat. The cooking spray prevents the quesadillas from sticking and helps them get a nice golden-brown color.
- Carefully place the folded quesadillas onto the hot skillet or griddle.
- Lightly brown each quesadilla for two to three minutes on each side, or until the cheese melts and the tortillas are crisp and golden brown. Keep a close eye on them to prevent burning, and adjust the heat if necessary. The key is to achieve that perfect balance of melty cheese and crispy tortilla.
- Once the quesadillas are cooked to your liking, remove them from the pan and place them on a cutting board.
- Cut each quesadilla into 3 wedges using a sharp knife. This makes them easier to handle and share.
- Serve the cheeseburger quesadillas immediately with your favorite cheeseburger fixings, such as lettuce, tomatoes, and pickles. Ketchup, mustard, mayonnaise, and your favorite burger sauce also make excellent dipping options.
Expert Tips & Tricks
- For extra flavor, consider adding a dash of Worcestershire sauce or a pinch of garlic powder to the ground beef while it’s cooking.
- To prevent the quesadillas from becoming soggy, make sure to drain the ground beef thoroughly after cooking.
- If you want to add a bit of spice, try using pepper jack cheese instead of mozzarella or cheddar.
- For a truly indulgent experience, brush the outside of the tortillas with melted butter before cooking. This will give them an extra crispy and golden-brown crust.
- If you’re making a large batch of quesadillas, you can keep them warm in a low oven (around 200°F or 95°C) until ready to serve.
- If the cheese isn’t melting fast enough but the tortilla is browning too quickly, lower the heat and cover the skillet with a lid for a minute or two to help the cheese melt.
- Don’t overcrowd the skillet! Cook the quesadillas in batches to ensure they brown evenly.
Serving & Storage Suggestions
Serve these cheeseburger quesadillas immediately while they’re hot and the cheese is gooey. Arrange the wedges on a platter and garnish with fresh lettuce, sliced tomatoes, and pickles for a classic cheeseburger presentation.
Leftover quesadillas can be stored in an airtight container in the refrigerator for up to 3 days. Reheat them in a skillet, microwave, or oven until warmed through. For the best results, reheat them in a skillet over medium heat until the tortilla is crispy and the cheese is melted again. Microwaving them can make the tortillas a bit soggy, so it’s best to use the skillet or oven if possible.
Freezing is not recommended as the texture of the tortillas can change significantly after thawing, but if necessary, wrap each quesadilla tightly in plastic wrap and then place them in a freezer-safe bag. Thaw completely before reheating.
Nutritional Information
| Nutrient | Amount per Serving | % Daily Value |
|---|---|---|
| Calories | 399.2 kcal | N/A |
| Calories from Fat | 216 g | 54% |
| Total Fat | 24.1 g | 37% |
| Saturated Fat | 11.4 g | 57% |
| Cholesterol | 85.9 mg | 28% |
| Sodium | 475.8 mg | 19% |
| Total Carbohydrate | 18.7 g | 6% |
| Dietary Fiber | 1.4 g | 5% |
| Sugars | 2 g | N/A |
| Protein | 25.7 g | 51% |
Note: Nutritional information is an estimate and may vary depending on specific ingredients and portion sizes.
Variations & Substitutions
- Leaner Option: Substitute extra lean ground beef, ground chicken, or ground turkey for the regular ground beef.
- Lower Fat Cheese: Choose a skim milk or fat-free variety of cheese to reduce the fat and cholesterol content.
- Spicy Kick: Add a pinch of cayenne pepper or a drizzle of hot sauce to the beef mixture.
- Different Cheese Combinations: Experiment with different cheese combinations, such as Monterey Jack, provolone, or even a blend of Mexican cheeses.
- Vegetarian Version: Replace the ground beef with plant-based crumbles or black beans. Add some sautéed bell peppers and mushrooms for extra flavor and texture.
- Deluxe Version: Add diced tomatoes, shredded lettuce, and a dollop of sour cream or guacamole to the finished quesadillas.
- Add some Heat: Mix in some jalapenos into the meat mixture.
FAQs (Frequently Asked Questions)
Q: Can I make these quesadillas ahead of time?
A: You can prepare the beef and cheese mixture ahead of time and store it in the refrigerator for up to 24 hours. Assemble and cook the quesadillas just before serving for the best results.
Q: Can I use smaller or larger tortillas?
A: Yes, you can use any size of tortilla you prefer. Adjust the amount of filling accordingly.
Q: How do I prevent the quesadillas from sticking to the skillet?
A: Make sure to coat the skillet with cooking spray before adding the quesadillas. You can also use a non-stick skillet for added insurance.
Q: Can I cook these quesadillas in the oven?
A: Yes, you can bake them in the oven at 375°F (190°C) for about 10-12 minutes, or until the cheese is melted and the tortillas are lightly browned.
Q: What other toppings can I add to these quesadillas?
A: The possibilities are endless! Consider adding bacon bits, sautéed mushrooms, caramelized onions, or even a drizzle of your favorite barbecue sauce.
Final Thoughts
These Simple Cheeseburger Quesadillas are a guaranteed crowd-pleaser. They’re quick, easy, and endlessly customizable to suit your tastes. Whether you’re looking for a fun weeknight meal or a tasty appetizer for a party, these quesadillas are sure to hit the spot. Don’t be afraid to get creative with your toppings and fillings, and most importantly, have fun! I encourage you to try out this recipe. Once you do, share your feedback with me. I would like to know how yours turned out. Maybe you could pair this with coleslaw and an ice-cold beer or soda for the ultimate comfort meal.