
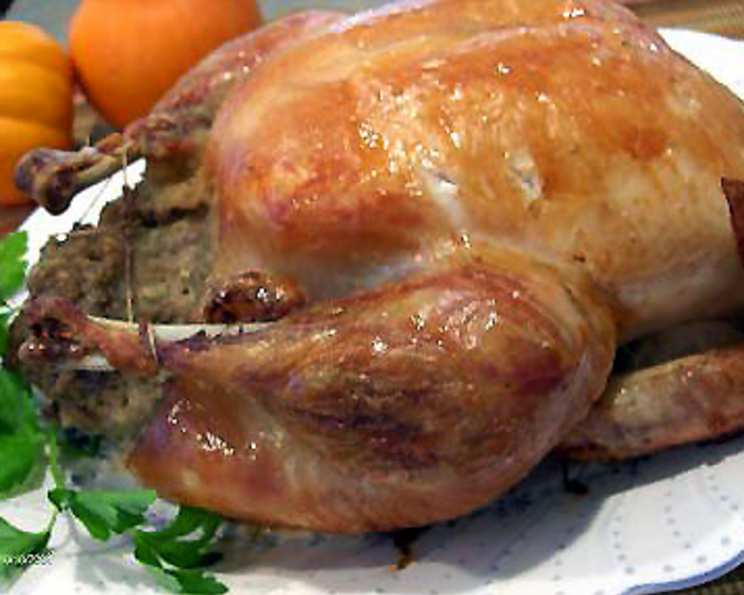
Simple Stuffed Roast Chicken With Gravy: A Beginner’s Delight
There’s something deeply comforting about the aroma of a roasting chicken filling the kitchen. I remember being a young child, perched on a stool, mesmerized as my grandmother carefully trussed a chicken, her hands moving with practiced ease. The anticipation was palpable, the promise of juicy, flavorful meat and crispy skin a reward worth waiting for. That memory is forever intertwined with the joy of sharing a simple, yet elegant meal with loved ones, a tradition I cherish and continue to this day.
Recipe Overview
- Prep Time: 25 minutes
- Cook Time: 2 hours 45 minutes
- Total Time: 3 hours 10 minutes
- Servings: 6
- Yield: 1 roast chicken with gravy
- Dietary Type: Omnivore
Ingredients
- 1 (120 g) box chicken flavor stuffing mix
- 1 1/4 cups hot water (hot tap water is ok)
- 2 tablespoons butter or 2 tablespoons margarine
- 1 (8 ounce) can water chestnuts, drained and rough chopped
- 1 small onion, chopped
- 1-2 tablespoon poultry seasoning, to taste
- 1 (5 lb) chicken (fresh or frozen, thawed) or (5 lb) turkey (fresh or frozen, thawed)
- Salt & fresh ground pepper, to taste
- 1/4 cup butter, softened
- Aluminum foil
For the Gravy:
- Chicken giblets
- Water, to cover
- Salt and pepper, to taste
- 1 teaspoon poultry seasoning
- 3-4 tablespoons flour or 3-4 tablespoons cornstarch
- Hot water, to thin if necessary
Equipment Needed
- Roasting pan
- Medium bowl
- Saucepan
- Blender
- Whisk
- Strainer
- Kitchen string
- Paper towels
Instructions
- Preheat your oven to 400°F (200°C). This initial high heat helps to crisp the skin beautifully.
- In a medium bowl, empty the contents of the chicken flavor stuffing box, including both the bread crumb and seasoning envelopes.
- Add 1 1/4 cups of hot water and 2 tablespoons of butter (or margarine) to the bowl. Stir well to combine. The butter will melt into the breadcrumbs, creating a moist and flavorful base.
- Add the drained and roughly chopped water chestnuts and the chopped onion to the stuffing mixture. Also, add 1-2 tablespoons of poultry seasoning (or to taste). Mix everything thoroughly and set aside. This stuffing is simple but incredibly delicious.
- Check inside the chicken for the giblets. Remove them and set aside for the gravy. Many chickens come with the giblets packaged separately inside the cavity.
- Rinse the chicken inside and out with cold running water. This helps remove any lingering impurities.
- Dry the chicken thoroughly inside and out with paper towels. A dry bird is crucial for achieving crispy skin.
- Sprinkle salt and fresh ground pepper generously inside the cavity and all over the outside of the chicken. Don’t be shy! Seasoning is key to a flavorful roast.
- Place the chicken in a roasting pan. Make sure the pan is large enough to accommodate the bird comfortably.
- Loosely pack the stuffing mix into the main cavity of the chicken. If there’s any stuffing left over, pack it into the neck cavity, folding the skin over it to enclose the stuffing.
- If necessary, secure the neck skin with a toothpick. This will prevent the stuffing from spilling out during cooking.
- Take a length of kitchen string and tie the ends of the legs as close together as possible. This helps the chicken cook more evenly and maintain its shape.
- Rub the 1/4 cup of softened butter all over the outside of the chicken, making sure to cover the entire surface. This will contribute to a golden-brown, crispy skin.
- Take two lengths of aluminum foil. Place one piece over the chicken lengthwise, and the other piece sideways over the first piece, forming a cross.
- Tuck the foil tightly to the chicken, ensuring it’s touching the bottom of the roasting pan but not underneath the bird.
- If the bird is not completely covered (except for the underside), use a third piece of foil to finish covering it. This creates a steamy environment that helps keep the chicken moist during the initial roasting period.
- Place the roasting pan on the middle rack of the oven and roast at 400°F (200°C) for 15 minutes.
- Reduce the heat after 15 minutes to 350°F (175°C) and roast for approximately 2 hours.
- At about 2 hours, carefully lift the aluminum foil and poke the chicken with a fork. If the juices run clear, remove the foil and roast for a further 30 minutes to brown the skin to golden perfection.
- If the juices are not yet clear, roast a little longer and check again. The internal temperature should reach 165°F (74°C) in the thickest part of the thigh.
- Once the chicken is well browned, remove it to a platter, cover with foil, and let it rest for at least 15 minutes. This allows the juices to redistribute, resulting in a more tender and flavorful bird.
Making the Giblet Gravy:
- While the chicken rests, if you wish to make giblet gravy, take the giblets (and neck if it’s there), place them in a saucepan, cover with water, add salt and pepper and a little poultry seasoning if you wish, bring to a boil, reduce heat, and simmer for at least an hour. This extracts all the flavor from the giblets.
- Remove the giblets to a strainer, reserving the liquid.
- Chop the giblets and pick any meat off the neck bones.
- Add the chopped giblets and meat to a blender along with the reserved liquid.
- Blend to liquefy the mixture.
- Add 3-4 tablespoons of flour or cornstarch to the blender and blend to mix well. This will thicken the gravy.
- Pour off as much fat as possible from the roasting pan.
- Take a whisk and move up any bits and pieces of stuffing/chicken stuck to the bottom of the pan. Remove any large pieces of skin.
- Add the giblet mix from the blender to the roasting pan. Whisk around to combine with the pan drippings.
- Place the roasting pan in a 450°F to 500°F (230-260°C) oven until bubbly, about 10 minutes. The high heat will help the gravy thicken and develop a richer flavor.
- Add a small amount of hot water if necessary if it is too thick, until it is the consistency you want. Cook another 5 minutes.
- Whisk and pour into a gravy boat and serve hot with the roast chicken.
Alternative Gravy (Without Giblets):
- If you don’t have giblets, you can still make a delicious gravy. Simply whisk up the brown bits in the roasting pan.
- Add 1 cup of hot water and make a slurry of cold water and either flour or cornstarch.
- Add the slurry to the pan and whisk, cook the same as above, adding a little more water if necessary.
Expert Tips & Tricks
- Brining: For an extra juicy chicken, consider brining it in a salt and sugar solution for several hours before roasting. This will help the chicken retain moisture during cooking.
- Aromatic Herbs: Add fresh herbs like rosemary, thyme, and sage to the cavity of the chicken for an enhanced flavor profile.
- Vegetable Boost: Place chopped carrots, celery, and onions in the bottom of the roasting pan. They’ll add flavor to the gravy and make a delicious side dish.
- Crispy Skin Secret: After removing the foil, pat the chicken dry with paper towels before returning it to the oven to brown. This will help the skin get extra crispy.
- Doneness Check: Always use a meat thermometer to ensure the chicken is cooked to a safe internal temperature of 165°F (74°C) in the thickest part of the thigh.
Serving & Storage Suggestions
Serve your beautifully roasted chicken hot, carved into portions, with a generous ladle of the homemade gravy. Complement it with classic sides like mashed potatoes, roasted vegetables, or a fresh green salad.
Storage:
- Room Temperature: Do not leave cooked chicken at room temperature for more than 2 hours.
- Refrigerator: Store leftover chicken in an airtight container in the refrigerator for up to 3-4 days.
- Freezer: For longer storage, freeze the chicken in airtight containers or freezer bags for up to 2-3 months.
Reheating:
- Oven: Reheat leftover chicken in the oven at 350°F (175°C) until heated through. Add a little broth or water to the pan to prevent it from drying out.
- Microwave: Reheat chicken in the microwave on medium power until heated through.
Nutritional Information
| Nutrient | Amount per Serving | % Daily Value |
|---|---|---|
| Calories | 950 kcal | 48% |
| Total Fat | 65g | 83% |
| Saturated Fat | 22g | 110% |
| Cholesterol | 300mg | 100% |
| Sodium | 650mg | 27% |
| Total Carbohydrate | 25g | 8% |
| Dietary Fiber | 1.8g | 7% |
| Sugars | 4g | N/A |
| Protein | 70g | 140% |
Note: Nutritional information is an estimate and may vary based on specific ingredients and cooking methods.
Variations & Substitutions
- Gluten-Free: Use a gluten-free stuffing mix and cornstarch instead of flour for the gravy.
- Herb Roasted Chicken: Add fresh herbs like rosemary, thyme, and sage under the skin of the chicken for an herbaceous flavor.
- Lemon-Garlic Chicken: Rub the chicken with lemon zest, minced garlic, and herbs before roasting for a bright and flavorful twist.
- Spicy Chicken: Add a pinch of cayenne pepper or a dash of hot sauce to the butter mixture for a spicy kick.
- Turkey Version: This recipe works equally well with a turkey. Just adjust the roasting time based on the size of the bird. A general rule of thumb is 13 minutes per pound at 350°F (175°C).
FAQs (Frequently Asked Questions)
Q: How do I know when the chicken is cooked through?
A: The best way to check doneness is with a meat thermometer. Insert it into the thickest part of the thigh, and it should read 165°F (74°C).
Q: Can I make the stuffing ahead of time?
A: Yes, you can prepare the stuffing a day ahead of time. Store it in an airtight container in the refrigerator and bring it to room temperature before stuffing the chicken.
Q: Can I freeze the leftover gravy?
A: Yes, you can freeze leftover gravy in an airtight container for up to 2-3 months. Thaw it overnight in the refrigerator before reheating.
Q: My chicken skin isn’t crispy enough. What can I do?
A: Make sure the chicken is thoroughly dry before roasting. You can also broil the chicken for a few minutes at the end of the cooking time to crisp up the skin, but watch it closely to prevent burning.
Q: What if I don’t have giblets for the gravy?
A: You can still make a delicious gravy using just the pan drippings. Simply whisk up the brown bits from the bottom of the pan and add hot water and a slurry of flour or cornstarch.
Final Thoughts
Don’t be intimidated by the thought of roasting a whole chicken. This recipe is designed to be simple and approachable, even for beginners. With just a few basic ingredients and some straightforward instructions, you can create a delicious and impressive meal that your family will love. So go ahead, give it a try, and savor the comforting flavors of a perfectly roasted chicken. And remember, cooking is all about experimenting and having fun, so don’t be afraid to put your own personal touch on this classic dish. Pair your roast chicken with a crisp white wine or a light-bodied red for a truly memorable dining experience.