
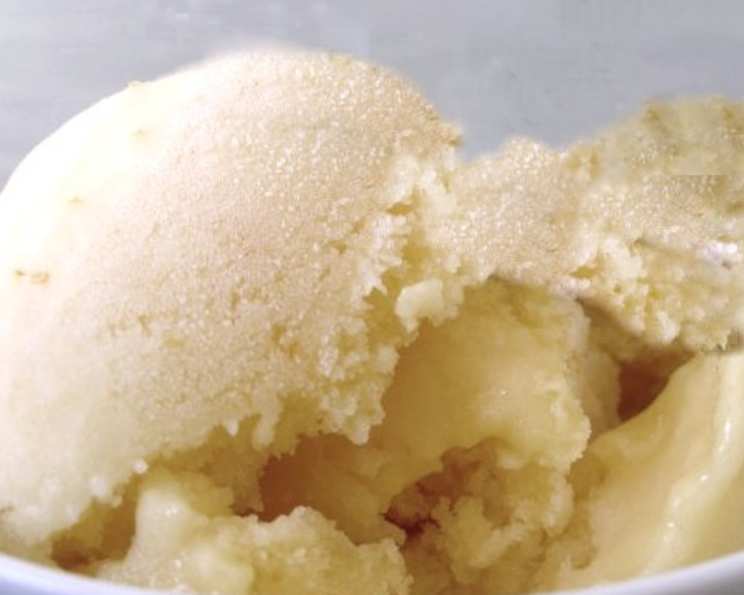
Simple Fresh Pear Ice
The first time I tasted pear ice, I was standing in a sun-drenched orchard, the air thick with the sweet scent of ripe fruit. A local farmer offered me a small paper cup filled with the pale, shimmering concoction. One spoonful, and I was hooked. The cool, refreshing burst of pear, heightened by a hint of almond and a touch of lemon, was the perfect antidote to the summer heat. It was a taste of pure, unadulterated joy, and I’ve been chasing that flavor ever since.
Recipe Overview
- Prep Time: 15 minutes
- Cook Time: 10 minutes
- Total Time: 25 minutes (plus freezing time)
- Servings: 6
- Yield: About 4 cups
- Dietary Type: Vegan, Gluten-Free, Dairy-Free
Ingredients
- 7 cups pears, fully ripe, peeled, cored, and cut-up (about 3 1/2 pounds or 14 medium)
- 2/3 cup sugar
- 1/2 teaspoon almond extract
- 1 tablespoon lemon juice
Equipment Needed
- Microwave-safe bowl
- Food processor
- Freezer-proof container
- Electric mixer
- Chilled bowl
Instructions
-
Begin by preparing the pears. Ensure they are fully ripe for the best flavor and texture. Peel, core, and cut the pears into uniform pieces. This will help them cook evenly. Place the cut pears in a microwave-safe bowl.
-
Cover the bowl and microwave on high power for 10 minutes, or until the pears are tender. It’s essential to stir the pears once halfway through the cooking process to ensure even cooking. This also helps to prevent any sticking or burning.
-
Allow the pears to cool slightly after microwaving. Do not drain any of the cooking liquid – this liquid contains valuable flavor and pectin that will contribute to the final texture of the ice.
-
Transfer the cooked pears, along with their cooking liquid, to a food processor. Add the sugar, almond extract, and lemon juice.
-
Process the mixture until it is completely smooth. The mixture should have a consistent, almost velvety texture. This step is crucial for creating a smooth and creamy final product.
-
Pour the smooth pear mixture into a freezer-proof container. Ensure the container is properly sealed to prevent freezer burn and maintain the best possible quality.
-
Freeze the mixture until it is almost firm. This will take several hours, depending on your freezer’s temperature. You want the mixture to be solid enough to hold its shape but still have some flexibility.
-
Once the mixture is almost firm, transfer it to a chilled bowl. Chilling the bowl will help prevent the ice from melting too quickly during the next step.
-
Using an electric mixer, beat the frozen mixture until it is smooth. This process breaks up any ice crystals and creates a lighter, more airy texture.
-
Return the beaten mixture to the freezer-proof container. Cover it tightly and freeze until completely solid. This final freezing step ensures the pear ice is firm and ready to serve.
Expert Tips & Tricks
- Ripeness is key: The riper the pears, the sweeter and more flavorful the ice will be.
- Almond Extract: Don’t skip the almond extract! A little goes a long way to enhancing the pear’s natural sweetness. If you prefer, you can substitute vanilla extract, but almond extract complements pears beautifully.
- Texture: For an even smoother texture, you can strain the processed mixture through a fine-mesh sieve before freezing.
- Freezing: The “almost firm” stage is crucial for achieving the best texture. If you freeze it completely solid before beating, it will be harder to get a smooth result.
- Adjust sweetness: Taste the mixture before freezing and adjust the sugar as needed, depending on the sweetness of your pears.
- Make Ahead: The pear ice can be made several days in advance. Just store it in a tightly sealed container in the freezer.
Serving & Storage Suggestions
Serve the Simple Fresh Pear Ice chilled, straight from the freezer. A simple scoop in a bowl or a pretty glass is all you need. Garnish with a sprig of mint or a thin slice of pear for an elegant touch.
Store leftover pear ice in an airtight container in the freezer. It will keep for several weeks. If it becomes too hard, let it soften slightly at room temperature before serving. It’s best consumed within a month for optimal flavor and texture. Due to its high sugar content, it will not freeze rock-solid, and it’s ready to eat directly from the freezer.
Nutritional Information
| Nutrient | Amount per Serving | % Daily Value |
|---|---|---|
| Calories | 199 kcal | 10% |
| Total Fat | 0.2g | 0% |
| Saturated Fat | 0g | 0% |
| Cholesterol | 0mg | 0% |
| Sodium | 2mg | 0% |
| Total Carbohydrate | 52.2g | 17% |
| Dietary Fiber | 6g | 23% |
| Sugars | 41.2g | N/A |
| Protein | 0.7g | 1% |
Variations & Substitutions
- Spice it up: Add a pinch of ground ginger, cinnamon, or nutmeg to the pear mixture for a warm, spiced variation.
- Citrus zest: Enhance the citrus notes by adding the zest of a lemon or orange to the mixture.
- Other Fruits: Try substituting some of the pears with other fruits like apples, quince, or raspberries.
- Herbs: Infuse the pear mixture with fresh herbs like rosemary or thyme for a more complex flavor profile. Be sure to remove the herbs before freezing.
- Sweetener Alternative: While the recipe calls for sugar, you could experiment with other sweeteners like honey or agave nectar. However, this may affect the flavor and texture of the final product.
- Alcoholic Kick: For an adult version, add a tablespoon or two of pear brandy or Calvados to the mixture before freezing.
FAQs (Frequently Asked Questions)
Q: Can I use canned pears for this recipe?
A: While fresh pears are ideal, you can use canned pears in a pinch. Be sure to drain them well and reduce the amount of sugar in the recipe accordingly.
Q: How long does it take to freeze the pear ice completely?
A: It typically takes 4-6 hours for the pear ice to freeze completely solid, but this can vary depending on your freezer.
Q: Can I make this recipe without an electric mixer?
A: Yes, you can. If you don’t have an electric mixer, you can use a fork to break up the ice crystals and smooth the mixture. It will require more effort and may not be as smooth, but it’s still possible.
Q: Why do I need to beat the mixture after the initial freezing?
A: Beating the mixture breaks up the ice crystals that form during freezing, resulting in a smoother, creamier texture.
Q: What if my pear ice is too hard to scoop?
A: Let it soften at room temperature for a few minutes before scooping. You can also try running your ice cream scoop under warm water.
Final Thoughts
This Simple Fresh Pear Ice is more than just a dessert; it’s a celebration of seasonal flavors and simple ingredients. I encourage you to try this recipe and experience the pure, refreshing taste of homemade pear ice. Don’t be afraid to experiment with variations and make it your own. Share your creations and let me know what you think. Perhaps pair it with a crisp biscotti or a glass of sparkling wine for an extra special treat. Enjoy!