
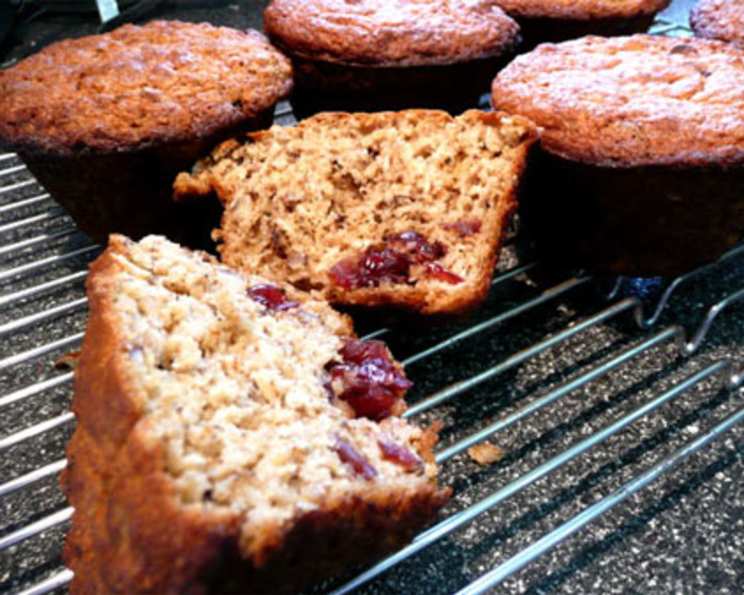
Simple Harvest Muffins
The scent of cinnamon and warm fruit baking in the oven… it instantly transports me back to my grandmother’s kitchen. Every autumn, as the leaves turned, she’d be whipping up batches of hearty, wholesome muffins, packed with whatever bounty the season offered. These weren’t delicate, dainty things; they were robust, nourishing, and bursting with flavor – the kind of muffin that fueled chilly mornings and happy memories. To this day, that familiar aroma is pure comfort, a taste of home that I’m so thrilled to share with you.
Recipe Overview
- Prep Time: 15 minutes
- Cook Time: 18-25 minutes
- Total Time: 33-40 minutes
- Yields: 12 muffins
- Serves: 12
- Dietary Type: Vegetarian
Ingredients
- 1 cup rolled oats
- 1 cup whole wheat flour
- ½ cup oat bran
- ½ cup brown sugar
- 2 teaspoons baking powder
- 1 teaspoon baking soda, aluminum-free
- 2 cups yogurt
- ½ cup butter, melted
- 2 eggs
- 1 cup fruit, chopped, combination of your choice of fresh and dried
- ½ cup nuts, chopped, and seeds
- 1 teaspoon cinnamon or 1 teaspoon combination allspice, nutmeg, ginger, clove
Equipment Needed
- Muffin tin
- Muffin liners (optional, but recommended)
- Mixing bowls (one large, one medium)
- Whisk
- Measuring cups and spoons
- Cooling rack
Instructions
- Begin by preheating your oven to 400 degrees Fahrenheit (200 degrees Celsius). This higher temperature helps give the muffins a good initial rise.
- In a large mixing bowl, combine all the dry ingredients: rolled oats, whole wheat flour, oat bran, brown sugar, baking powder, and baking soda.
- Add the fruit, nuts, and seeds to the bowl of dry ingredients. Toss everything together until the fruit and nuts are evenly distributed throughout the flour mixture. This helps prevent them from sinking to the bottom of the muffins during baking.
- In a separate, medium-sized bowl, whisk together the wet ingredients: eggs and yogurt. Whisk until the mixture is smooth and well combined.
- Add the melted butter to the yogurt mixture. Whisk again until everything is thoroughly combined. Be sure the butter isn’t too hot or it could cook the eggs!
- Now, gently fold the wet ingredients into the dry ingredients. The key here is to mix until just moistened – do not overmix. Some lumps are perfectly fine! Overmixing will develop the gluten in the flour, resulting in tough muffins.
- Line a 12-cup muffin tin with paper liners, or grease the tin well with cooking spray.
- Divide the muffin batter evenly among the 12 muffin cups. Load them full, almost to the top, as these muffins don’t rise a tremendous amount. This ensures you get a nice, hearty muffin.
- Bake in the preheated oven for 18-25 minutes, or until the muffins are firm to the touch and golden brown on top. To test for doneness, insert a toothpick into the center of a muffin; if it comes out clean or with just a few moist crumbs attached, they’re ready.
- Once baked, remove the muffin tin from the oven and transfer the muffins to a wire rack to cool completely.
Expert Tips & Tricks
- Don’t overmix! I cannot stress this enough. A few lumps in the batter are your friend. Overmixing develops the gluten and makes for a tougher muffin.
- Spice it up! Feel free to adjust the spices to your liking. If you love nutmeg, add a bit more. If you’re not a fan of cloves, leave them out. This recipe is very forgiving.
- Ingredient Prep: Ensure your butter is fully melted and slightly cooled before adding it to the yogurt and egg mixture. This prevents the eggs from scrambling and ensures even distribution of the fat.
- Muffin Liners are your friend: Using muffin liners makes cleanup a breeze and helps the muffins release cleanly from the tin.
- Prevent Sticky Muffins: To prevent the muffins from becoming soggy on the bottom, cool them completely on a wire rack. This allows air to circulate around the muffins, preventing condensation.
Serving & Storage Suggestions
These muffins are delicious served warm or at room temperature. They make a perfect addition to breakfast, brunch, or as a midday snack. For an extra touch, spread a little butter or cream cheese on top.
To store, place the muffins in an airtight container at room temperature for up to 2 days. For longer storage, keep them in the refrigerator for up to a week. You can also freeze the muffins for up to 2 months. To freeze, wrap them individually in plastic wrap and then place them in a freezer-safe bag or container. To reheat, thaw the muffins at room temperature or in the microwave. You can also warm them in a low oven (around 300°F or 150°C) for a few minutes.
Nutritional Information
Here’s an estimate of the nutritional information per muffin:
| Nutrient | Amount per Serving | % Daily Value |
|---|---|---|
| Calories | 243.8 kcal | N/A |
| Calories from Fat | 122 g | 50% |
| Total Fat | 13.7 g | 21% |
| Saturated Fat | 6.5 g | 32% |
| Cholesterol | 60.9 mg | 20% |
| Sodium | 293.1 mg | 12% |
| Total Carbohydrate | 27.1 g | 9% |
| Dietary Fiber | 3.1 g | 12% |
| Sugars | 11.3 g | N/A |
| Protein | 6.7 g | 13% |
Note: Nutritional information is an estimate and may vary depending on the specific ingredients used.
Variations & Substitutions
- Gluten-Free: Substitute the whole wheat flour with a gluten-free all-purpose flour blend. Be sure to choose a blend that contains xanthan gum or another binder to help with the texture.
- Dairy-Free: Replace the yogurt with a non-dairy yogurt alternative, such as almond, soy, or coconut yogurt. Use a plant-based butter substitute for the melted butter.
- Vegan: In addition to the dairy-free substitutions, use flax eggs (1 tablespoon ground flaxseed mixed with 3 tablespoons water per egg) in place of the chicken eggs. Let the flax egg mixture sit for a few minutes to thicken before adding it to the wet ingredients.
- Fruit Combinations: Get creative with your fruit choices! Apples and cranberries, blueberries and lemon zest, or peaches and raspberries are all delicious combinations.
- Nut-Free: Replace the nuts with additional seeds, such as sunflower seeds, pumpkin seeds, or sesame seeds.
- Spiced Up: Add a pinch of ground cardamom or ginger for a warmer, spicier flavor profile.
FAQs (Frequently Asked Questions)
Q: Can I use all-purpose flour instead of whole wheat flour?
A: Yes, you can substitute all-purpose flour for the whole wheat flour. However, the muffins will have a slightly different texture – they will be a bit lighter and less dense.
Q: Can I make these muffins ahead of time?
A: Absolutely! These muffins are great for making ahead of time. Store them in an airtight container at room temperature for a couple of days, or freeze them for longer storage.
Q: Can I reduce the amount of sugar in the recipe?
A: Yes, you can reduce the amount of sugar slightly, but keep in mind that sugar contributes to the muffin’s moistness and texture. Reducing it too much may result in a drier muffin.
Q: My muffins are browning too quickly. What should I do?
A: If your muffins are browning too quickly, tent the muffin tin with aluminum foil during the last few minutes of baking. This will help to prevent them from burning.
Q: What kind of yogurt should I use?
A: You can use any kind of yogurt you prefer – Greek yogurt, plain yogurt, or even flavored yogurt (just be mindful of the added sugar). Greek yogurt will result in a slightly denser muffin.
Final Thoughts
I truly hope you’ll give these Simple Harvest Muffins a try. They’re a delightful way to embrace the flavors of the season and create your own cherished memories in the kitchen. Don’t be afraid to experiment with different fruit and nut combinations to personalize them to your liking. And please, share your creations and feedback – I’d love to see what you come up with! Pair them with a warm cup of tea or coffee for the perfect cozy treat. Happy baking!