
The Easiest Honeycomb You’ll Ever Make
The first time I tasted honeycomb, I was at a bustling county fair, mesmerized by the candy stall overflowing with treats. The golden, aerated confection, glistening under the summer sun, beckoned. One bite, and I was hooked. The initial crunch, followed by the rapid melt-in-your-mouth sweetness, punctuated with a subtle caramel note, was an experience I never forgot. Making honeycomb at home always felt intimidating, like some alchemical feat, until I discovered this incredibly simple recipe. It’s now my go-to for satisfying that sweet craving with minimal fuss and maximum delightful crackle.
Recipe Overview
- Prep Time: 5 minutes
- Cook Time: 10 minutes
- Total Time: 15 minutes
- Servings: 20 pieces (approximate)
- Yields: 1 batch
- Dietary Type: Vegetarian
Ingredients
- 4 tablespoons granulated sugar
- 2 tablespoons golden syrup
- 1 teaspoon baking soda, well sifted
Equipment Needed
- Medium-sized saucepan
- Wooden spoon or heat-resistant spatula
- Greased baking tin or sheet
Instructions
- Combine the sugar and golden syrup in the saucepan.
- Place the saucepan over medium heat.
- Boil the mixture, stirring occasionally to prevent sticking, for precisely 10 minutes. The mixture will bubble and darken slightly. Keep a close eye on it; you want a deep amber color, but avoid burning.
- Remove the saucepan from the heat. This is a crucial step!
- Immediately add the sifted baking soda to the hot sugar mixture. Sifting is essential to prevent lumps.
- Quickly and thoroughly mix the baking soda into the hot mixture. Be careful, as it will foam up rapidly. Don’t overmix – just ensure the baking soda is evenly distributed.
- Pour the foamy mixture into your prepared greased tin or baking sheet.
- Leave the honeycomb to cool completely and harden, approximately 30 minutes to an hour, before breaking or cutting it into pieces.
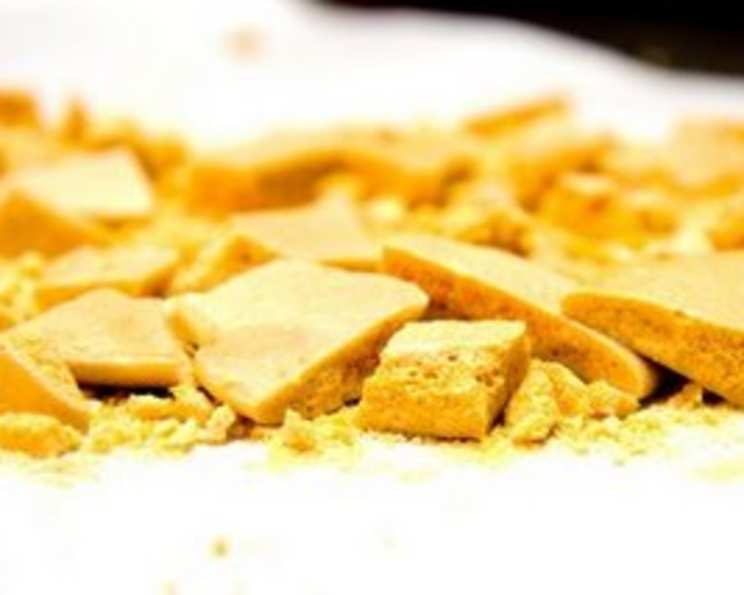
- Break or cut into pieces. The honeycomb is very brittle, so expect it to snap rather than cut cleanly.
Expert Tips & Tricks
- The Right Pan: Use a saucepan that’s large enough to accommodate the foaming action of the baking soda. A pan that’s too small will result in a sticky mess overflowing onto your stovetop.
- Don’t Overcook: Overcooking the sugar mixture will result in a bitter, burnt taste. The color should be a deep amber, not dark brown. If you’re unsure, err on the side of undercooking slightly.
- Sifting is Key: Sifting the baking soda eliminates clumps, ensuring it disperses evenly and creates the characteristic honeycomb texture.
- Timing is Everything: Once you add the baking soda, work quickly! The reaction happens fast, and you need to get the mixture into the tin before it sets.
- Greasing the Tin: A well-greased tin prevents the honeycomb from sticking and makes it easier to remove. You can use butter, oil, or a non-stick cooking spray. Lining the tin with parchment paper also works well.
- Don’t Stir Too Much: Overmixing after adding the baking soda can deflate the mixture, resulting in a denser honeycomb. Mix just enough to incorporate the baking soda.
- Humidity Hurts: Honeycomb is hygroscopic, meaning it absorbs moisture from the air. On humid days, it may become sticky. Store it in an airtight container to prevent this.
- Rescue Burnt Sugar: Unfortunately, burnt sugar is difficult to rescue. The bitterness will permeate the entire batch. It’s best to start over if it burns. Prevention is key: keep a close eye on the sugar mixture while it’s boiling and remove it from the heat immediately when it reaches the right color.
- Fixing Sticky Honeycomb: If your honeycomb turns out sticky instead of crunchy, it’s likely due to undercooking or absorbing too much moisture. You can try placing it in a preheated oven at a very low temperature (around 200°F or 93°C) for a short period to dry it out, but be careful not to burn it. Storing it properly in an airtight container is the best prevention.
Serving & Storage Suggestions
Honeycomb is fantastic on its own as a sweet treat. It can also be crumbled over ice cream, yogurt, or fruit salad for added texture and sweetness. It pairs beautifully with dark chocolate and can be used as a decorative element on cakes or cupcakes.
Store your honeycomb in an airtight container at room temperature. It will keep for several days, but it’s best enjoyed fresh. Avoid storing it in the refrigerator, as the moisture will cause it to become sticky.
Freezing is not recommended as it will change the texture.
Nutritional Information
(Estimated per serving, assuming 20 servings per batch)
| Nutrient | Amount per Serving | % Daily Value* |
|---|---|---|
| Calories | 22 kcal | 1% |
| Total Fat | 0g | 0% |
| Saturated Fat | 0g | 0% |
| Trans Fat | 0g | |
| Cholesterol | 0mg | 0% |
| Sodium | 30mg | 1% |
| Total Carbohydrate | 6g | 2% |
| Dietary Fiber | 0g | 0% |
| Total Sugars | 6g | |
| Protein | 0g | 0% |
| Vitamin D | 0mcg | 0% |
| Calcium | 0mg | 0% |
| Iron | 0mg | 0% |
| Potassium | 0mg | 0% |
*Percent Daily Values are based on a 2,000 calorie diet. Your daily values may be higher or lower depending on your calorie needs.
Variations & Substitutions
- Different Sugars: While granulated sugar works best for its clean flavor and stability, you could experiment with using a portion of brown sugar for a deeper, more molasses-like flavor. Be aware that this may affect the final texture.
- Flavor Extracts: Add a drop or two of your favorite extract (vanilla, almond, peppermint) after removing the pan from the heat, just before adding the baking soda.
- Chocolate Coating: Dip pieces of cooled honeycomb in melted dark, milk, or white chocolate for an extra indulgent treat.
- Salted Honeycomb: Sprinkle a pinch of sea salt over the honeycomb while it’s still warm for a delicious sweet-and-salty combination.
- Spice It Up: Add a pinch of cinnamon, nutmeg, or ginger to the sugar mixture for a warm, spiced honeycomb.
- Edible Glitter: For a festive touch, sprinkle edible glitter over the honeycomb before it sets.
FAQs (Frequently Asked Questions)
Q: Why is my honeycomb sticky instead of crunchy?
A: This is usually caused by undercooking the sugar mixture or high humidity. Try drying it out in a low oven, but proper storage in an airtight container is key to prevent it.
Q: Can I use honey instead of golden syrup?
A: While you can experiment with honey, golden syrup is preferred for its smooth texture and consistent results. Honey can sometimes crystallize or burn more easily.
Q: What if I don’t have golden syrup?
A: Light corn syrup can be used as a substitute for golden syrup, but the flavor will be slightly different.
Q: Why does the baking soda need to be sifted?
A: Sifting ensures that the baking soda is evenly distributed throughout the mixture, preventing clumps and creating the desired honeycomb texture.
Q: How long does honeycomb last?
A: Stored in an airtight container at room temperature, honeycomb will last for several days, but it’s best enjoyed fresh.
Final Thoughts
This deceptively simple honeycomb recipe is a fantastic way to impress friends and family with a homemade treat that tastes like it came straight from a fancy candy shop. Don’t be intimidated by candy making – this recipe is incredibly forgiving, and even if it’s not perfect the first time, it will still be delicious. So, grab your saucepan, gather your ingredients, and get ready to experience the delightful crunch of homemade honeycomb. I encourage you to experiment with variations, share your creations, and most importantly, enjoy the sweet reward! Perhaps pair it with a strong cup of black coffee to balance the sweetness. Happy cooking!