
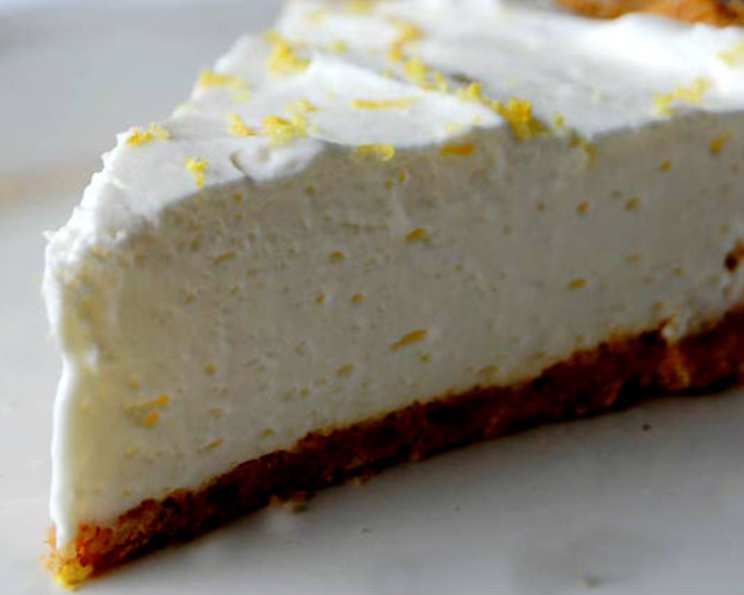
Simple Lemon Cheesecake: A Taste of Sunshine
There’s something about the bright, tangy flavor of lemon that instantly lifts my spirits. I remember baking a lemon cheesecake with my grandmother every summer. The aroma of the warm citrus filling permeated the entire house, a signal that summer was truly here. We’d carefully layer slices of ripe strawberries on top, their sweetness perfectly complementing the cheesecake’s refreshing tartness. To this day, the taste of lemon cheesecake evokes those cherished memories and the warmth of family.
Recipe Overview
- Prep Time: 20 minutes
- Cook Time: 1 hour 15 minutes
- Total Time: 2 hours 20 minutes (includes cooling)
- Servings: 6-8
- Yield: 1 cheesecake
- Dietary Type: Not Gluten-Free
Ingredients
For the Crust:
- 1 cup graham cracker crumbs
- 2 tablespoons brown sugar
- 2 tablespoons melted unsalted butter
For the Cheese Filling:
- 1 lb cream cheese, at room temperature
- 2/3 cup granulated sugar
- 1/2 cup sour cream
- 3 eggs, at room temperature, lightly beaten
- 2 tablespoons lemon juice
- 1 teaspoon grated lemon zest
- 1 teaspoon vanilla extract
For the Cheesecake Topping:
- 3/4 cup sour cream
- 3 tablespoons granulated sugar
- 1/3 cup whipping cream
Equipment Needed
- 8-inch springform pan
- Mixing bowls
- Electric mixer or whisk
- Measuring cups and spoons
- Flat-bottomed glass or measuring cup
Instructions
-
Prepare the Crust: Preheat the oven to 400 degrees F (200 degrees C). Lightly butter an 8-inch springform pan. Ensuring every nook and cranny is covered will prevent the crust from sticking.
-
Combine Crust Ingredients: In a mixing bowl, combine the graham cracker crumbs with the brown sugar. Mix thoroughly to evenly distribute the sweetness.
-
Add Butter: Pour the melted unsalted butter into the crumb mixture and stir until all the crumbs are moistened. The mixture should resemble wet sand.
-
Press into Pan: Press the crumb mixture into the bottom of the prepared springform pan, packing it down firmly and evenly with the base of a flat glass or measuring cup. This creates a solid, stable base for the cheesecake.
-
Bake the Crust: Bake the crust until golden brown, about 7 to 10 minutes. Keep a close eye on it to prevent burning. Once baked, remove from the oven and set aside. Maintain the oven temperature at 400 degrees F (200 degrees C).
-
Prepare the Cheese Filling: In a medium bowl, combine the softened cream cheese and granulated sugar. Use an electric mixer or whisk to blend until smooth and creamy. Ensure there are no lumps for a perfectly smooth cheesecake.
-
Incorporate Sour Cream: Blend in the sour cream until fully incorporated. This adds a lovely tang and moisture to the filling.
-
Add Eggs Gradually: Stir in the lightly beaten eggs, one-third at a time, mixing gently after each addition. Avoid overmixing, as this can incorporate too much air and cause the cheesecake to crack during baking.
-
Flavor with Lemon and Vanilla: Stir in the lemon juice, grated lemon zest, and vanilla extract, blending well until everything is evenly distributed. The lemon zest is essential for adding that intense citrus flavor.
-
Pour Filling into Crust: Pour the cheese filling into the baked crust, spreading it evenly.
-
Bake the Cheesecake: Place the filled springform pan in the oven. Immediately turn the heat down to 300 degrees F (150 degrees C) and bake for one hour, or until the cake begins to rise on the sides but the center still has a slight wobble.
-
Cool Gradually: Turn the oven off. Open the oven door slightly (a wooden spoon works well to keep it ajar) and let the cake sit in the oven for another 30 minutes. This gradual cooling helps prevent cracking.
-
Cool Completely: Remove the cheesecake from the oven and set it on a rack to cool completely.
-
Prepare the Topping: Preheat the oven to 350 degrees F (175 degrees C). In a medium bowl, combine the sour cream, granulated sugar, and whipping cream. Blend with a spoon until smooth.
-
Apply Topping: Spread the topping evenly over the top of the baked cheesecake. If the cake has any cracks, use the topping to fill them in.
-
Bake the Topping: Bake until the topping is set, about 15 minutes. The topping should be firm to the touch.
-
Chill and Serve: Cool the cheesecake completely before removing the side of the springform pan. Chill the cheesecake thoroughly in the refrigerator until ready to serve, at least 4 hours, but preferably overnight.
Expert Tips & Tricks
- Room Temperature Ingredients: Using room temperature cream cheese and eggs is crucial for a smooth, lump-free filling. Allow them to sit at room temperature for at least an hour before starting.
- Water Bath (Optional): For an even more decadent and crack-free cheesecake, consider using a water bath. Wrap the bottom of the springform pan in foil and place it in a larger pan. Pour hot water into the larger pan until it reaches about halfway up the sides of the springform pan.
- Don’t Overmix: Overmixing the batter incorporates too much air, which can cause the cheesecake to puff up and then crack as it cools. Mix just until the ingredients are combined.
- Prevent Cracking: The gradual cooling process is key to preventing cracks. Don’t skip the step of letting the cheesecake sit in the oven with the door ajar.
- Level the Crust: If the crust puffs up during baking, gently press it down with the back of a spoon immediately after removing it from the oven.
- Freezing: Cool the cheesecake completely before freezing. Wrap it tightly in plastic wrap and then in foil. Freeze for up to 2 weeks for best quality. Thaw overnight in the refrigerator before serving.
Serving & Storage Suggestions
Serve the Simple Lemon Cheesecake chilled, ideally with fresh fruit or a fruit coulis. Berries like raspberries, strawberries, or blueberries complement the lemon flavor beautifully. A dollop of whipped cream or a dusting of powdered sugar also makes for an elegant presentation.
Store leftover cheesecake wrapped tightly in plastic wrap in the refrigerator for up to 4 days. For longer storage, freeze the cheesecake as described above. Do not leave at room temperature for more than 2 hours.
Nutritional Information
| Nutrient | Amount per Serving | % Daily Value |
|---|---|---|
| Calories | 657.2 kcal | N/A |
| Calories from Fat | 431 g | 66% |
| Total Fat | 47.9 g | 73% |
| Saturated Fat | 26.6 g | 132% |
| Cholesterol | 229.5 mg | 76% |
| Sodium | 391 mg | 16% |
| Total Carbohydrate | 49.3 g | 16% |
| Dietary Fiber | 0.4 g | 1% |
| Sugars | 41.7 g | N/A |
| Protein | 9.9 g | 19% |
Note: Nutritional information is an estimate and may vary based on specific ingredients and preparation methods.
Variations & Substitutions
- Gluten-Free Crust: Substitute the graham cracker crumbs with gluten-free graham-style crackers or almond flour for a gluten-free option.
- Different Citrus: Experiment with other citrus fruits like lime or orange for a different flavor profile. Use the same amount of juice and zest as the lemon.
- Berry Swirl: Swirl a berry puree into the cheesecake filling before baking for a beautiful and flavorful twist.
- Chocolate Crust: Use chocolate graham crackers for the crust for a rich and decadent combination.
- Vegan Cheesecake: This recipe is difficult to make Vegan and maintain the same texture.
FAQs (Frequently Asked Questions)
Q: Can I use a different size springform pan?
A: Yes, but you may need to adjust the baking time. A smaller pan will require a longer baking time, while a larger pan will require a shorter baking time.
Q: Why did my cheesecake crack?
A: Cheesecakes crack when they cool too quickly or are overbaked. Be sure to cool the cheesecake gradually in the oven with the door ajar and avoid overbaking.
Q: Can I make this cheesecake ahead of time?
A: Absolutely! In fact, cheesecake tastes even better after it has had time to chill in the refrigerator for at least 4 hours, or preferably overnight.
Q: How do I prevent the crust from getting soggy?
A: Pre-baking the crust helps to prevent it from becoming soggy. Also, make sure to press the crust firmly and evenly into the pan.
Q: Can I freeze this cheesecake?
A: Yes, you can freeze this cheesecake. Wrap it tightly in plastic wrap and then in foil. Freeze for up to 2 weeks for best quality. Thaw overnight in the refrigerator before serving.
Final Thoughts
This Simple Lemon Cheesecake is a delightful dessert that’s perfect for any occasion. Its bright, tangy flavor and creamy texture are sure to impress. Don’t be intimidated by the baking time – it’s well worth the effort! Give this recipe a try and let me know what you think. Serve it with a glass of chilled lemonade or a sparkling wine for a truly special treat. Happy baking!