
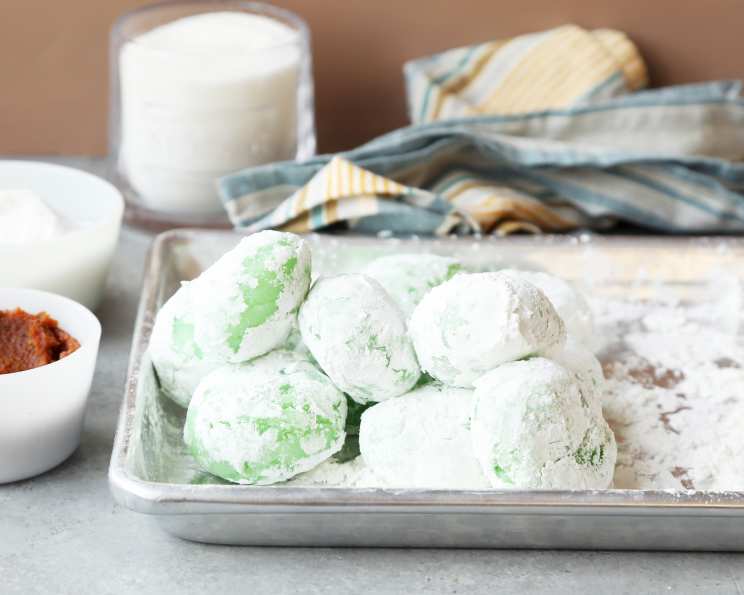
Simple Mochi: A Taste of Home, Made Easy
The first time I tasted mochi, I was a wide-eyed child at a local Japanese festival. The sticky, chewy texture and subtle sweetness were unlike anything I’d ever experienced. It wasn’t just a treat; it was an edible embodiment of comfort, tradition, and a connection to a culture I was eager to explore. I remember being mesmerized watching the vendors pounding the rice into that wonderfully pliable dough, and the smiles on everyone’s faces as they savored each bite. Now, years later, I can recreate that feeling of warmth and joy in my own kitchen with this incredibly simple mochi recipe, perfect for anyone craving a taste of authentic Japanese flavor.
Recipe Overview
- Prep Time: 5 minutes
- Cook Time: 4 minutes
- Total Time: 9 minutes
- Servings: 8-10
- Yield: About 8-10 pieces
- Dietary Type: Gluten-Free
Ingredients
- 1 cup mochiko sweet rice flour (glutinous rice flour)
- 1 cup water
- 1/4 cup sugar
- Katakuriko (potato starch), for dusting
Equipment Needed
- Microwaveable bowl or dish
- Plastic wrap
- Mixing bowl
- Spoon or spatula
Instructions
- In a mixing bowl, combine the mochiko and sugar.
- Add the water to the bowl and mix thoroughly until well combined. The mixture will appear quite watery, and that is perfectly normal.
- Pour the mixture into a microwaveable dish.
- Cover the dish tightly with plastic wrap. Ensure the plastic wrap is microwave-safe and that it seals well to trap steam.
- Microwave on high for 4 minutes. The mochi should be puffed up and slightly translucent.
- Carefully remove the dish from the microwave. Be cautious, as the dish and the mochi will be very hot.
- Remove the plastic wrap. Be careful of the escaping steam.
- Allow the mochi to cool for a few minutes if you prefer to handle it more easily. Cooling slightly will make it less sticky.
- Generously dust a clean surface with katakuriko (potato starch). This will prevent the mochi from sticking.
- Turn the mochi out onto the dusted surface.
- Dust the top of the mochi with more katakuriko.
- Cut the mochi into your desired shapes and sizes.
- Serve immediately and enjoy!
Expert Tips & Tricks
- The key to perfect mochi is the mochiko: Ensure you are using glutinous rice flour (mochiko) and not regular rice flour. The glutinous nature of mochiko is what gives mochi its characteristic chewy texture.
- Don’t overcook: Overcooking mochi can make it tough. Watch carefully during the microwaving process. If it starts to bubble over, pause the microwave and let it settle before resuming.
- Dust generously: The more katakuriko you use, the less sticky the mochi will be. Don’t be afraid to coat it liberally. If you don’t have katakuriko, cornstarch can be used as a substitute, though the texture might be slightly different.
- For even cooking: Use a wide, shallow microwaveable dish. This will help the mochi cook more evenly.
- Experiment with flavors: Don’t be afraid to get creative! Adding a few drops of food coloring or flavoring extracts can transform the mochi into something truly unique.
Serving & Storage Suggestions
Serve your freshly made mochi immediately for the best texture and flavor. Mochi is traditionally enjoyed warm or at room temperature.
If you have leftovers, store them in an airtight container at room temperature for up to a day. However, be aware that the texture will change over time, becoming harder and less pliable. To prevent sticking, wrap each piece of mochi individually in plastic wrap or parchment paper.
Mochi can also be stored in the refrigerator for up to 2 days, but it will become even harder. If refrigerating, allow it to come to room temperature before serving, or gently reheat it in the microwave for a few seconds to soften it.
Mochi can be frozen for longer storage. Wrap each piece tightly in plastic wrap and place them in a freezer-safe bag. Frozen mochi can be stored for up to a month. Thaw at room temperature for several hours before serving. Reheating is not recommended as it can affect the texture.
Nutritional Information
| Nutrient | Amount per Serving | % Daily Value |
|---|---|---|
| Calories | 96.5 kcal | N/A |
| Calories from Fat | 2 g | 3% |
| Total Fat | 0.3 g | 0% |
| Saturated Fat | 0.1 g | 0% |
| Cholesterol | 0 mg | 0% |
| Sodium | 0.9 mg | 0% |
| Total Carbohydrate | 22.1 g | 7% |
| Dietary Fiber | 0.5 g | 1% |
| Sugars | 6.3 g | N/A |
| Protein | 1.2 g | 2% |
Note: Nutritional information is an estimate and may vary based on specific ingredients and portion sizes.
Variations & Substitutions
- Filled Mochi: Before dusting with katakuriko, flatten a piece of mochi, add a teaspoon of your favorite filling (red bean paste, chocolate, ice cream, peanut butter), and pinch the edges closed to seal.
- Flavored Dough: Add a few drops of food coloring to the batter for a vibrant color. Similarly, a few drops of flavoring extracts like strawberry, grape, orange, or blueberry can be added to the batter before cooking for a unique taste.
- Chocolate Mochi: Stir about 1/4 cup of melted chocolate chips into the mochi batter before cooking for a rich chocolate flavor.
- Kinako Dusting: Instead of katakuriko, dust with kinako (roasted soybean flour) for a nutty flavor.
- Matcha Mochi: Add 1-2 teaspoons of matcha powder to the dry ingredients for a vibrant green mochi with an earthy flavor.
FAQs (Frequently Asked Questions)
Q: Can I use regular rice flour instead of mochiko?
A: No, regular rice flour will not work for this recipe. You need mochiko, which is a glutinous rice flour, to achieve the sticky and chewy texture of mochi.
Q: My mochi is too sticky. What did I do wrong?
A: Make sure you are using enough katakuriko or cornstarch to dust the surface and your hands. Also, avoid overcooking the mochi, as this can make it stickier.
Q: How do I prevent the plastic wrap from melting in the microwave?
A: Ensure you are using microwave-safe plastic wrap and that it is not touching the mochi directly. Leave a small gap between the mochi and the plastic wrap.
Q: Can I make mochi without a microwave?
A: Yes, you can steam the mochi mixture instead. Place the mixture in a heatproof bowl set over a pot of simmering water, ensuring the bowl doesn’t touch the water. Steam for about 20-25 minutes, or until the mochi is translucent and cooked through.
Q: My mochi is too hard after it cools. How can I soften it?
A: Briefly microwave the mochi for a few seconds with a small amount of water. Be careful not to overheat it, as it can become sticky again. Alternatively, you can steam it for a few minutes to restore its softness.
Final Thoughts
This simple mochi recipe is your passport to a world of delicious possibilities. Don’t be intimidated by the seemingly complex world of Japanese sweets – this recipe makes it accessible to anyone, no matter their culinary experience. Embrace the process, experiment with flavors, and most importantly, enjoy the chewy, delightful result. Share your mochi creations with friends and family, and watch their faces light up with the same joy I felt at that first festival so many years ago. Pair it with a cup of warm green tea for the perfect comforting treat. I hope this recipe becomes a beloved staple in your kitchen, bringing a touch of Japanese tradition to your everyday life.