
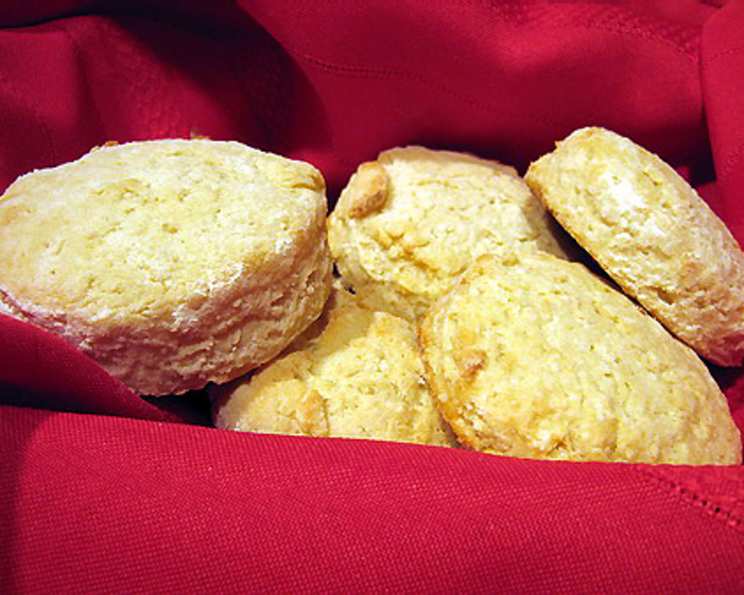
Simple Sour Cream Biscuits: A Taste of Home in Minutes
The aroma of freshly baked biscuits has always been a potent time machine for me. It instantly whisks me back to my grandmother’s cozy kitchen, a place perpetually filled with warmth, laughter, and the comforting scent of buttermilk biscuits rising in the oven. While her recipe was a closely guarded secret, the memory of those tender, golden-brown gems inspired me to embark on my own biscuit-baking journey. This recipe for simple sour cream biscuits is the result – a quicker, easier version that delivers that same heartwarming satisfaction, even when you’re short on time. These biscuits are so quick and delicious, they are perfect for a small family, or even just one person!
Recipe Overview
- Prep Time: 5 minutes
- Cook Time: 10-12 minutes
- Total Time: 15-17 minutes
- Servings: 4
- Yield: 4 biscuits
- Dietary Type: Not specified
Ingredients
- 1 cup self rising flour
- 1/4 teaspoon baking soda
- 3/4 cup sour cream
- 2 teaspoons vegetable oil
Equipment Needed
- Baking sheet
- Mixing bowl
- Measuring cups and spoons
- Knife or biscuit cutter
Instructions
- Preheat your oven to 425 degrees Fahrenheit (220 degrees Celsius).
- In a medium mixing bowl, combine the self-rising flour and baking soda. Ensure there are no lumps of baking soda.
- Add the sour cream and vegetable oil to the flour mixture.
- Stir the ingredients together until just combined. Be careful not to overmix, as this will result in tough biscuits. The dough will be sticky.
- Lightly flour a clean work surface.
- Place the dough onto the floured surface. Knead the dough gently 4-6 times to bring it together. This step develops a bit of gluten for structure, but overworking it will make the biscuits tough.
- Shape the dough into a roughly circular or square shape that is about 3/4 inch thick.
- Using a knife, cut the dough into 4 equal squares. Alternatively, use a biscuit cutter (or an upside-down drinking glass) to cut out 4 round biscuits. If using a cutter, press straight down without twisting to ensure the biscuits rise evenly.
- Place the biscuits onto an ungreased baking sheet, leaving a little space between each biscuit.
- Before baking, you have the option of brushing the tops of the biscuits with melted butter for a richer flavor and a more golden-brown color. Alternatively, you can lightly spray the tops with non-stick cooking spray.
- Bake in the preheated oven for 10 to 12 minutes, or until the biscuits are golden brown on top. Keep a close eye on them during the last few minutes of baking, as oven temperatures can vary.
Expert Tips & Tricks
- Don’t Overmix: The key to tender biscuits is to avoid overmixing the dough. Mix until just combined; a few streaks of flour are okay.
- Cold Ingredients: For even better results, use cold sour cream and vegetable oil. This helps to keep the butter from melting too quickly during baking, resulting in flakier biscuits.
- High Heat: Baking at a high temperature (425°F) helps the biscuits rise quickly and develop a golden-brown crust.
- Flour Power: Self-rising flour is a must for this recipe, as it contains baking powder and salt, which are essential for the biscuits to rise properly. If you don’t have self-rising flour, you can make your own by combining 1 cup of all-purpose flour with 1 1/2 teaspoons of baking powder and 1/4 teaspoon of salt.
- Rest the Dough: If you have a little extra time, let the dough rest for 10 minutes before cutting and baking. This allows the gluten to relax, resulting in a more tender biscuit.
- For more golden tops: Brush with egg wash before baking.
- Adding Flavor: Experiment with adding a pinch of garlic powder, onion powder, or dried herbs to the flour mixture for extra flavor.
Serving & Storage Suggestions
These simple sour cream biscuits are best served warm, straight from the oven. Enjoy them plain, or spread with butter, jam, honey, or your favorite toppings. They are also delicious alongside savory dishes like soup, chili, or pot roast. They also make a great substitute for pie crust! Try topping your favorite pot pie filling with the raw biscuits and bake until golden brown.
Leftover biscuits can be stored in an airtight container at room temperature for up to 2 days, or in the refrigerator for up to 5 days. To reheat, wrap the biscuits in foil and warm them in a preheated oven at 350°F (175°C) for about 5-10 minutes. You can also reheat them in the microwave, but they may become slightly softer. For longer storage, freeze the baked biscuits in an airtight container for up to 2 months. Thaw them completely before reheating.
Nutritional Information
| Nutrient | Amount per Serving | % Daily Value |
|---|---|---|
| Calories | 222.8 kcal | N/A |
| Calories from Fat | N/A | 47% |
| Total Fat | 11.6 g | 17% |
| Saturated Fat | 6 g | 29% |
| Cholesterol | 19 mg | 6% |
| Sodium | 498.4 mg | 20% |
| Total Carbohydrate | 25 g | 8% |
| Dietary Fiber | 0.8 g | 3% |
| Sugars | 0.1 g | 0% |
| Protein | 4.5 g | 8% |
Variations & Substitutions
- Buttermilk Biscuits: If you don’t have sour cream, you can substitute with buttermilk. You may need to adjust the amount of flour slightly to achieve the right consistency.
- Herb Biscuits: Add a tablespoon of chopped fresh herbs, such as chives, rosemary, or thyme, to the flour mixture for a savory twist.
- Cheese Biscuits: Stir in 1/2 cup of shredded cheddar cheese, parmesan cheese, or other cheese of your choice for cheesy goodness.
- Sweet Biscuits: Add a tablespoon of sugar and a dash of cinnamon to the flour mixture for slightly sweet biscuits.
- Gluten-Free Biscuits: Use a gluten-free self-rising flour blend and follow the recipe as directed. You may need to experiment with different blends to find one that works best for you.
- Dairy-Free Biscuits: Substitute the sour cream with a dairy-free sour cream alternative or plain, unsweetened coconut yogurt.
FAQs (Frequently Asked Questions)
Q: Can I use all-purpose flour instead of self-rising flour?
A: No, self-rising flour is essential for this recipe, as it contains baking powder and salt, which help the biscuits rise. If you only have all-purpose flour, you can make your own self-rising flour by combining 1 cup all-purpose flour with 1 1/2 teaspoons baking powder and 1/4 teaspoon salt.
Q: Why are my biscuits tough?
A: Overmixing the dough is the most common cause of tough biscuits. Be sure to mix the ingredients until just combined.
Q: Can I make the dough ahead of time?
A: Yes, you can prepare the dough ahead of time and store it in the refrigerator for up to 24 hours. Wrap the dough tightly in plastic wrap to prevent it from drying out.
Q: How do I get my biscuits to rise higher?
A: Use cold ingredients, avoid overmixing the dough, and make sure your baking powder is fresh. Also, don’t twist the biscuit cutter when cutting out the biscuits, as this can seal the edges and prevent them from rising properly.
Q: Can I freeze the unbaked biscuits?
A: Yes, you can freeze the unbaked biscuits. Place the cut biscuits on a baking sheet and freeze for about 1 hour, or until solid. Then, transfer the frozen biscuits to a freezer bag and store for up to 2 months. Bake directly from frozen, adding a few extra minutes to the baking time.
Final Thoughts
These simple sour cream biscuits are a testament to the fact that delicious, homemade goodness doesn’t have to be complicated or time-consuming. With just a few basic ingredients and a few minutes of your time, you can enjoy warm, tender biscuits that are perfect for breakfast, lunch, or dinner. So go ahead, give this recipe a try, and experience the simple joy of homemade baking! Don’t hesitate to share your feedback and variations – I’m eager to hear about your biscuit-baking adventures. Pair with a dollop of clotted cream and a cup of Earl Grey tea for the perfect teatime treat!