
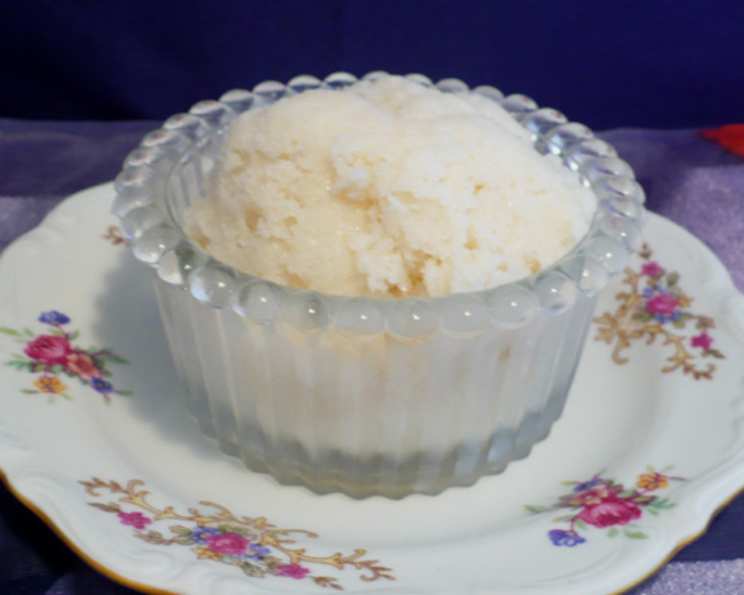
Simple Vanilla Ice Milk: A Taste of Childhood Summers
The clatter of the old ice cream maker churning on the porch, the air thick with the humid promise of a summer evening – that’s the memory this simple vanilla ice milk evokes for me. My grandmother, a woman who could coax magic from the humblest ingredients, would let me crank the handle until my arm ached, the anticipation building with each turn. The reward wasn’t just the cool, sweet treat, but the shared experience, the laughter, and the feeling of pure, uncomplicated joy that only a scoop of homemade ice milk on a hot day can bring. This recipe is a homage to those carefree days, a reminder that sometimes, the simplest things are the most delicious.
Recipe Overview
- Prep Time: 10 minutes
- Cook Time: 20 minutes (in ice cream machine) / 6+ hours (freezing)
- Total Time: 6 hours 30 minutes
- Servings: 8
- Yield: Approximately 1 quart
- Dietary Type: Vegetarian
Ingredients
- 4 cups milk (any fat percentage)
- 1 cup sugar
- 1 teaspoon vanilla extract
Equipment Needed
- Medium bowl
- Whisk or spoon
- Ice cream machine (optional)
- Tupperware container or freezer-proof dish
Instructions
- In a medium bowl, combine the milk, sugar, and vanilla extract.
- Stir continuously until the sugar is completely dissolved. This is crucial for a smooth, non-gritty final product. Don’t rush this step!
- If using an ice cream machine: Pour the milk mixture into the ice cream machine. Process according to the manufacturer’s instructions, typically around 20 minutes, or until the mixture thickens to a soft-serve consistency.
- Transfer the thickened mixture to a Tupperware container or other freezer-safe container.
- Freeze for at least 8 hours, or preferably overnight, to allow the ice milk to fully solidify. For a smoother consistency, consider stirring the ice milk every 4 hours or so during the initial freezing period.
- If not using an ice cream machine: Pour the milk mixture into a shallow, freezer-proof dish.
- Place the dish in the freezer.
- Once ice crystals begin to form, typically after 2-4 hours, remove the dish from the freezer and stir vigorously to break up the crystals. This step is critical to prevent a coarse, icy texture.
- Return the dish to the freezer and repeat the stirring process every 2-4 hours until the ice milk is fully frozen.
- Before serving, let the ice milk soften slightly at room temperature for a few minutes to make it easier to scoop.
Expert Tips & Tricks
- Milk Choice Matters: While any milk will work, using whole milk will result in a creamier, richer ice milk. Skim milk will be lighter, but may have a slightly icier texture. Experiment to find your preference!
- Sugar Dissolving: Ensuring the sugar is completely dissolved before freezing is paramount. Undissolved sugar crystals will result in a grainy texture. Warming the milk slightly can help speed up the dissolving process, but be sure to let it cool completely before freezing.
- The Importance of Stirring (Without a Machine): If you’re not using an ice cream machine, the frequent stirring is non-negotiable. It’s what prevents large ice crystals from forming and gives the ice milk a smoother, more palatable texture. Set a timer as a reminder!
- Flavor Infusions: For a more complex vanilla flavor, consider using a vanilla bean instead of extract. Split the bean lengthwise, scrape out the seeds, and add both the seeds and the pod to the milk mixture during the initial stirring. Remove the pod before freezing.
- Boozy Boost: For an adult twist, add a tablespoon or two of your favorite liqueur, such as vanilla vodka, amaretto, or rum, to the milk mixture before freezing. Be mindful of the alcohol content, as too much can inhibit freezing.
Serving & Storage Suggestions
Serve the vanilla ice milk chilled, in a bowl or cone. It pairs beautifully with fresh fruit, chocolate sauce, chopped nuts, or a sprinkle of cinnamon. For a classic sundae, top with whipped cream and a cherry.
Leftover ice milk should be stored in an airtight container in the freezer. It will keep for up to 2 weeks, although the texture may degrade slightly over time. To minimize ice crystal formation, press a piece of plastic wrap directly onto the surface of the ice milk before sealing the container. If the ice milk becomes too hard to scoop, let it soften at room temperature for a few minutes before serving. Avoid re-freezing melted ice milk, as this will significantly compromise the texture.
Nutritional Information
(Note: These values are estimates and may vary depending on the specific ingredients used, particularly the fat content of the milk.)
| Nutrient | Amount per Serving | % Daily Value* |
|---|---|---|
| Calories | 130 kcal | 7% |
| Total Fat | 3g | 4% |
| Saturated Fat | 2g | 10% |
| Cholesterol | 10mg | 3% |
| Sodium | 50mg | 2% |
| Total Carbohydrate | 22g | 8% |
| Dietary Fiber | 0g | 0% |
| Sugars | 22g | – |
| Protein | 3g | 6% |
*Percent Daily Values are based on a 2,000 calorie diet.
Variations & Substitutions
- Fruity Fun: Add pureed or finely chopped fruit to the milk mixture before freezing. Berries, peaches, and mangoes are excellent choices.
- Chocolate Swirl: Drizzle melted chocolate into the ice milk as you transfer it to the freezer container.
- Nutty Delight: Stir in chopped nuts, such as pecans, walnuts, or almonds, after the ice milk has partially frozen.
- Dairy-Free Option: Substitute the milk with your favorite non-dairy milk, such as almond milk, soy milk, or oat milk. Keep in mind that the texture may be slightly different. Full-fat coconut milk will give the richest, creamiest result.
- Extract Exploration: Experiment with different extracts, such as almond, coconut, or peppermint, instead of vanilla.
FAQs (Frequently Asked Questions)
Q: What makes this ice milk different from ice cream?
A: Ice milk typically has a lower fat content than ice cream, as it uses more milk than cream. This results in a lighter, less rich dessert.
Q: Can I use a sugar substitute in this recipe?
A: Yes, you can experiment with sugar substitutes like stevia or erythritol. However, be aware that they may affect the texture and sweetness level of the final product.
Q: Why is my ice milk icy?
A: Icy ice milk is usually caused by large ice crystals forming during the freezing process. This can be prevented by stirring the mixture frequently (if not using an ice cream machine) or by adding a small amount of alcohol.
Q: Can I add eggs to make this richer?
A: While you can certainly add eggs, doing so would technically make it an ice cream rather than ice milk. If you want to try it, temper 2-3 egg yolks into the warm milk mixture before chilling and churning.
Q: How long does it take to freeze without an ice cream maker?
A: Without an ice cream maker, it typically takes at least 6-8 hours to fully freeze the ice milk, with frequent stirring every 2-4 hours to prevent ice crystal formation.
Final Thoughts
This simple vanilla ice milk is more than just a recipe; it’s an invitation to create your own memories. It’s a blank canvas for your culinary creativity, a taste of summer nostalgia, and a reminder that the best things in life are often the simplest. So, gather your ingredients, get churning (or stirring!), and enjoy the sweet rewards of homemade goodness. I’d love to hear about your variations and how this recipe brings a little bit of joy to your day. Happy scooping!