
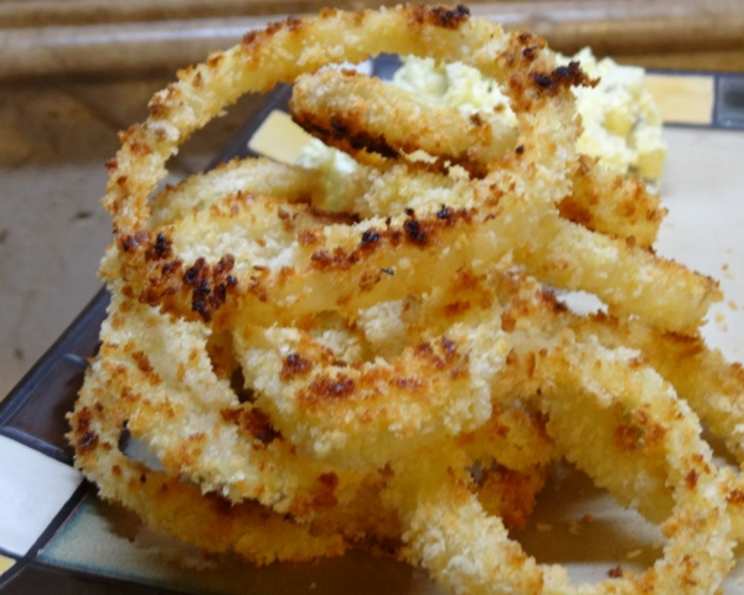
Simply the Best Baked Onion Rings!
The memory is as clear as day: summer evenings, the scent of freshly cut grass, and the unmistakable aroma of something delicious baking in the oven. My grandma, a culinary wizard in her own right, always had a batch of these baked onion rings ready for us kids after a long day of playing outside. They were crispy, savory, and disappeared almost as quickly as she made them. They were simple, homemade, and incredibly satisfying – a testament to the fact that sometimes, the best things in life are the simplest.
Recipe Overview
- Prep Time: 20 minutes
- Cook Time: 20 minutes
- Total Time: 40 minutes
- Servings: 4
- Dietary Type: Vegetarian
Ingredients
- 2 peeled onions
- ¾ cup all-purpose flour
- 2-3 egg whites
- ¾ cup nonfat breadcrumbs or lowfat breadcrumbs
- 2 teaspoons Italian seasoning
- 1 ½ teaspoons garlic powder
- 1 ½ teaspoons onion powder
- ½ teaspoon salt
Equipment Needed
- Baking sheet
- Nonstick cooking spray
- 3 shallow bowls
- Knife
- Cutting board
Instructions
-
Begin by preheating your oven to 400 degrees Fahrenheit (200 degrees Celsius). Preparing the oven first ensures it’s at the correct temperature when the onion rings are ready to bake, promoting even cooking and crispiness.
-
Lightly coat a baking sheet with nonstick cooking spray. This prevents the onion rings from sticking and makes for easier cleanup later. You can also line the baking sheet with parchment paper for even simpler removal.
-
Now, prepare the onions. Slice them widthwise into rings, about ¼ to ½ inch thick. Gently separate the rings from each other. Thicker rings will take longer to cook, while thinner rings may become too crispy.
-
Set up your breading station. In the first shallow bowl, place the all-purpose flour. In the second bowl, lightly whisk the egg whites. In the third bowl, combine the nonfat or lowfat breadcrumbs, Italian seasoning, garlic powder, onion powder, and salt. Mix well to ensure the spices are evenly distributed throughout the breadcrumbs, infusing every onion ring with flavor.
-
The breading process is crucial for achieving that crispy exterior. Take each onion ring and dredge it in the flour, making sure to coat all surfaces. Shake off any excess flour. Next, dip the floured onion ring into the egg whites, again ensuring complete coverage. Allow excess egg white to drip off. Finally, transfer the onion ring to the breadcrumb mixture, pressing gently to ensure the breadcrumbs adhere to all sides. A thorough coating is key to a satisfying crunch.
-
Carefully place the breaded onion rings onto the prepared baking sheet, making sure they are not touching. Overcrowding the baking sheet can lead to steaming instead of baking, resulting in soggy onion rings. Repeat the breading process with the remaining onion rings.
-
Bake the onion rings in the preheated oven for approximately 20 minutes, or until they are golden brown and crispy. Keep a close eye on them, as baking times may vary depending on your oven. For even browning, you can flip the onion rings halfway through the baking time.
Expert Tips & Tricks
- Crispy Coating Secrets: For an even crispier coating, try adding a tablespoon of cornstarch to the flour mixture. Cornstarch helps to absorb moisture and creates a lighter, crispier crust.
- Flavor Boost: Experiment with different spice combinations in the breadcrumb mixture. Smoked paprika, cayenne pepper, or even a touch of brown sugar can add unique flavor dimensions.
- Breadcrumb Alternatives: If you don’t have breadcrumbs on hand, crushed cornflakes or panko breadcrumbs can be used as substitutes. Panko breadcrumbs will give you an extra crispy texture.
- Prevent Soggy Bottoms: To prevent the bottoms of the onion rings from becoming soggy, place a wire rack on top of the baking sheet and arrange the breaded onion rings on the rack. This allows air to circulate around the onion rings, promoting even crisping.
- Make-Ahead Magic: You can bread the onion rings ahead of time and store them in the refrigerator for up to 24 hours before baking. Just be sure to place them in a single layer on a baking sheet lined with parchment paper to prevent sticking.
Serving & Storage Suggestions
Serve these delightful baked onion rings hot, straight from the oven, for the best taste and texture. They make a fantastic appetizer, side dish, or snack. Pair them with your favorite dipping sauces, such as ketchup, barbecue sauce, ranch dressing, or a spicy aioli.
Leftover onion rings can be stored in an airtight container in the refrigerator for up to 2 days. However, they will lose some of their crispiness. To reheat, spread them out on a baking sheet and bake in a preheated oven at 350 degrees Fahrenheit (175 degrees Celsius) for about 5-10 minutes, or until warmed through and slightly crispy. Reheating in a toaster oven can also work well. Microwaving is not recommended, as it will make them soggy.
Freezing is not ideal, as the texture will be compromised upon thawing.
Nutritional Information
| Nutrient | Amount per Serving | % Daily Value |
|---|---|---|
| Calories | 202.8 kcal | N/A |
| Calories from Fat | 12 g | 6% |
| Total Fat | 1.4 g | 2% |
| Saturated Fat | 0.3 g | 1% |
| Cholesterol | 0 mg | 0% |
| Sodium | 470.3 mg | 19% |
| Total Carbohydrate | 39.3 g | 13% |
| Dietary Fiber | 2.7 g | 10% |
| Sugars | 3.9 g | N/A |
| Protein | 7.8 g | 15% |
Note: Nutritional information is an estimate and may vary based on specific ingredients and portion sizes.
Variations & Substitutions
- Gluten-Free Onion Rings: Substitute the all-purpose flour with a gluten-free flour blend. Ensure the breadcrumbs are also gluten-free.
- Vegan Onion Rings: Replace the egg whites with a flax egg (1 tablespoon of ground flaxseed mixed with 3 tablespoons of water, let sit for 5 minutes to thicken).
- Spicy Onion Rings: Add a pinch of cayenne pepper or a dash of hot sauce to the egg white mixture for a spicy kick.
- Cheese Onion Rings: Add grated Parmesan cheese to the breadcrumb mixture for a cheesy flavor.
- Sweet Onion Rings: Use sweet onions like Vidalia or Walla Walla for a milder, sweeter flavor.
FAQs (Frequently Asked Questions)
Q: Can I use yellow onions instead of white onions?
A: Yes, you can use yellow onions. They have a slightly stronger flavor than white onions, but will still work well in this recipe.
Q: How do I prevent the breading from falling off?
A: Ensure each onion ring is thoroughly coated with flour, egg white, and breadcrumbs. Press the breadcrumbs gently onto the onion rings to help them adhere.
Q: Can I use an air fryer instead of baking?
A: Absolutely! Air frying is a great alternative for achieving extra crispy onion rings. Cook at 375°F (190°C) for about 10-12 minutes, flipping halfway through.
Q: Are these onion rings truly low in fat?
A: By baking instead of deep-frying and using nonfat or lowfat breadcrumbs, these onion rings are significantly lower in fat than traditional fried onion rings.
Q: Can I add other seasonings to the breadcrumb mixture?
A: Yes, feel free to experiment with different seasonings to customize the flavor to your liking. Garlic salt, paprika, or even a dash of chili powder can be delicious additions.
Final Thoughts
These baked onion rings are a testament to the fact that you don’t have to sacrifice flavor for a healthier alternative. They’re crispy, savory, and surprisingly addictive. I encourage you to give this recipe a try and experience the joy of homemade onion rings without the guilt. Share your creations with friends and family, and let me know what you think! What dipping sauce did you pair them with? I’m always looking for new ideas. Happy cooking!