
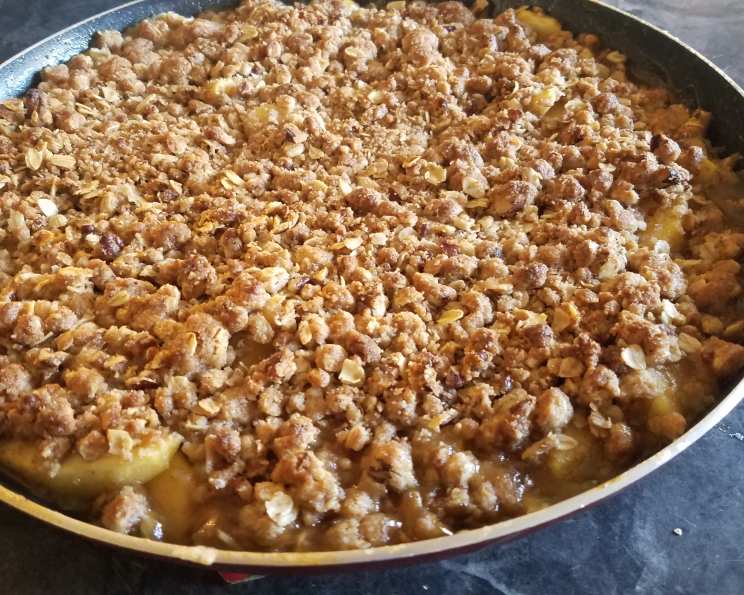
Skillet Apple Pie: A Rustic American Classic
I can still smell the cinnamon-infused air wafting from my grandmother’s kitchen every autumn. Apple pie wasn’t just a dessert; it was a symbol of home, of warmth, and of shared moments around a crackling fireplace. While her traditional pie was a masterpiece, this skillet apple pie offers that same comforting nostalgia but with a touch of rustic simplicity that feels just right for today’s kitchens. The caramelized apples and flaky crust, all baked to golden perfection in a skillet, create a dessert that is both visually stunning and utterly delicious.
Recipe Overview
- Prep Time: 30 minutes
- Cook Time: 20 minutes
- Total Time: 50 minutes
- Servings: 6
- Yield: 1 pie
- Dietary Type: Vegetarian
Ingredients
For the Crust:
- 1 cup unbleached all-purpose flour, plus more for dusting work surface (5 ounces)
- 1 tablespoon sugar
- 1⁄2 teaspoon table salt
- 2 tablespoons vegetable shortening, chilled
- 6 tablespoons cold unsalted butter, cut into 1/4-inch pieces
- 3-4 tablespoons ice water
For the Filling:
- 1⁄2 cup apple cider
- 1⁄3 cup maple syrup
- 2 tablespoons fresh lemon juice
- 2 teaspoons cornstarch
- 1⁄8 teaspoon ground cinnamon (optional)
- 2 tablespoons unsalted butter
- 2 1⁄2 lbs apples, peeled, cored, halved, and cut into 1/2-inch-thick wedges (about 6 medium – 3 sweet, 3 tart)
For Baking:
- 1 egg white, lightly beaten
- 2 teaspoons sugar
Equipment Needed
- Food processor
- Medium bowl
- Rubber spatula
- Plastic wrap
- Rolling pin
- 12-inch heatproof skillet
- Sharp knife
Instructions
-
Prepare the Crust: Begin by combining the dry ingredients. In a food processor, pulse the flour, sugar, and salt until they are well combined.
-
Add the shortening and process until the mixture has the texture of coarse sand, about ten 1-second pulses. This step ensures the crust will be tender.
-
Scatter the butter pieces over the flour mixture. Process until the mixture is pale yellow and resembles coarse crumbs, with butter bits no larger than small peas, about ten 1-second pulses. The small pieces of butter are key to creating flaky layers.
-
Transfer the mixture to a medium bowl.
-
Sprinkle 3 tablespoons of ice water over the mixture. Using the blade of a rubber spatula, use a folding motion to mix. Press down on the dough with the broad side of the spatula until the dough starts to stick together. Add up to 1 tablespoon more ice water if the dough remains too dry and doesn’t come together. Be careful not to overwork the dough.
-
Turn the dough out onto a sheet of plastic wrap and flatten it into a 4-inch disk. Wrap the dough and refrigerate for at least 30 minutes, or up to 2 days, before rolling it out. If the dough is refrigerated for longer than 1 hour, let it stand at room temperature until it becomes malleable before rolling.
-
Prepare the Filling: Adjust the oven rack to the upper-middle position (between 7 and 9 inches from the heating element) and preheat the oven to 500 degrees.
-
In a medium bowl, whisk together the apple cider, maple syrup, lemon juice, cornstarch, and cinnamon (if using) until smooth. This mixture will thicken as it cooks with the apples, creating a delicious sauce.
-
Heat the butter in a 12-inch heatproof skillet over medium-high heat. When the butter melts and the foaming subsides, add the apples and cook, stirring 2 or 3 times until the apples begin to caramelize, about 5 minutes. It’s important to not fully cook the apples at this stage; they will continue to cook in the oven.
-
Remove the skillet from the heat, add the cider mixture, and gently stir until the apples are well coated. Set aside to cool slightly.
-
Assemble and Bake: On a lightly floured work surface, or between 2 large sheets of plastic wrap, roll out the dough to an 11-inch circle.
-
Roll the dough loosely around the rolling pin and unroll it over the apple filling in the skillet.
-
Brush the dough with the egg white and sprinkle with the sugar. The egg white will give the crust a beautiful shine, and the sugar will add a touch of sweetness and crunch.
-
With a sharp knife, gently cut the dough into 6 pieces by making 1 vertical cut followed by 2 evenly spaced horizontal cuts (perpendicular to the first cut). This allows steam to escape during baking.
-
Bake until the apples are tender and the crust is a deep golden brown, about 20 minutes.
-
Let cool for 15 minutes before serving. This allows the filling to set slightly and prevents burning your mouth.
Expert Tips & Tricks
- Apple Selection: Using a mix of sweet and tart apples, such as Honeycrisp and Granny Smith, provides a balanced flavor.
- Dough Temperature: Keeping the dough cold throughout the process is crucial for a flaky crust. If the butter starts to melt, return the dough to the refrigerator for a few minutes.
- Skillet Size: A 12-inch heatproof skillet is ideal. If you don’t have one, you can transfer the apple mixture to a regular skillet for the stovetop portion and then transfer everything to a pie dish for baking.
- Preventing a Soggy Crust: Blind baking the crust for about 10 minutes before adding the filling can help prevent a soggy bottom.
- Adding Depth of Flavor: Consider adding a pinch of nutmeg or allspice to the apple filling for a warmer, more complex flavor profile. A tablespoon of bourbon or rum can also enhance the taste.
Serving & Storage Suggestions
Serve the skillet apple pie warm, ideally with a scoop of vanilla ice cream or a dollop of whipped cream. A sprinkle of cinnamon on top adds a final touch of elegance.
Leftovers can be stored at room temperature for up to 2 days or in the refrigerator for up to 4 days. To reheat, warm individual slices in the microwave or bake the entire pie in a preheated oven at 350°F (175°C) until heated through. For longer storage, the baked pie can be frozen for up to 2 months. Wrap it tightly in plastic wrap and then foil before freezing. Thaw overnight in the refrigerator before reheating.
Nutritional Information
| Nutrient | Amount per Serving | % Daily Value |
|---|---|---|
| Calories | 454 kcal | N/A |
| Total Fat | 20.3g | 31% |
| Saturated Fat | 11.1g | 55% |
| Cholesterol | 40.7mg | 13% |
| Sodium | 213.4mg | 8% |
| Total Carbohydrate | 69.1g | 23% |
| Dietary Fiber | 7g | 27% |
| Sugars | 41.9g | N/A |
| Protein | 3.6g | 7% |
Note: Nutritional information is an estimate and may vary based on specific ingredients and preparation methods.
Variations & Substitutions
- Gluten-Free: Use a gluten-free all-purpose flour blend for the crust. Be sure to add a binder like xanthan gum to improve the texture.
- Vegan: Substitute the butter with a vegan butter alternative, the egg white with aquafaba (chickpea brine), and the maple syrup with agave nectar.
- Spiced Apple Pie: Add a blend of warm spices like cinnamon, nutmeg, ginger, and cloves to the apple filling.
- Caramel Apple Pie: Drizzle caramel sauce over the apples before baking for an extra decadent treat.
- Different Fruits: Experiment with other fruits like peaches, berries, or pears, adjusting the sweetness as needed.
FAQs (Frequently Asked Questions)
Q: Can I make the crust ahead of time?
A: Yes, the crust can be made up to 2 days in advance and stored in the refrigerator. Make sure to wrap it tightly in plastic wrap to prevent it from drying out.
Q: Can I use a pre-made pie crust?
A: Absolutely! If you’re short on time, a store-bought pie crust will work just fine. Be sure to adjust the baking time accordingly.
Q: How do I prevent the crust from burning?
A: If the crust is browning too quickly, you can tent it with foil during the last few minutes of baking.
Q: Can I add nuts to the filling?
A: Yes, chopped walnuts or pecans would be a delicious addition to the apple filling. Add them along with the cider mixture.
Q: My apples are very tart. Should I add more sweetener?
A: Taste the apple mixture before adding it to the crust. If it’s too tart for your liking, add an extra tablespoon or two of maple syrup or sugar.
Final Thoughts
This skillet apple pie is more than just a recipe; it’s an invitation to create memories. The aroma that fills your kitchen as it bakes, the warmth of the skillet in your hands, and the smiles it brings to those who share it make it a truly special dessert. So, gather your ingredients, preheat your oven, and get ready to experience the rustic charm and comforting flavors of this American classic. Don’t hesitate to share your creations and any variations you try; I’m always eager to see how you make this recipe your own. Enjoy!