
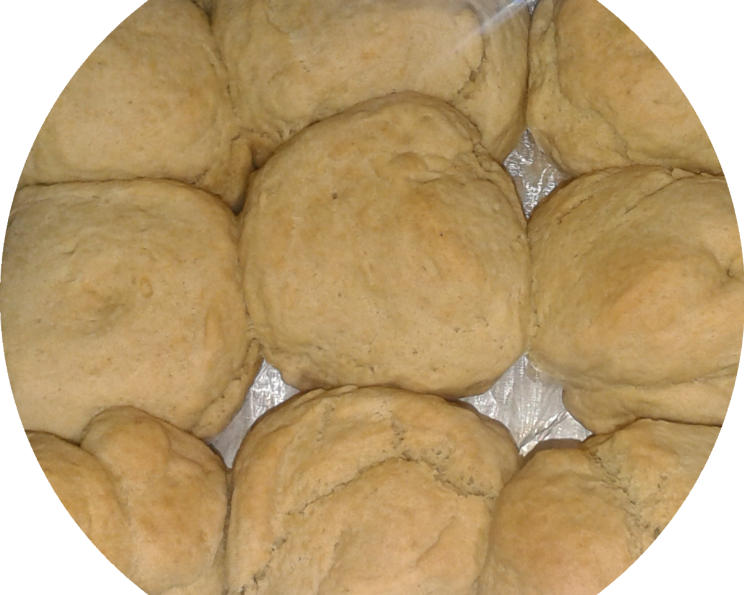
Skillet Biscuits: A Stovetop Symphony of Flavor
The scent of warm biscuits has always been a culinary time machine for me, whisking me back to my grandmother’s cozy kitchen. I remember standing on a wobbly stool, mesmerized as she transformed simple ingredients into golden-brown discs of pure comfort. While her oven-baked biscuits were legendary, it was her occasional skillet biscuits, cooked right on the stovetop, that held a unique charm – a rustic, slightly dense, utterly irresistible treat perfect for a lazy Sunday morning. These skillet biscuits were a testament to resourcefulness and the magic that can be created with minimal effort.
Recipe Overview
- Prep Time: 10 minutes
- Cook Time: 15-20 minutes
- Total Time: 25-30 minutes
- Servings: 6-8 (depending on biscuit size)
- Yield: 6-8 biscuits
- Dietary Type: Vegetarian
Ingredients
- 1 3/4 cups flour
- 1/2 teaspoon salt
- 2 teaspoons baking powder
- 1 teaspoon sugar
- 1/2 teaspoon baking soda
- 1/4 cup shortening or 5 tablespoons butter (cold, cut into small pieces)
- 3/4 cup buttermilk
Equipment Needed
- Large mixing bowl
- Measuring cups and spoons
- Pastry blender or fork (if using shortening or butter)
- Lightly floured surface
- Biscuit cutter or knife
- Cast iron skillet or heavy-bottomed skillet
Instructions
- In a large mixing bowl, whisk together the flour, salt, baking powder, sugar, and baking soda. Make sure these dry ingredients are well combined for even rising.
- Cut in the shortening or cold butter using a pastry blender or fork. The mixture should resemble coarse crumbs. This step is crucial for creating flaky layers in your biscuits. If using your hands, work quickly to prevent the butter from melting.
- Add the buttermilk to the bowl and gently mix until just combined. Do not overmix; a few streaks of flour are perfectly fine. Overmixing develops the gluten, resulting in tough biscuits.
- Turn the dough out onto a lightly floured surface. Gently knead it for about 30 seconds, just enough to bring it together. Avoid excessive kneading.
- Pat the dough to a thickness of approximately 1/2 inch. Use a biscuit cutter (about 2-3 inches in diameter) to cut out the biscuits. If you don’t have a biscuit cutter, a sharp knife will work just fine. Cut straight down, avoiding twisting, to ensure the biscuits rise evenly.
- Heat a lightly greased skillet over medium heat. A well-seasoned cast iron skillet is ideal, but any heavy-bottomed skillet will work.
- Place the biscuits in the hot skillet, about 1 inch apart.
- Cook the biscuits for approximately 3-4 minutes per side, or until golden brown and cooked through. Adjust the heat as needed to prevent burning. The exact cooking time will depend on the thickness of the biscuits and the heat of your skillet.
- To check for doneness, insert a toothpick into the center of a biscuit. If it comes out clean, the biscuit is cooked through. You can also gently split a biscuit open to check that the inside is not doughy.
- Remove the biscuits from the skillet and let them cool slightly on a wire rack before serving.
Expert Tips & Tricks
- Keep it cold: Cold ingredients are the secret to flaky biscuits. Ensure your butter or shortening and buttermilk are thoroughly chilled before starting.
- Don’t overmix: Overmixing develops gluten, leading to tough biscuits. Mix the dough until just combined, leaving some streaks of flour.
- Gentle kneading: Knead the dough gently and briefly, just enough to bring it together. Over-kneading will result in dense, chewy biscuits.
- Hot skillet, moderate heat: Ensure your skillet is properly heated before adding the biscuits, but avoid using high heat, which can cause them to burn on the outside before they are cooked through on the inside.
- For an extra touch of flavor: Brush the tops of the biscuits with melted butter before or after cooking for a richer taste and golden sheen.
- Make ahead: You can prepare the biscuit dough ahead of time and store it in the refrigerator for up to 24 hours. Bring it to room temperature slightly before cutting and cooking.
Serving & Storage Suggestions
Serve the skillet biscuits warm with butter, jam, honey, or alongside your favorite savory dishes. They are excellent with soups, stews, or as a side for breakfast. Leftover biscuits can be stored in an airtight container at room temperature for 1-2 days, in the refrigerator for up to 4 days, or frozen for up to 2 months. To reheat, wrap the biscuits in foil and warm them in a preheated oven at 350°F (175°C) for 5-10 minutes, or until heated through. You can also reheat them in a skillet over low heat.
Nutritional Information
| Nutrient | Amount per Serving | % Daily Value |
|---|---|---|
| Calories | 200 kcal | 10% |
| Total Fat | 8g | 12% |
| Saturated Fat | 4g | 20% |
| Cholesterol | 15mg | 5% |
| Sodium | 300mg | 13% |
| Total Carbohydrate | 28g | 9% |
| Dietary Fiber | 1g | 4% |
| Sugar | 2g | – |
| Protein | 4g | 8% |
Nutritional information is an estimate and may vary depending on specific ingredients and portion sizes.
Variations & Substitutions
- Gluten-free: Use a gluten-free flour blend designed for baking. You may need to add a binder like xanthan gum.
- Dairy-free: Substitute the buttermilk with a mixture of almond milk or soy milk with 1 tablespoon of lemon juice or vinegar. Use a dairy-free butter substitute or shortening.
- Sweet biscuits: Add 1-2 tablespoons of sugar to the dry ingredients for sweeter biscuits, perfect with fruit preserves.
- Savory biscuits: Add herbs like rosemary, thyme, or chives to the dough for savory biscuits that pair well with soups and stews. You can also add shredded cheese, such as cheddar or Parmesan, for extra flavor.
- Bacon cheddar biscuits: Crumble cooked bacon and add shredded cheddar cheese to the dough for a delicious and savory twist.
FAQs (Frequently Asked Questions)
Q: Why are my skillet biscuits dense instead of fluffy?
A: Skillet biscuits tend to be slightly denser than oven-baked biscuits due to the cooking method. Ensure you are not overmixing the dough, and that your baking powder and baking soda are fresh.
Q: Can I use all-purpose flour instead of self-rising flour?
A: Yes, this recipe uses all-purpose flour in conjunction with baking powder and baking soda to create the leavening. Self-rising flour already contains these ingredients, so it is not a direct substitute.
Q: How do I prevent the biscuits from burning on the bottom?
A: Cook the biscuits over medium heat and adjust as necessary. If they are browning too quickly, reduce the heat slightly. Using a heavy-bottomed skillet also helps distribute the heat more evenly.
Q: Can I freeze the biscuit dough before cooking?
A: Yes, you can freeze the biscuit dough. Cut out the biscuits and place them on a baking sheet lined with parchment paper. Freeze for about an hour, then transfer them to a freezer bag. Cook from frozen, adding a few extra minutes to the cooking time.
Q: What can I use if I don’t have buttermilk?
A: You can make a buttermilk substitute by adding 1 tablespoon of lemon juice or white vinegar to 1 cup of milk. Let it sit for 5 minutes before using.
Final Thoughts
These skillet biscuits are more than just a recipe; they’re a connection to simpler times and a reminder that incredible flavor can be achieved with minimal fuss. Whether you’re a seasoned baker or a kitchen novice, I encourage you to give this recipe a try. The slighty dense, golden-brown perfection of a stovetop biscuit is a unique treat that will bring a smile to your face. Don’t be afraid to experiment with flavors and make them your own. And most importantly, share your creations with loved ones – because good food is always best enjoyed together.