
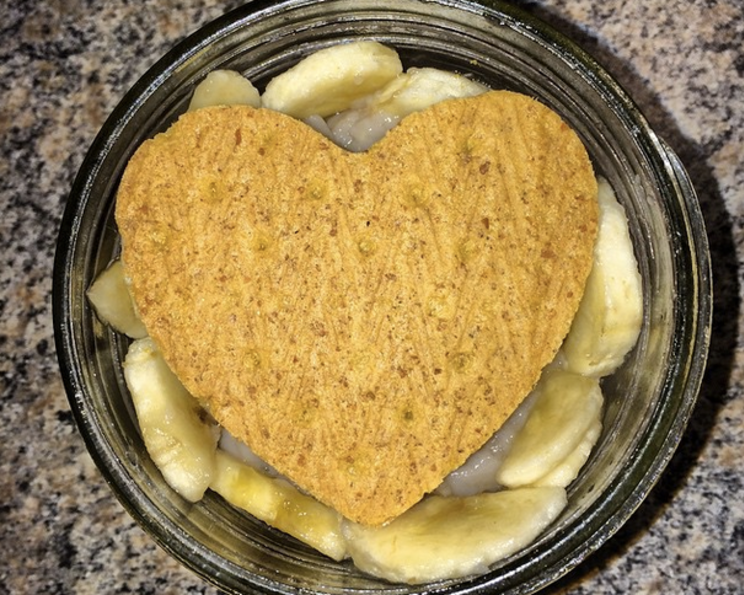
Skinny Banana Pudding: A Guilt-Free Indulgence
Banana pudding has always been a fixture at our family gatherings, a comforting classic passed down through generations. I remember my grandmother’s version, rich with cream and layered high with vanilla wafers. The scent alone evokes memories of laughter, stories, and that special feeling of being surrounded by loved ones. This “skinny” version allows me to enjoy a taste of that nostalgia without the heavy guilt – a perfect balance of tradition and mindful eating.
Recipe Overview
- Prep Time: 15 minutes
- Cook Time: 10-15 minutes
- Total Time: 8 hours 15 minutes (includes chilling time)
- Servings: 6
- Yield: About 6 cups
- Dietary Type: Vegetarian (easily made vegan)
Ingredients
- 1/2 cup stevia
- 2 tablespoons sugar
- 1/3 cup cornstarch
- 3 cups unsweetened coconut milk (such as Silk brand)
- 2 bananas, pureed
- 1 teaspoon vanilla extract
- 1 tablespoon maple syrup
- 1 tablespoon applesauce
- Sliced bananas, vanilla wafers, and/or graham crackers for serving (optional)
Equipment Needed
- Medium saucepan
- Whisk
- Measuring cups and spoons
- Refrigerator-safe bowl or individual serving dishes
Instructions
-
In a medium saucepan, combine the stevia, sugar, and cornstarch. Whisk them together thoroughly until well mixed. This ensures there are no lumps of cornstarch in the final pudding.
-
Place the saucepan over medium heat. Slowly add the unsweetened coconut milk while whisking continuously. It’s crucial to add the milk gradually to prevent clumps from forming. This step is about creating a smooth and velvety base for the pudding.
-
Add the pureed bananas to the saucepan. Continue whisking constantly as the mixture heats up. The bananas will add natural sweetness and thickness to the pudding.
-
Keep whisking the mixture until it begins to thicken. This will usually take about 5-10 minutes once the mixture starts simmering. You’ll know it’s ready when it coats the back of a spoon. Be patient and keep stirring to prevent scorching on the bottom of the pan.
-
Once the pudding reaches the desired consistency, remove the saucepan from the heat. Immediately stir in the vanilla extract, maple syrup, and applesauce. These ingredients add a depth of flavor and a touch of sweetness. The applesauce also helps to moisten the pudding.
-
Transfer the banana pudding to a refrigerator-safe bowl or individual serving dishes. Cover the surface of the pudding directly with plastic wrap to prevent a skin from forming. This is a critical step for a smooth, attractive final product.
-
Refrigerate the pudding for at least 8 hours, or preferably overnight, to allow it to fully cool and set. This chilling time is essential for the pudding to achieve its signature creamy texture.
-
Before serving, garnish with sliced bananas, vanilla wafers, graham crackers, or other toppings of your choosing. Get creative with your presentation!
Expert Tips & Tricks
- Preventing Lumps: Whisking is your best friend! Make sure to thoroughly combine the dry ingredients before adding any liquid. Adding the coconut milk slowly while whisking vigorously will also help prevent lumps.
- Adjusting Sweetness: Taste the pudding before chilling and adjust the amount of stevia or sugar to your liking. Remember that the bananas will contribute to the overall sweetness.
- Vegan Option: This recipe is naturally vegetarian and easily made vegan. Ensure the sugar you use is vegan (some processed sugars use bone char in the refining process). The Silk coconut milk is already vegan-friendly!
- Making it Ahead: The pudding can be made up to 3 days in advance and stored in the refrigerator. In fact, the flavor often improves with time as the ingredients meld together.
- For a smoother texture: Use an immersion blender to ensure there are no clumps after the pudding has cooked.
- If pudding is too thin: Mix 1 tablespoon of cornstarch with 2 tablespoons of cold water. While the pudding is simmering, slowly drizzle in the cornstarch slurry and stir until the desired consistency is reached.
Serving & Storage Suggestions
Serve the skinny banana pudding chilled. For an elegant presentation, layer it in parfait glasses with sliced bananas and crumbled vanilla wafers. You can also create a trifle by layering the pudding with cubed pound cake, berries, and whipped cream (or a dairy-free alternative).
Store leftover pudding in an airtight container in the refrigerator for up to 3 days. While it’s best consumed within this time frame, it can sometimes last a bit longer, but be sure to check for any changes in texture or aroma before enjoying. It is not recommended to freeze the pudding, as the texture can become grainy upon thawing.
Nutritional Information
| Nutrient | Amount per Serving | % Daily Value |
|---|---|---|
| Calories | 200 kcal | 10% |
| Total Fat | 8g | 12% |
| Saturated Fat | 7g | 35% |
| Cholesterol | 0mg | 0% |
| Sodium | 20mg | 1% |
| Total Carbohydrate | 30g | 10% |
| Dietary Fiber | 2g | 8% |
| Sugars | 15g | |
| Protein | 2g | 4% |
Note: Nutritional information is an estimate and may vary based on specific ingredients and portion sizes.
Variations & Substitutions
- Gluten-Free: Use gluten-free vanilla wafers or graham crackers for serving. You can also use gluten-free cookies, or omit the wafers entirely.
- Different Milk: If you prefer, you can substitute the coconut milk with unsweetened almond milk, soy milk, or oat milk. Keep in mind that the flavor and texture will be slightly different depending on the milk you choose.
- Spice it up: Add a pinch of cinnamon or nutmeg to the pudding mixture for a warm, comforting flavor.
- Chocolate Banana Pudding: Stir in a tablespoon or two of cocoa powder to the pudding mixture for a chocolatey twist.
- Individual Servings: Layer the pudding, sliced bananas, and wafers in small mason jars for individual, portable desserts.
FAQs (Frequently Asked Questions)
Q: Can I use regular sugar instead of stevia?
A: Yes, you can substitute regular sugar for stevia. Start with the same amount (1/2 cup) and adjust to taste. Keep in mind that using regular sugar will increase the overall calorie and carbohydrate content of the pudding.
Q: Why is it important to cover the pudding with plastic wrap while chilling?
A: Covering the pudding with plastic wrap directly on the surface prevents a skin from forming, which can be unappetizing in texture.
Q: Can I use fresh bananas instead of pureed bananas?
A: While you can use fresh bananas, pureeing them helps to incorporate them more smoothly into the pudding and contributes to its creamy texture. If you use fresh bananas, mash them very well.
Q: How do I know when the pudding is thick enough?
A: The pudding is thick enough when it coats the back of a spoon. When you run your finger through the coating, it should leave a clear line that doesn’t immediately fill in.
Q: Can I add other fruits to the pudding?
A: Yes, you can add other fruits such as berries, peaches, or mangoes. Add them after the pudding has cooled slightly to prevent them from breaking down too much.
Final Thoughts
This skinny banana pudding is a delightful way to satisfy your sweet cravings without compromising your health goals. It’s a comforting, nostalgic dessert that’s perfect for any occasion. Don’t hesitate to experiment with different variations and toppings to create your own unique version. I encourage you to try this recipe and share your feedback – I’d love to hear how you made it your own! Pair it with a light coffee or a refreshing glass of iced tea for the perfect ending to any meal.