
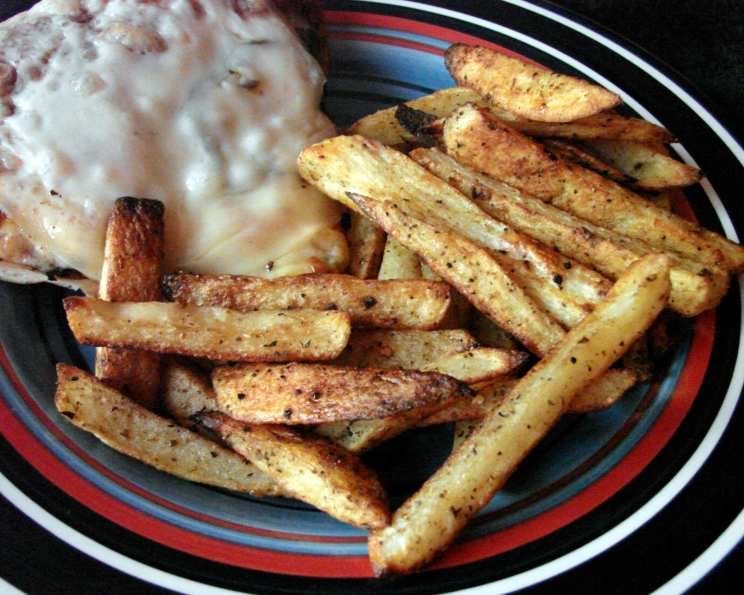
Crispy, “Skinny” Fries: Guilt-Free Indulgence
I remember being a kid, utterly captivated by the scent of freshly fried potatoes wafting from the neighborhood chip shop. The golden, crispy exterior giving way to a fluffy interior was pure magic. But as a chef, I’ve always been on a quest to recreate that joyful experience in a healthier way. These “skinny” fries, baked to crispy perfection, are my answer – all the satisfying crunch, none of the deep-fried guilt. The secret lies in a simple ice bath and a hot oven, transforming humble potatoes into a truly crave-worthy side.
Recipe Overview
- Prep Time: 15 minutes
- Cook Time: 30 minutes
- Total Time: 45 minutes
- Servings: 4
- Dietary Type: Gluten-Free
Ingredients
- 4 large baking potatoes
- 1 tablespoon oil
- 2-4 teaspoons cajun seasoning
- Salt and pepper to taste
Equipment Needed
- Large bowl
- Cookie sheet or jelly roll pan
- Non-stick cooking spray
- Paper towels
Instructions
- Start by preparing the potatoes. Scrub them thoroughly under running water to remove any dirt or debris. This step is crucial as we’re keeping the skins on for added fiber and nutrients.
- Next, cut each potato lengthwise into three equal slices. Then, cut each slice into thirds or fourths, depending on the size of your potatoes, to create thin fries. Aim for uniformity so they cook evenly.
- As you cut the potatoes, immediately place them in a large bowl filled with ice water. The ice water helps to draw out excess starch, resulting in crispier fries. Let the potatoes soak for 10 to 15 minutes while the oven preheats.
- Preheat your oven to 425 degrees Fahrenheit (220 degrees Celsius). This high temperature is essential for achieving that desirable golden-brown color and crispy texture.
- Once the oven is preheated, drain the potatoes from the ice water. Place the drained potatoes on a clean kitchen towel or several layers of paper towels. Thoroughly pat them dry. Removing as much moisture as possible is key to crispy, not soggy, fries.
- Return the dried potatoes to the bowl. Drizzle with 1 tablespoon of oil. You can use olive oil, avocado oil, or any other high-heat oil you prefer.
- Sprinkle the potatoes with 2 to 4 teaspoons of cajun seasoning, adjusting the amount to your preferred level of spice.
- Use your hands to evenly distribute the oil and cajun seasoning over the potatoes, ensuring that each fry is coated.
- Lightly spray a cookie sheet or jelly roll pan with non-stick cooking spray. This will prevent the potatoes from sticking during baking.
- Arrange the seasoned potatoes in a single layer on the prepared cookie sheet. Avoid overcrowding, as this can steam the potatoes instead of baking them crispy. You may need to use two cookie sheets depending on the size of your potatoes.
- Bake in the preheated oven for approximately 30 minutes, turning the fries frequently (every 10 minutes or so) to ensure even browning and crisping on all sides.
- The fries are done when they are golden brown and tender. Use a fork to test for tenderness. If they’re not quite there after 30 minutes, continue baking for a few more minutes, keeping a close eye on them to prevent burning.
- Remove the baked fries from the oven and transfer them to a serving bowl.
- Sprinkle with additional cajun seasoning, salt, and pepper to taste. Serve immediately and enjoy!
Expert Tips & Tricks
- The Potato Choice Matters: Russet potatoes are ideal for fries due to their high starch content, which contributes to that fluffy interior.
- Even Cuts, Even Cooking: Strive for uniform fry size to ensure even cooking. Thicker fries will take longer to cook, while thinner fries might burn.
- Don’t Skip the Soak: The ice water bath is a non-negotiable step. It removes excess starch, preventing the fries from sticking together and promoting crispness.
- Dry, Dry, Dry: Thoroughly drying the potatoes after soaking is critical. Excess moisture will hinder browning and result in soggy fries.
- Hot Oven is Key: A high oven temperature is crucial for achieving a crispy exterior.
- Don’t Overcrowd: Overcrowding the baking sheet will steam the fries instead of baking them crispy. Use two sheets if necessary.
- Spice it Up: Feel free to experiment with different seasonings. Garlic powder, onion powder, smoked paprika, or even a touch of chili powder can add exciting flavor variations.
- For Extra Crisp: For extra crispy fries, try tossing the potatoes with a tablespoon of cornstarch before adding the oil and seasonings. The cornstarch helps to absorb moisture and create an even crispier coating.
Serving & Storage Suggestions
Serve these “skinny” fries immediately for the best taste and texture. They make a fantastic side dish for burgers, sandwiches, grilled chicken, or fish. You can also enjoy them as a snack with your favorite dipping sauce, such as ketchup, mayonnaise, aioli, or BBQ sauce.
Leftover fries can be stored in an airtight container in the refrigerator for up to 2 days. To reheat, spread them out on a baking sheet and bake in a preheated oven at 350 degrees Fahrenheit (175 degrees Celsius) for about 5-10 minutes, or until heated through and crispy. You can also reheat them in an air fryer for a similar result.
While refrigeration is fine, freezing these fries is not recommended. Freezing and thawing will significantly affect the texture, making them soggy.
Nutritional Information
| Nutrient | Amount per Serving | % Daily Value |
|---|---|---|
| Calories | 160 kcal | 8% |
| Total Fat | 3.5g | 5% |
| Saturated Fat | 0.5g | 3% |
| Cholesterol | 0mg | 0% |
| Sodium | 6mg | 0% |
| Total Carbohydrate | 30.1g | 10% |
| Dietary Fiber | 2.7g | 10% |
| Sugars | 1.3g | 3% |
| Protein | 2.8g | 6% |
Note: Nutritional information is an estimate and may vary based on specific ingredients and portion sizes.
Variations & Substitutions
- Sweet Potato Fries: Substitute the baking potatoes with sweet potatoes for a sweeter and slightly healthier twist. The cooking time may need to be adjusted slightly.
- Herb-Infused Fries: Add fresh herbs like rosemary, thyme, or oregano to the potatoes along with the oil and seasonings for an aromatic and flavorful variation.
- Spicy Garlic Fries: Add minced garlic and a pinch of red pepper flakes to the potatoes for a spicy and garlicky kick.
- Parmesan Fries: Sprinkle grated Parmesan cheese over the fries during the last few minutes of baking for a cheesy and savory treat.
- Oil Alternatives: Experiment with different types of oil, such as coconut oil or grapeseed oil, for subtle flavor variations.
FAQs (Frequently Asked Questions)
Q: Why do I need to soak the potatoes in ice water?
A: Soaking the potatoes in ice water helps to remove excess starch, which prevents them from sticking together and promotes a crispier texture.
Q: Can I use different types of potatoes?
A: While russet potatoes are ideal, you can also use Yukon Gold or red potatoes. However, the texture may be slightly different.
Q: How do I prevent the fries from sticking to the baking sheet?
A: Make sure to spray the baking sheet generously with non-stick cooking spray. You can also line the baking sheet with parchment paper.
Q: Can I make these fries in an air fryer?
A: Yes, you can definitely make these fries in an air fryer. Preheat your air fryer to 400 degrees Fahrenheit (200 degrees Celsius) and cook for about 15-20 minutes, shaking the basket occasionally, until golden brown and crispy.
Q: How can I make these fries even healthier?
A: Use less oil or try spraying the fries with oil instead of drizzling. You can also increase the amount of seasoning to compensate for the reduced oil.
Final Thoughts
These “skinny” fries prove that you don’t have to sacrifice flavor or satisfaction to enjoy a healthier version of your favorite comfort food. The combination of simple techniques and quality ingredients transforms humble potatoes into a truly irresistible treat. So, gather your ingredients, preheat your oven, and get ready to experience the joy of crispy, guilt-free fries. Don’t be afraid to experiment with different seasonings and variations to create your own signature fry recipe. And most importantly, share your creations with friends and family – because everything tastes better when enjoyed together! Happy cooking!